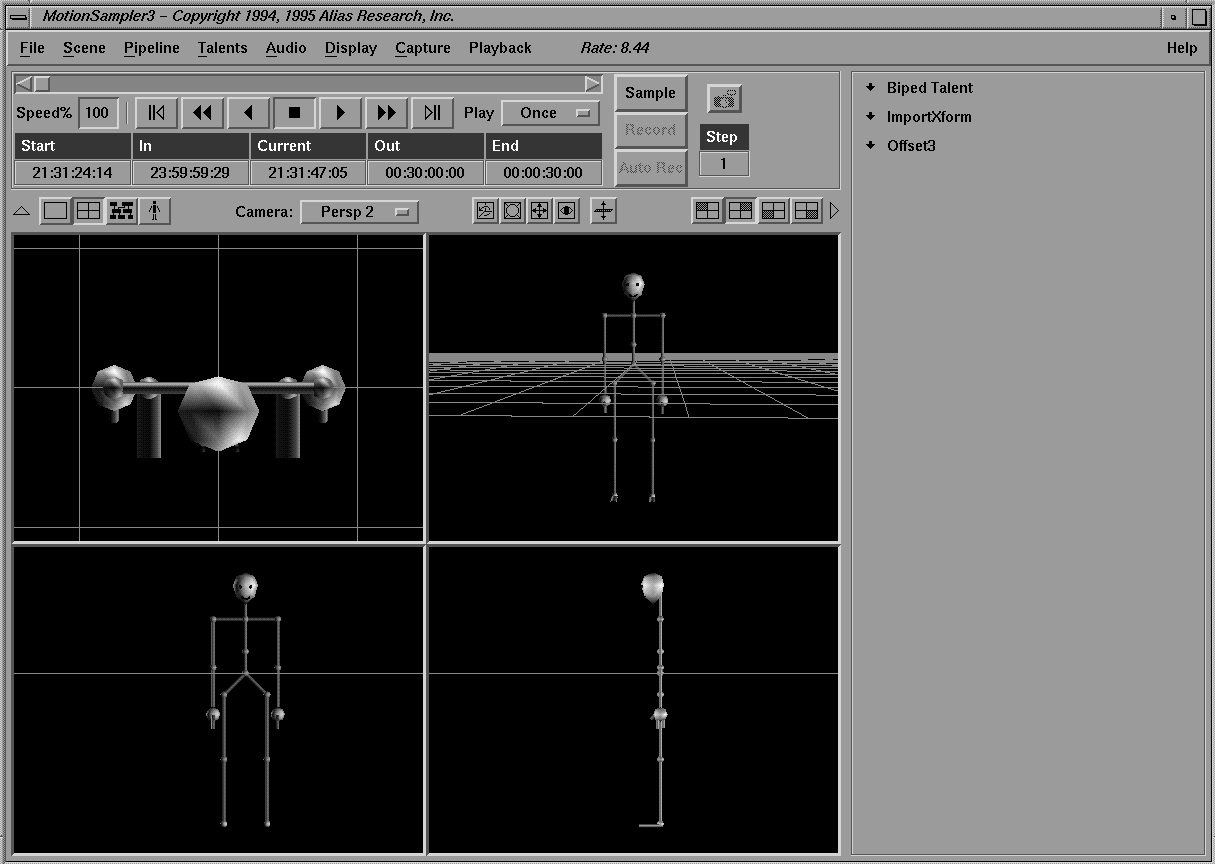
In four view mode, four different perspectives of the scene show in the view/edit area as follows:
Four view mode is useful for calibrating talents as it is helpful to see the scene from more than one viewpoint at a time.
When in either single view mode or four view mode, an option menu labeled Camera is used to attach a new camera to the current view. The Camera menu appear.
MotionSampler loads four built-in perspective cameras, three built-in orthographic cameras, and any cameras defined in the wire files.
Only the cameras loaded from the wire files can be animated.
Only the built-in cameras can be freely positioned.
The built-in cameras are always in the menu list and are labeled Persp 1, Persp 2, Persp 3, Persp 4, Ortho Front, Ortho Top, and Ortho Side.
If cameras are loaded from wire files, their names are appended to the menu list.
In single and four view mode, the Camera menu updates to show the camera selected for the active view.
The Camera menu is also used to change the camera for the view in both single and four view mode.
| A view is not the same as a camera. A camera shows a particular viewpoint in the scene, but a view actually renders the scene to a window from the location of a camera. |
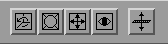
When a view is attached to one of the seven built-in cameras, you can interactively aim and position it using controls that are similar to the controls in Alias.
These view controls are located to the right of the Camera option menu and appear as follows:
The functions of the view control buttons are as follows:
All of the view controls are used in the following way:
| You may need to switch between the view controls to achieve the view you need. |
The mouse button you use with the view control affect the direction you move the view. The mouse buttons work as follows:
| If the current view is attached to one of the cameras that were loaded from a wire file, it is fixed and cannot be adjusted using the view controls. |
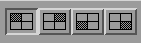
To the left of the toolbox area are four 3D view buttons as follows:
The buttons show the arrangement of the four views displayed in four view mode. The shaded rectangle indicates which window is active.
When in single view mode, clicking these buttons switches the view shown in the large view/edit area.
When in four view mode, clicking these controls selects the active quadrant of the view/edit area.
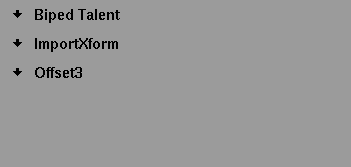
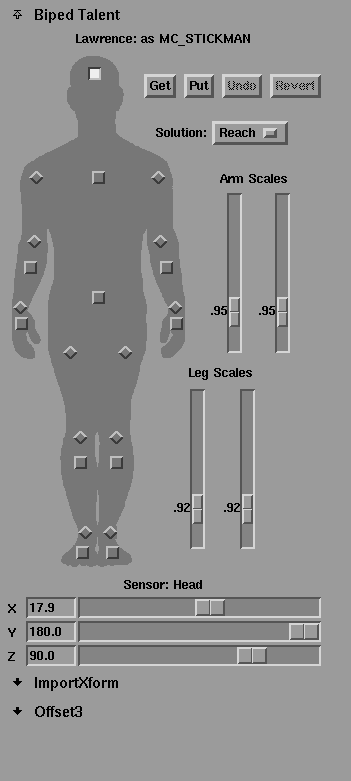
The Toolbox panel is the area to the right of the shuttle bank. When single or four view mode is selected, the toolbox panel becomes the Plugin Tool panel which appears as follows:
When the pipeline is empty and there are no active modules, the plugin tool panel is empty. As modules are added to the pipeline, some of them install interfaces that appear in the plugin tool panel. The interfaces are used to calibrate a talent's movements to the model they are applied to. See the Calibration section below for more information about the uses of the sliders and buttons.
Each interface installed by a plugin can be compressed to just a title (as shown above), or opened to display the whole interface as follows:
The plugin tool panel stacks the interfaces so that they can be scrolled up or down if many interfaces are installed and cannot all be seen at once.
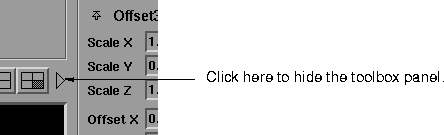
If you are not using the plugin tool panel, it can be hidden so that the view/edit area is larger. To hide the plugin tool panel, click the arrow to the left of the toolbox area that appears as follows:
The plugin tool panel does not appear when either the Pipeline or Talent editor is open.