~Lesson 3~ |
 Next Page | |
| ||
~Lesson 3~ |
Next Page | |
| ||
When a file is saved, the computer adds information to the end of the file name. This information tells the computer what type of file it is and which application should be used to open that file. This added information is called the file name extension. The computer can be set up to either show file name extensions or hide them and show only file names.
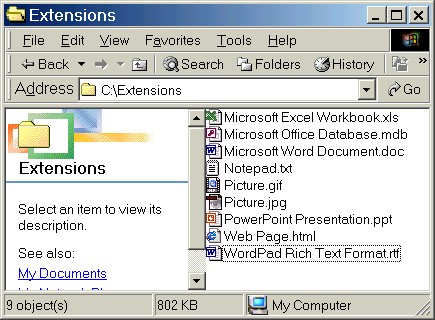
In the picture above, you can see that each file has a period or dot (".") and then three or four letters after its name:
| Microsoft Excel Workbook | .xls |
| Microsoft Office Database | .mdb |
| Microsoft Word Document | .doc |
| Notepad | .txt |
| Picture | .gif |
| Picture | .jpg |
| PowerPoint Presentation | .ppt |
| Web Page | .html |
| WordPad Rich Text Format | .rtf |
The computer knows that any file with the extension of ".xls" needs to be opened with Microsoft Excel, that ".mdb" is the extension for files that need to be opened with Microsoft Access, that the extension ".doc" goes with Microsoft Word, etc.
Most computers are set up to hide file name extensions by default. However, even if they are hidden, the extensions are still part of the file names.
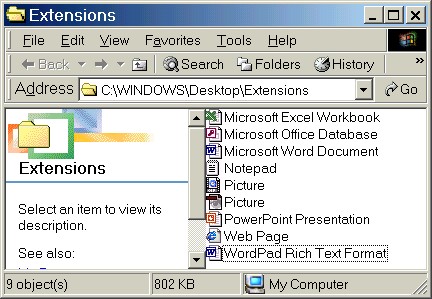
These are the steps to take to change the computer so that you can see file name extensions:
| Step 1. | Open any folder. |
| Step 2. | Go to the Tools menu and select Folder Options. |
| Step 3. | Click on the View tab. |
| Step 4. | Find the line that says "Hide file extensions for known file types." |
| Step 5. | If the box has a checkmark in it, click the box to remove the checkmark. The entire file name will now be shown for all files, including the extension. NOTE: It is very important that you do not change any of the |
| Step 6. | Click on the OK button at the bottom of the dialog box. |
| Step 7. | Close the folder window by clicking on the Close ("X") button in the upper right-hand corner. |
Practice:
Please read all instructions before starting.
| 1. | Using the instructions in "How to Show Two Windows at Once," resize this lesson window. If necessary, move the window around on the screen until you can see a folder on the desktop, preferably the My Documents folder. |
| 2. | Open the folder. |
| 3. | Go to the Tools menu and select Folder Options. |
| 4. | Click on the View tab. |
| 5. | Find the line that says "Hide file extensions for known file types." Does it have a checkmark in the box? If so, click the box once to remove the checkmark, then click on the OK button at the bottom of the dialog box. |
| 6. | If there are files in the folder, look at the file names and notice the extension at the end of each file name. |
| 7. | If there are no files in the folder, look for files on the desktop and notice their extensions (move the folder window around on the screen if necessary). If you still do not see any files, ask the teacher for help. |
| 8. | Go back to the Tools menu and select Folder Options again. |
| 9. | Click on the View tab and put a checkmark back in the box next to "Hide file extensions for known file types." |
| 10. | Click on the OK button at the bottom of the dialog box. |
| 11. | Close the folder window by clicking on the Close ("X") button in the upper right-hand corner. |
| 12. | If there are any files on the desktop, look at the file names and notice that the extensions have been removed from the names. |
| 13. | Return to this lesson window either by clicking on the lesson window or by clicking on its Taskbar button. Click on the Maximize button in the upper right-hand corner (the middle button of the three) if you want the window to fill the screen again. |
Next Page |