Step 1: Opening the Toolbars Menu
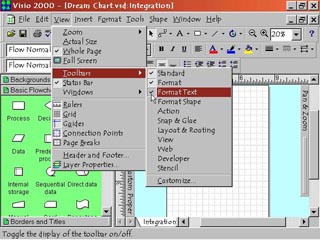
1. To open the toolbars menu, select View > Toolbars. This displays the Toolbars submenu. From here you can display or hide any of the eleven Visio toolbars.
Step 1: Opening the Toolbars Menu
|
1. To open the toolbars menu, select View > Toolbars. This displays the Toolbars submenu. From here you can display or hide any of the eleven Visio toolbars. |
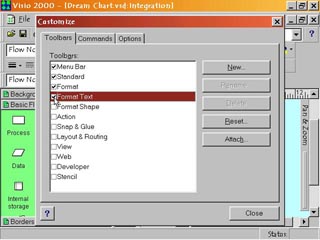
Step 2: Displaying a Toolbar |
2. In the Toolbars submenu, move your cursor to the space just left of the name of the toolbar you want. Left click to select the toolbar. The selected toolbar will now display a check mark beside the toolbar name. Click outside the submenu to see the workspace with the new toolbar. |
Step 3: Hiding a Toolbar
|
3. In the Toolbars submenu, move your cursor over the check mark just left of the name of the toolbar you want to hide. Left click to deselect the toolbar. The deselected toolbar will no longer have a check mark beside the toolbar name. Hiding toolbars you are not currently using is necessary to keep the workspace from being too cluttered. |
Step 4: Toolbar Organization |
4. Each of the eleven toolbars is organized to contain related tools and commands for certain tasks. In some cases there are commands and tools that seem to appear on more than one toolbar. Actually while they are similar, there can be important differences in how they work or on what they work on. Most toolbars are also subdivided with related commands grouped together. I.E. File management commands appear together on the left of the Standard Toolbar. The Standard Toolbar should always appear on startup. |
 Proceed to the Next Page!
Return to the Previous Page!