 |
 |
4. Procedures > Some of the Procedures in LOGO
![]()
![]()
![]()
![]()
![]()
![]()
4.1. PROCEDURES | A Logo Procedure | Writing A Procedure | Running A Procedure | Variables | Examples |
4.1.1. What is A Logo Procedure?
In LOGO, the commands are executed as and when entered. These commands do not get stored in memory.
Till now we have been writing commands one by one to draw figures. If the same figure is to be drawn again, the same set of commands will have to be given again. Instead, if we want to save the set of commands and give it a name, we can do it with the help of LOGO Procedures.
A procedure is useful if we want to reuse a certain set of commands. We can give a name to a set of commands and can recall it whenever needed. A procedure once defined can be stored in memory and can be called any time when required.
A LOGO procedure is a set of LOGO commands given one after the other to perform a particular task and referred to by a name.
A LOGO Procedure is divided into 3 parts:
![]() Title of the Procedure
Title of the Procedure
![]() Set of Instructions
Set of Instructions
![]() End Line
End Line
The Title of the Procedure:
![]() Can
include letters, numbers or symbols
Can
include letters, numbers or symbols
![]() The first
character should always be a letter
The first
character should always be a letter
![]() Blank
spaces cannot be included
Blank
spaces cannot be included
![]() Arithmetic operators + , -, *, / cannot be included in the name
Arithmetic operators + , -, *, / cannot be included in the name
![]() LOGO
Command names cannot be included
LOGO
Command names cannot be included
The title of the procedure is the name given to the procedure. Preferably a procedure name should be such that it gives some information about the set of instructions.
| VALID PROCEDURES | INVALID PROCEDURES |
|
Square H20 PR3S S$2 |
SH 2 - A blank space is given 23 ABE - First character should be a letter FD - FD is a LOGO Command F/D - Includes an arithmetic operator |
4.1.2. Writing A Procedure
A procedure is started by giving the TO command followed by the name of the procedure.
![]()

![]()
![]()
![]()
![]()
![]()
![]()
![]()
![]()
![]()
![]()
![]() WRITING
A PROCEDURE USING THE INPUT BOX:
WRITING
A PROCEDURE USING THE INPUT BOX:
STEP 1 : Click in the Command Input Box
STEP 2 : Type <TO> followed by a name for the procedure, for example: TO CIRCLE
STEP 3 : Now, press the <Enter> key
STEP 4 : After pressing the <Enter> key, the To Mode Input box appears
STEP 5 : Click inside the box
STEP 6 : Enter the commands one after the other, pressing the <Enter> key after each command
STEP 7 : Type <END> to mark the end of the procedure
 Let us write a procedure for drawing a
CIRCLE:
Let us write a procedure for drawing a
CIRCLE:
![]()
![]()
![]()
![]()
![]()
WRITING OR EDITING A LOGO PROCEDURE USING THE EDITOR WINDOW:
The Editor Window allows you to make changes in an already existing procedure and also to write new procedures.
To write a new procedure using Editor Window follow the steps given below:
STEP 1 : Click in the Command Input box and type <Edit "Square"> and press the <Enter> key. Square is the name of a new procedure. The Editor Window appears as shown below.
STEP 2 : Insert a blank line after the line containing TO SQUARE by pressing <Enter> key.
STEP 3 : Type the commands that you want to be included in the procedure for example,
CS
FD 40
RT 90
FD 40
RT 90
FD 40
RT 90
FD 40

The commands appear in the Editor Window between the Title Line and the End Line.
STEP 4 : Click on <File> in the Menu bar of the Editor window.
STEP 5 : Click on <Save and Exit> option in the Dropdown menu.
4.1.3. Running A Procedure
Running a procedure, means executing the set of commands typed and saved in the procedure. A defined procedure can be called any time by simply typing the name of the procedure in the Command Input box.
You can run a procedure by typing the name of the procedure, for example, SQUARE in the Command Input box and then pressing the <Enter> key.
4.1.4. Variables
![]() A
variable in LOGO is denoted by a: ,
followed by the name of the variable. For example,
A
variable in LOGO is denoted by a: ,
followed by the name of the variable. For example,
TO VARYSQ :SIDE
REPEAT 4 [FD :SIDE RT 90]
END
![]() Now, lets
do on your own with these examples:
Now, lets
do on your own with these examples:
| EXAMPLE 1 TO VARYRECT :W :L REPEAT 2 [FD :W RT 90 FD :L RT 90] END |
EXAMPLE 2 TO HEXAGON :SIDE REPEAT 6 [FD :SIDE RT 60] END |
| EXAMPLE 3 TO POLY :SIDE :ANGLE REPEAT 360/:ANGLE [FD :SIDE RT :ANGLE] END |
EXAMPLE 4 TO ROTATE :SIDE :ANGLE REPEAT 360/:ANGLE [POLY :SIDE :ANGLE LT 90] END |
4.1.5. Examples
Now, let us look at a few examples of procedures:
EXAMPLE 1
Procedure to draw a SQUARE:
TO SQUARE
REPEAT 4 [FD 40 RT 90]
END
SQUARE DEFINED
![]() To run the
procedure, type <SQUARE> and press the <Enter> key.
To run the
procedure, type <SQUARE> and press the <Enter> key.
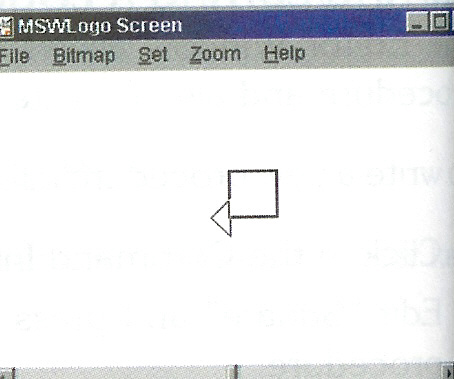
A square gets drawn on the Graphic screen as shown.

EXAMPLE 2
Procedure to draw a CIRCLE:
TO CIRCLE
REPEAT 360 [FD 1 RT 1]
END
CIRCLE DEFINED
![]() To run the
procedure, type <CIRCLE> and press the <Enter> key.
To run the
procedure, type <CIRCLE> and press the <Enter> key.
A circle is drawn in the Graphic Screen.

EXAMPLE 3
Procedure to draw a TRIANGLE:
TO TRIANGLE
REPEAT 3 [FD 60 RT 120]
END
TRIANGLE DEFINED
![]() To run the
procedure, type <TRIANGLE> and press the <Enter> key.
To run the
procedure, type <TRIANGLE> and press the <Enter> key.
Then a triangle is drawn in the Graphic Screen.