![]()
![]()
![]()

|
|
|
|
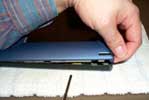
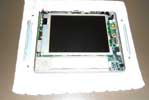
1) Place ePods face down on a towel so the screen doesn't get scratched.
2) Remove the battery cover long screw, battery cover and battery.
3) Remove the other 9 long screws from back of the case.
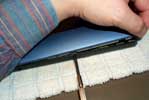
4) Turn the ePods over so the screen is up.
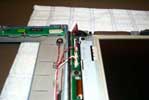
5) Start at the upper right corner and gently pry the front bezel up.
6) Insert a small straight slot screwdriver between the front bezel and the black side insert and "pop" the two clips.
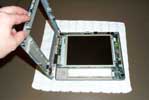
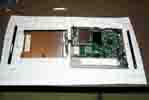
7) Open the ePods "like a book". The front panel can only open about 120 degrees until step 8. Be careful of the wires on the left side which go to the speaker, microphone and "button board".
8) Remove the connector going to the button board. At this point the front panel can be opened 180 degrees.
9) (Optional) Remove the other 2 connectors going to the microphone and speaker
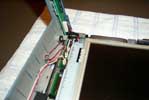
10) Remove the infrared lens (note its orientation)
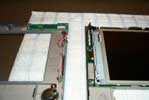
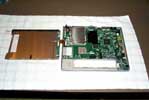
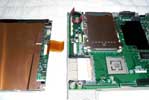
11) Remove the connector for the LCD backlight (2 wires, upper right)
12) Remove the 4 long screws and 2 brackets for the LCD.
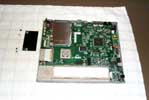
13) Open the LCD "like a book and place it on the front cover. You should now be able to read the motherboard revision.
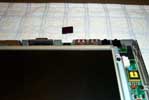
14) Remove the two medium screws for the black side filler pieces
15) (Optional) Remove the LCD connector by pulling out the two release tabs on either side of the flat cable. Once the tabs are out the cable will come free with very little effort.
16) Remove the two short screws for the daughterboard. Remove the two hex standoff screws for the daughterboard.
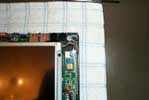
17) Remove the rest of the short screws for the motherboard, power board (lower right) and LCD backlight board (far right). Open the boards "like a book" away from the back case. (you can now see the RAM and empty RAM pads)
|
|
Send mail to [email protected] with
questions or comments about this web site.
|