NO2 Install Continued
Now to secure the bottle itself. Although there was a heated argument over whether it is necessary to drill the clamps into the sheetmetal of the trunk, eventually it was conceded that the thick board of the trunk liner was good enough, because, well, it's marks car and thats the way he wanted it. Yank out the board, mark where the holes are going, drill them, screw the bitches on, (dont forget the bolts on the other side) and throw the thing back into the trunk and clamp the bottle on. (fig. 7) Done.

(fig. 7) right after this, we had to drive derek to the hospital because he drilled into his foot.
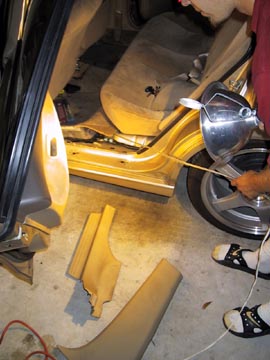
(fig. 6) reach under the carpet and pull the line out the side.
So now the other pieces have been fedexed to us. You have the wiring, the computer, and the switches and the vacuum hosing. Start with the computer. We placed it right above and to the left of the throttle body, above the intake, right over the vin numbers. In this case, due to the placement of the wires and tubing, it is necessary to install the computer upside down. Only two of the self-tapping screws will be used, and that is sufficient enough to hold if firmly against the car. Wrap the nitrous 'line in' threading on the left of the computer (actually, it's the right, but it's upside down) with teflon tape and attach the nitrous line that comes from the bottle.
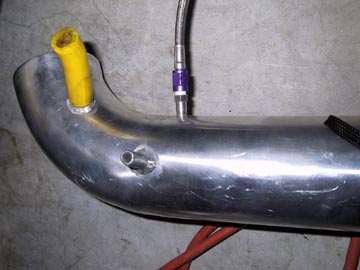
(fig. 8) drilled and tapped and connected.
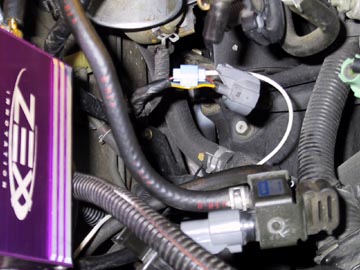
(fig 9) the white wire comes from the box.
Take your intake, and assuming you have a aftermarket metal intake, pick where you want the nozzle to go. Somewhere between 6 to 8 inches from the throttle body is good. Drill ahole and tap the hole with the supplied tap. (If you dont know how to tap, then you shouldn't be installing a NO2 kit.) Take the other nitrous line and assemble the nozzle with the size shot you want- we did a 55 just to start out. Again, remember the teflon tape. (fig. 8) Look into the intake and try to make sure the nozzle hole is directed toward the throttle body. Okay, put that to the side until the wiring has been finished.
ZEX says the throttle postion sensor wire that we want to connect to is white. Well, it isn't. On an accord, it is a red wire with a black chaser. This wire should be bundled with two other wires on the throttle body. Find it and use a connector to splice the zex wire (the white one) into it. (fig. 9) (dont forget to shorten the wire so that you dont have extra wires hanging all over. that looks crappy.) Now there is the ground wire. We ran this up near the front of the car, on the side where the headlights are grounded.

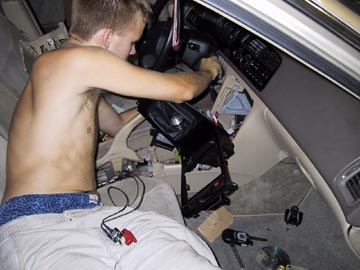
(fig. 10) the wire from the computer comes from the firewall, and here mark hooks the power line into the power line of the radio.
(fig. 11) derek clamps the 'intake' line onto the end of the intake manifold.
Then there is the switch wire. Run this in through the firewall past the same spot you fed the nitrous line. Take the red wire and attach it to the switch's wire using a butt connector. Stick your switch wherever you want, like in the cupholder if you want to hide it from your mommy. Run the power line to a constant power source- the radio, ignition, whatever. (fig. 10)
Two vacuum lines and you are almost finished. One goes to the fuel pressure regulator and another goes to the intake manifold. Remove the vacuum line that goes from the fuel regulator to the intake manifold. Take the zex's vacuum line and go from the 'intake' plume on the zex computer to the intake manifold where the old line went to. (fig.11) Take the other line and go from the 'regulator' plume to the fuel regulator. (fig. 12) So basically you take one line off and replace it with two. Understand?