Aprilia SL-1000
Fork Spring Replacement
(Continued from page 2... click here to go to the start of this
document.)
This procedure
is based on my RS250 manual, which also has USD Showa
forks.
Disassembly
Procedure
Remove the
springs
- The RS250
manual leaves draining the fork oil until a later stage,
but I prefer to get it over with now. The method I've been
using is to back out the compression screw at the bottom of
the fork leg, then removing the compression valve and
draining the oil out the bottom (see the page on
replacing fork oil). You need to be very
careful not to damage the valve needle. Record the number
of turns to fully seat the compression valve before backing
it out. After removing the valve, pump the forks a few times
to spray out the oil, then replace and tighten the compression
valve.
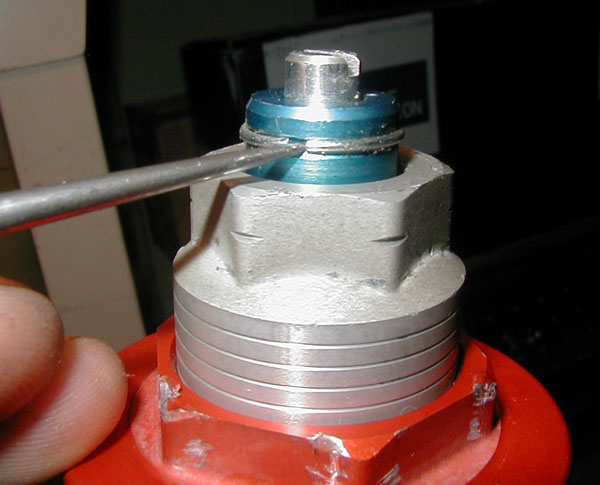
- Turn the
rebound adjust screw on top of the preload cap all the way
in (gently), recording the number of turns. Then turn it
all the way out (again, gently) to free the needle from
the orifice. Next turn the preload adjuster in to reveal
the spring clip on the top of the adjuster rod
(anodized blue). Remove this clip, keeping your hand over
it so as not to spring it across the room. After removing
the clip, you can back out the preload adjuster all the way
and remove it from the fork.
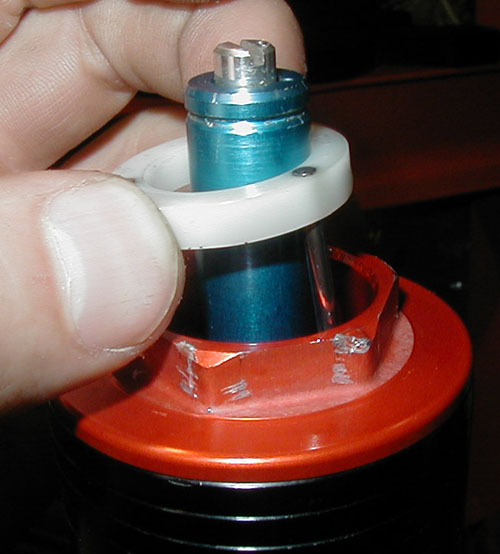
- Remove the nylon
ring underneath the preload adjuster that retains three pins
that push down on the spring.
Unscrew the red preload cap completely now. There should be no spring
pressure behind it. When it is unscrewed, the fork can be
collapsed, revealing a steel preload tube bolted to the
cap. This tube is pressing down on the spring and is under
pressure.
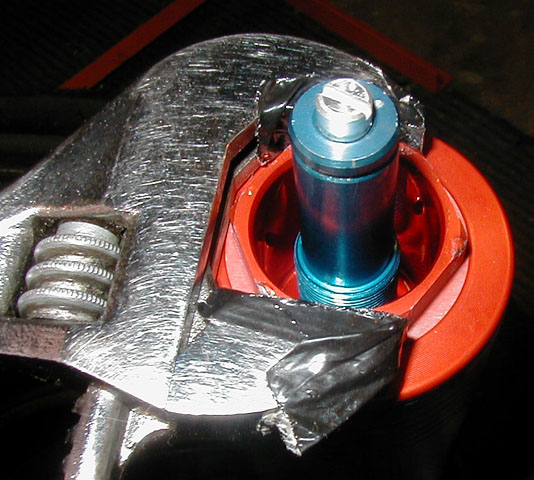
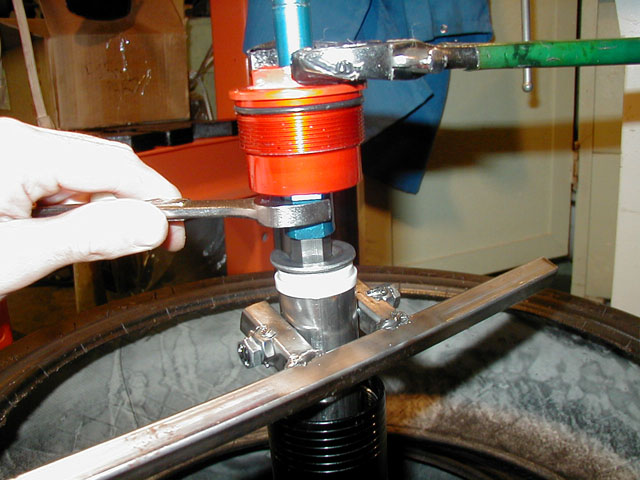
- To remove the
preload tube, it must first be pushed down against the
spring while the blue damping rod is held up. When the
tube has compressed the spring about an inch, it will
reveal a wrench flat on the damping rod that must be held
while the preload cap is removed. I strongly recommend you
make or buy both of the special tools
to depress and hold this tube.
- The first tool grips the preload tube
using the holes in its sides and has handles to allow you
to push down on the tube with both hands. At 1 kg/mm, you
need to be able to apply about 50 lbs to depress the tube
enough to get at the wrench flat. I thought about using a
couple long bolts, or perhaps modifying a c-clamp to fit in
the hole. In the end I just welded up a tool shown in the
picture below.
- The second tool is a like a slotted clip, something to
just slip over the damping rod under its lock nut to hold
the preload tube down so you can release the push-down tool
and remove the cap. The clip or plate could be a fender
washer, maybe 1-1/2 inches in diameter to hold the tube,
with a half inch hole slotted out to the edge to slip over
the rod. I was quite lucky, as I had a piece just like
this already: the Honda CBR600F3 cartridge forks have a
slotted and dished washer in their parts list that serves a
similar function (holding down the spring beneath a lock
nut). If you order this part, or find it at a junk dealer,
it works perfectly. I had a few bent F3 forks lying
around.
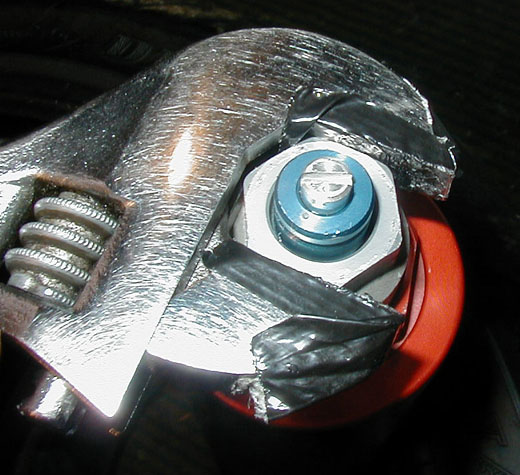
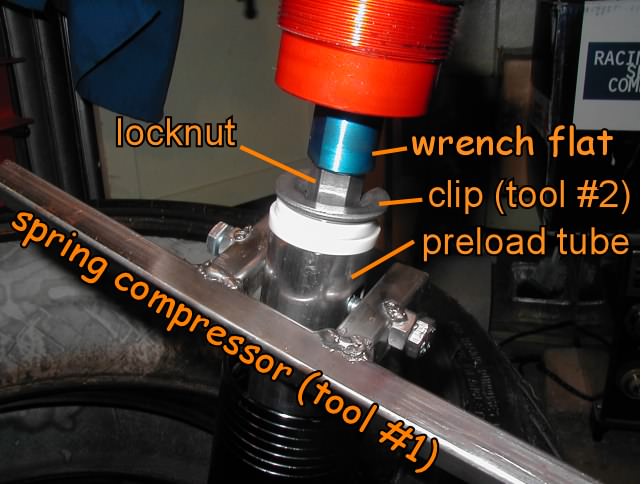
| The preload tube has already been compressed and clipped down,
revealing the wrench flats on the blue damping rod that you need to expose.
Note the use of two tools to compress and retain the preload tube.
(Click on image to enlarge and show notations.) |
 |
- I would
recommend you depress the tube carefully and evenly, and
only enough to get the clip in place. There is something
that the tube bushing can get hung up on deeper in the
forks (perhaps it can leave the bottom of the tube), and I
managed to damage a bushing because I was not careful about
this. (At least I think that's how it was damaged). This
bushing does not have a separate part number, and an entire
preload tube must be ordered if you damage it ($45 a side).
To avoid depressing the tube excessively, have an assistant
hold the preload cap up and slip in the clip while you depress
the tube. Once the tube is clipped down, you can hold the rod with
a wrench and unscrew the red preload cap from it.
- After the
preload cap has been removed, you can once again depress
the preload tube with the tool and remove the clip.
Release the tube slowly, maneuvering it so it doesn't hang
up on the blue damping rod.
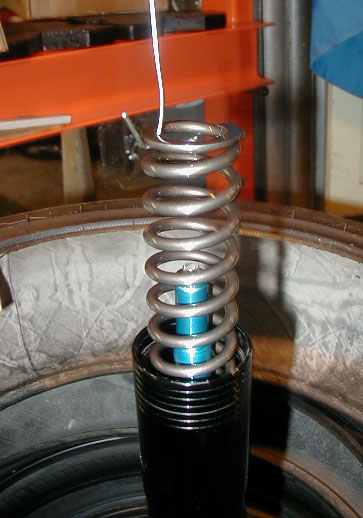
- Remove the
preload tube from the fork (with plastic spacer and washer
above), then fish out the spring beneath it, and finally
the washer and preload spacer beneath that. Remember that
if you tip the fork over at this point to retreive the
spacer, its going to have residual oil in it!
- Note that USD
forks, unlike standard damping rod forks, will fall apart
if the preload cap is off and you lift them by the upper
(outer) tube. Don't do this!
Click here to continue to the fork
assembly procedure.
or
Click here to go back to Falco page.