Go to start of this article...
The only difference I noticed about the new clutch design is that there is now a special 10th plate. This plate has chamfered cuts in the teeth, and one of the teeth is cut short. On consulting with my dealer (thanks Seacoast Sport Cycle), he informed me that this plate goes deepest in the motor (goes in first). I placed the chamfered side facing out of the motor (for no real good reason--I can argue for either way).
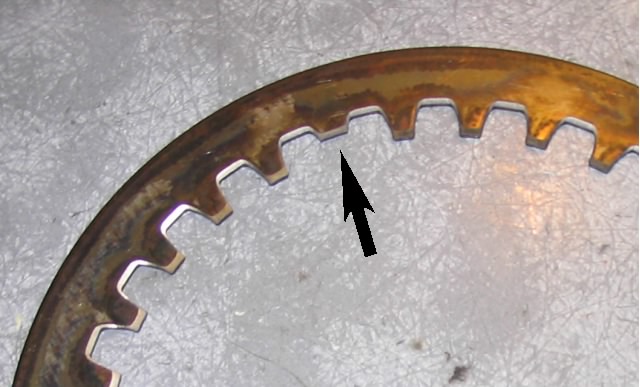
| The first steel into the motor is chamfered. It also has one shortened tooth. The RSV manual did not cover its placement, so I placed the chamfered side facing out of the motor, and put the shortened tooth adjacent to the lubrication hole drilled deepest in the hub. The corroded look of this steel is because it was not packaged with oil like the other steels. There was no serious pitting, so I cleaned it up and used it. |
|
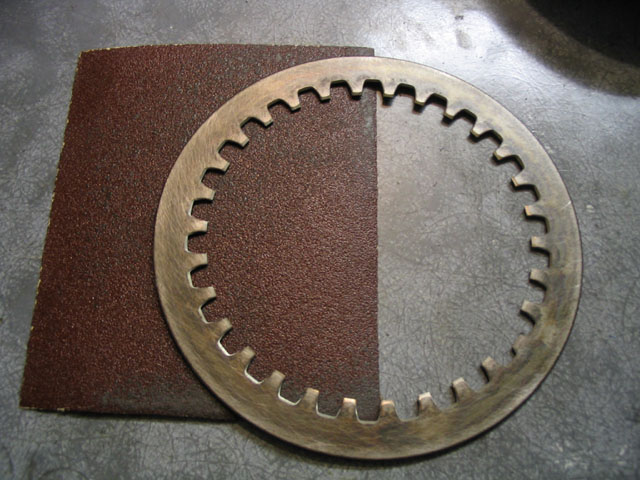
Before assembling the clutch, I did try one more trick. In discussions with Marc Salvisberg of Factory Pro tuning, he mentioned that an old racer's trick was to scuff up your steels with coarse sandpaper. When I first heard this, I cringed, but Marc knows a lot of tricks that work. And I started thinking, when I get an automobile flywheel resurfaced, it comes back with a ground finish, not polished smooth. Perhaps a bit of bite would keep the frictions from glazing.
|
I put a sheet of 100 grit sandpaper on a flat surface, and one by one, lightly scuffed up the frictions. I used a small circular motion to make sure there were plenty of scratches going across the friction radially. In the end, the result was very mild because I didn't want to take off any material. After I was done, I cleaned the steels in a mixture of laundry soap and water to remove any abrasive grit. |
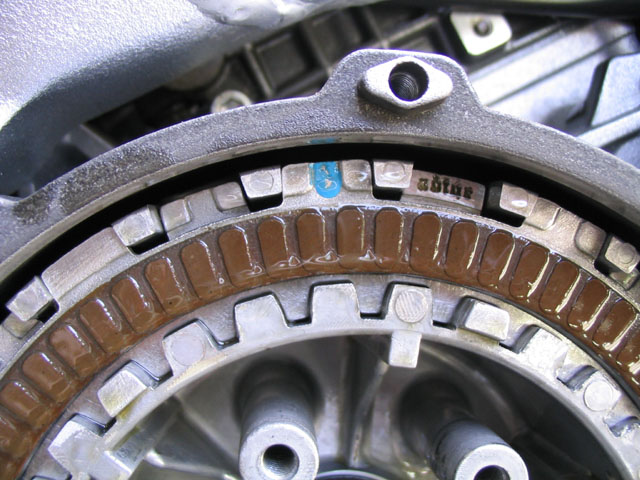
Remember to pre-soak your frictions in oil. Then locate the friction with the blue dot painted on the tab (my previous clutch had a red-dot). I didn't see what was different about this plate, but it is supposed to go on the stack last.
| The final friction to go in the stack has a blue dot painted on it. This friction is normally offset from the others and placed in special slots in the basket. |
|
The only other thing I did differently with this clutch was to wash the rubber vacuum diaphragm in soapy water, as it had started to build up some oily deposits. I used contact cleaner to wash the metal parts of the diaphragm assembly.
Here are the part numbers off the packaging for this clutch. I'm unsure of the total prices, but with an oil filter and four quarts of Silkolene semi-synth it was $214.
| Spring (6) | 239480 |
| Steel plate (9) | 0259260 |
| Steel plate (1) | 0259264 |
| Friction plate (9) | 8106634 |
Go back to the original clutch page...
Go back to the Falco home page.