At approximately 6,000 miles, I began noticing clutch slip at high 2nd gear loads. Over the next 1,500 miles, it got worse, until the clutch would break free in second and third under any hard acceleration.
At this time, Aprilia considers this a consumable item and doesn't cover the clutch under warranty. Fortunately, at $160 list (I paid $144) for the entire clutch kit, it is reasonably priced. Even better, it is very easy to replace. Still, please ask your dealer to bring early clutch failure to the attention of Aprilia. If enough of us complain, maybe they'll redesign it.
Update (17-Jan-2002) Barnett now makes a clutch kit for the Falco. John Abatte has installed one. Priced similar to the Aprilia clutch, it has different construction and may provide better life.
Disassembly procedure: Click on images to enlarge
|
|
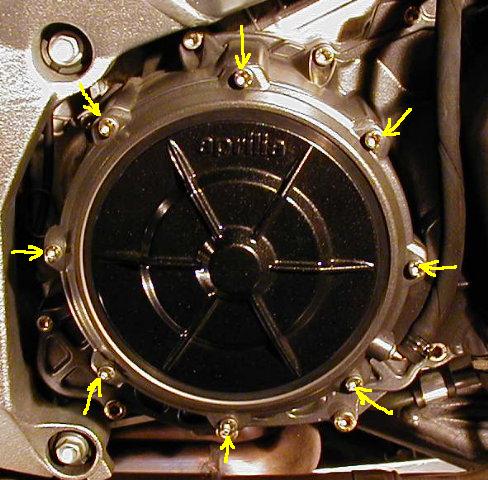
Start by setting the bike on the sidestand, clean the clutch cover and oil tank bottom, then drain the oil tank. You do not need to remove the magnetic oil plug or oil filter. The clutch is behind the right hand (brake lever side) engine cover. Only the eight M5 screws on the inner cover need to be removed. You can leave the vacuum hose in place. |
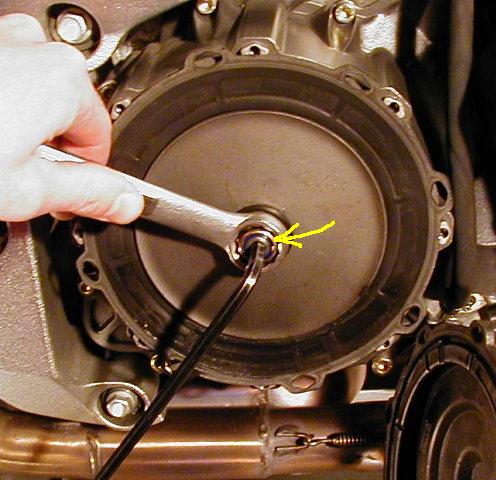
| Carefully set the cover aside. Lift the eight tabs on the vacuum diaphram and rotate the diaphram off the tabs. Use a 19mm wrench on the M12 locknut while holding the clutch disengagement shaft with an allen key. |
|
|
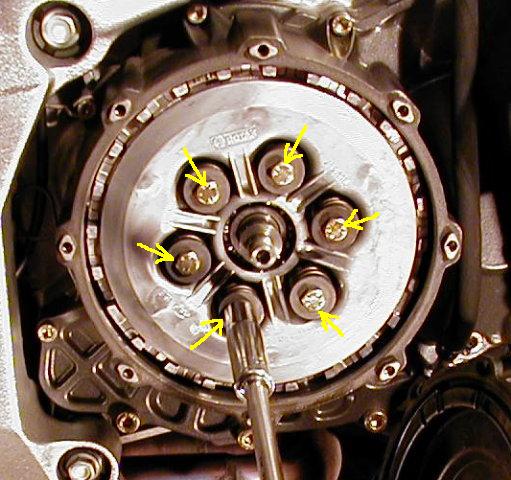
Remove the outer washer, vacuum "pressure plate", diaphragm, support disc, and inner washer and set them aside in order. The "spring holder" hub will now be exposed. Shift the bike into gear, hold the rear brake down and remove the six M6 bolts, washers and springs. |
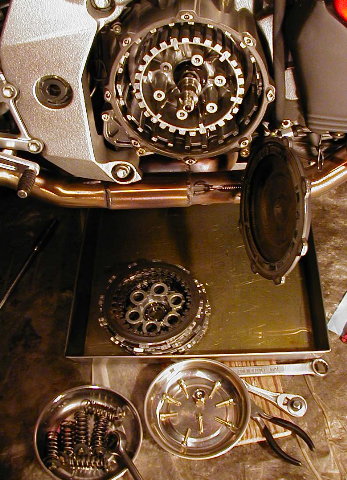
| Remove the hub, exposing the clutch stack. Fish out the steels and frictions from the basket. You do not need to remove the shaft, but don't bend it. Inspect the basket and hub, especially along the fingers. Smooth wear spots are normal, but there should be no edges that would prevent the stack from sliding easily. |
|
|
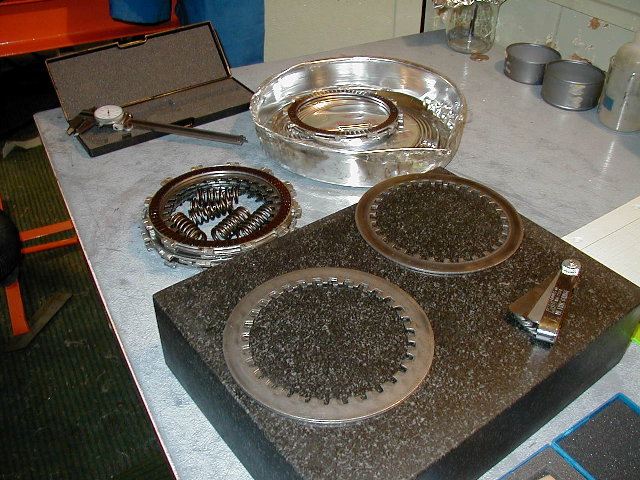
You should inspect any new or old components before you reinstall them. Frictions should always be replaced. Inspect them for glazing, wear (thickness), and cracking. Steels should be checked for bluing (a sign of overheating), and warpage. I check for warping by holding two steels together and looking for light between them (spec is less than 0.006 in warpage for one plate). Springs should be checked to make sure they have adequate free length (short springs are an indicator of fatigue and the reduced spring rate will not provide enough holding pressure). |
Measurements for the Stock Aprilia clutch:
| Item | Avg, New |
Avg, Used |
Aprilia Spec |
| Spring | 1.72 in | 1.73 in | > 1.69 in |
| Steel plate | 0.059 in | 0.058 in | |
| Friction plate (new measured dry) | 0.137 in | 0.135 in | |
| Stack height (steels+frictions) | 1.82 in | 1.80 in | > 1.77 in |
Assembly procedure:
Update (July 2003) I've finally faced the inevitable and replaced my clutch a second time (at 16,000 miles). I again chose the stock clutch, which has reportedly been updated since my last installation. You can read more about the differences and a few minor installation notes.
Go back to Falco home page.