The utilized technique is from the Homebuilt Aircraft world and uses Epoxy resin with E-glass on top of Hot Saw cut foam blocks. This method was somewhat difficult to master and required a lot of labor but we learned a lot about composite construction and were happy with the end results.
The Spoiler came in at a svelte 2.25lbs and was bonded to the Deck-lid for a Semi-permanent installation.
The next step is to do some aerodynamic testing, if you see a WRX driving down the freeway with yarn tufts hanging off the Spoiler, that is us!
Get ready, which means buying the materials, building the Hot Saw and reading a good book on how to build composite structures. We used Burt Rutan's Moldless Aircraft Composite Construction manual. Most of the materials can be sourced from Aircraft Spruce & Specialty Co.
Materials: Foam Blocks, Bi-directional and Uni-directional E-glass, Epoxy Resin, Micro Balloons, Sandpaper, Super-fill, Primer and Paint, Paint roller, Instant foam bonding glue, Lots of Masking Tape, Dremel tool and Bits, Silicon Adhesive, Hot Saw, Squeegee, Paper and Pencil for sketches, Cardboard and 1/16th Plywood for templates, small nails, 5-minute Epoxy, Safety gear for Epoxy and dust exposure.
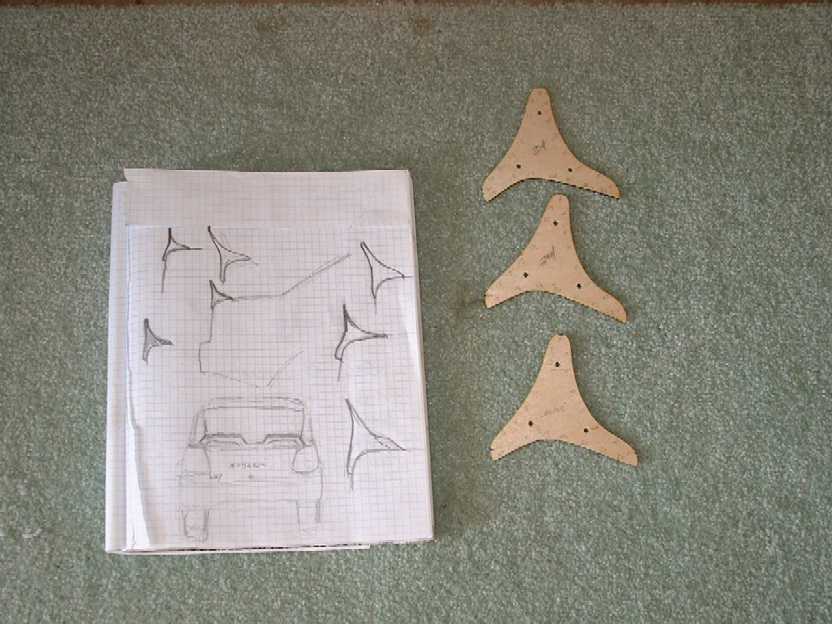
Sketches: This is a fun part, we drew up a couple of different designs and then played with some cardboard to see how it might look on the back of the car. Once we settled on a basic cross-sectional shape we had to capture the contour of the rear Deck-lid on our templates. Since it is a compound curve it took 3 different shaped templates for each side, so a total of 6 cross-sections.
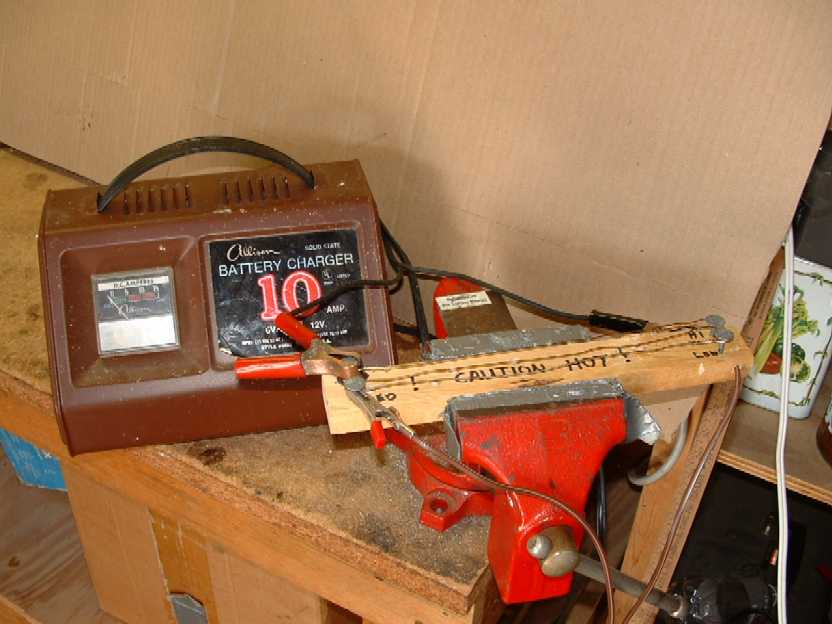
Build the Hot Saw: It was amazing to us how simple this is and how well it works. The saw itself is made from some coat rack dowel, aluminum scrap tubing, .035 Safety-wire, an old extension cord and alligator clips. The power source is a 10-amp battery charger and the "Variable" resistor to control the wire temp is made from a wrapping of Safety-wire. One of the most important things is to make sure you get a saw that has a nice tight wire.
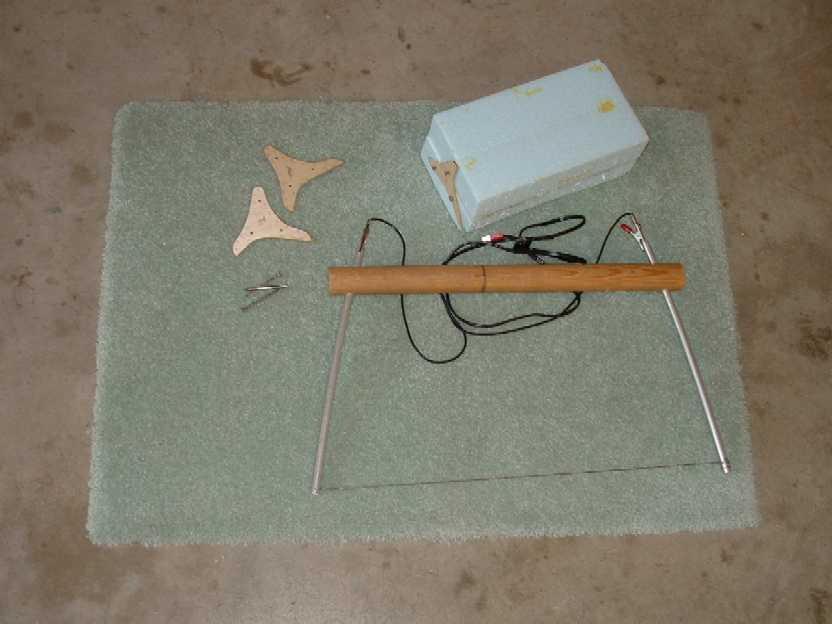
Prepare the Foam Blocks for cutting: We used 2" thick Styrofoam pieces glued together with 5 minute Epoxy and sanded to a nice even block. Since we have a compound curve on the Deck-lid, it takes four blocks of about 10" inches long by 6" X 6", these blocks will subsequently be cut with the Hot Saw guided by the 3 different 1/16th Plywood templates. (CAUTION, SOME FOAM SUCH AS URETHANE GIVES OFF POISIONOUS FUMES WHEN HEATED, DO NOT USE !!!).
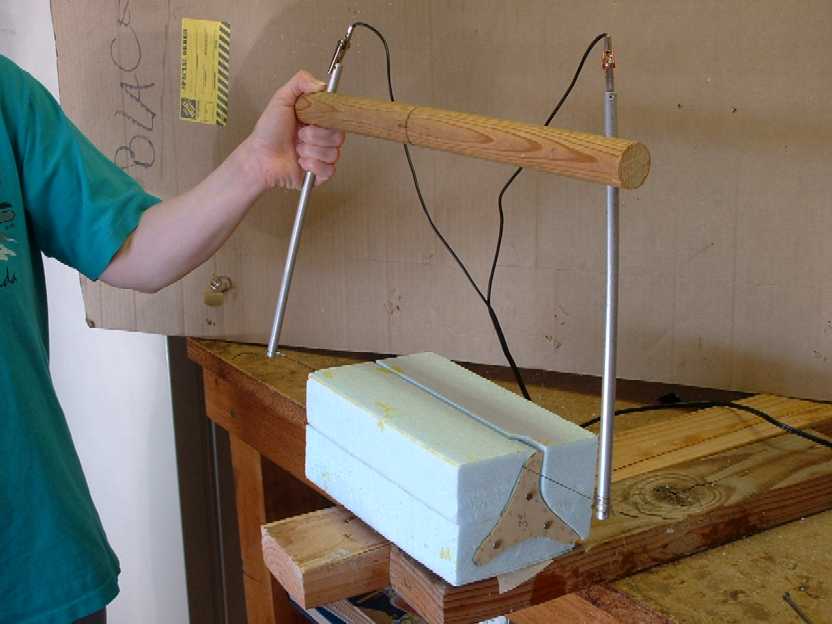
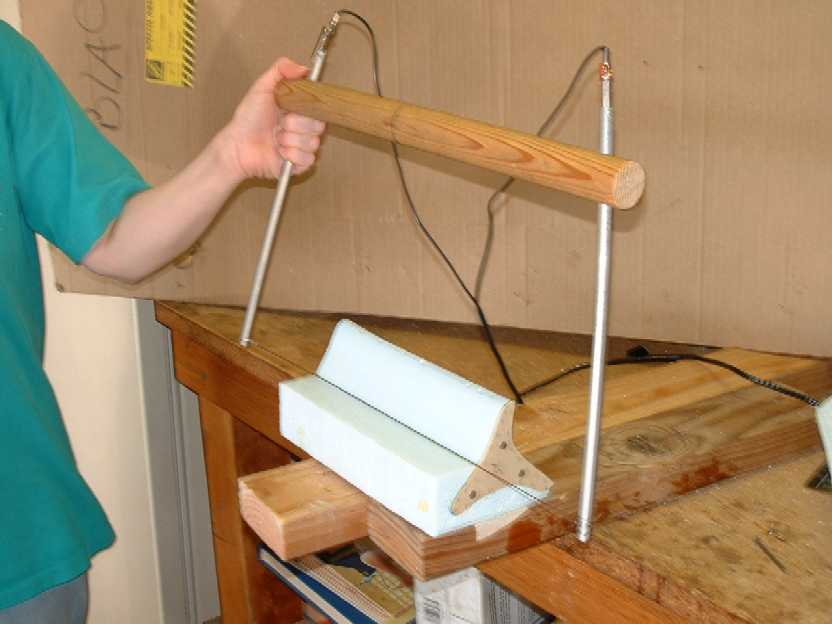
Cut the Foam Blocks: This is another really fun part, the 1/16th templates are carefully located to the end of the Foam Bocks using the small nails. Location is everything and we took our time to get it right. Next using a partner on one end of the saw, the Team carefully follows the outline of the template and cuts out the Foam Core from the Foam Block. Temperature, correct speed and unison are what it takes, we scrapped a lot of Cores before we got good ones. Also, make sure you pin the right templates to the block.
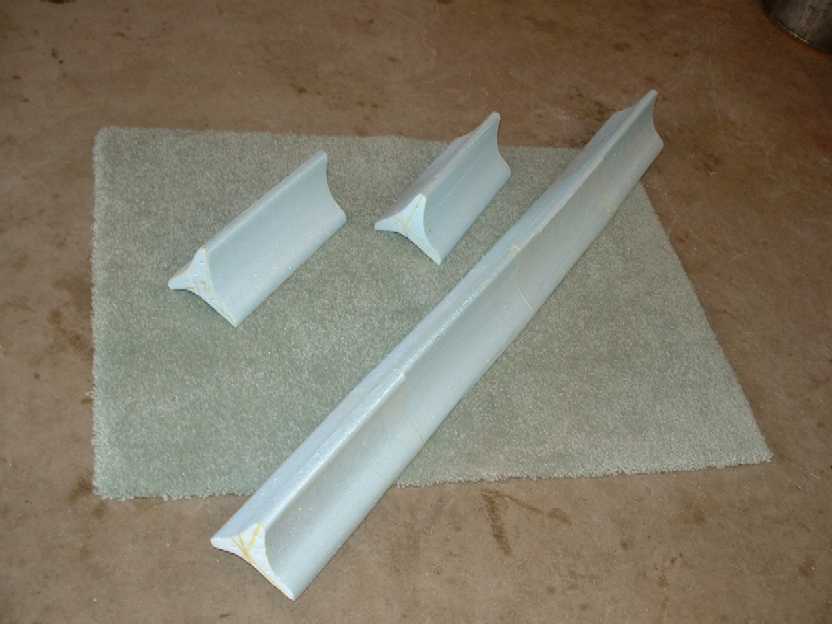
Glue the Cores together: Using the 5-minute Epoxy, glue the 4 Foam Cores end to end. The important thing is to make sure you glue the correct blocks together to match the curve of the rear Deck-lid. You will have 2 rights and 2 lefts, then after gluing one long core.
Capture the curve of the Deck-lid: This was one of the most difficult things to do and we made a key mistake here. Using a hacksaw blade cut scarfs in the Foam Cores about every 2", all sides. Next take the foam core to the car rear Deck-lid and with someone's help place the core where it fits the best. Using the instant foam glue bond the scarf's to hold the core to the shape of the rear Deck-lid. (We used 5-minute Epoxy and it held the foam well but was almost impossible to sand at a latter operation, this resulted in a whole lot of work that could have been saved by using instant glue.
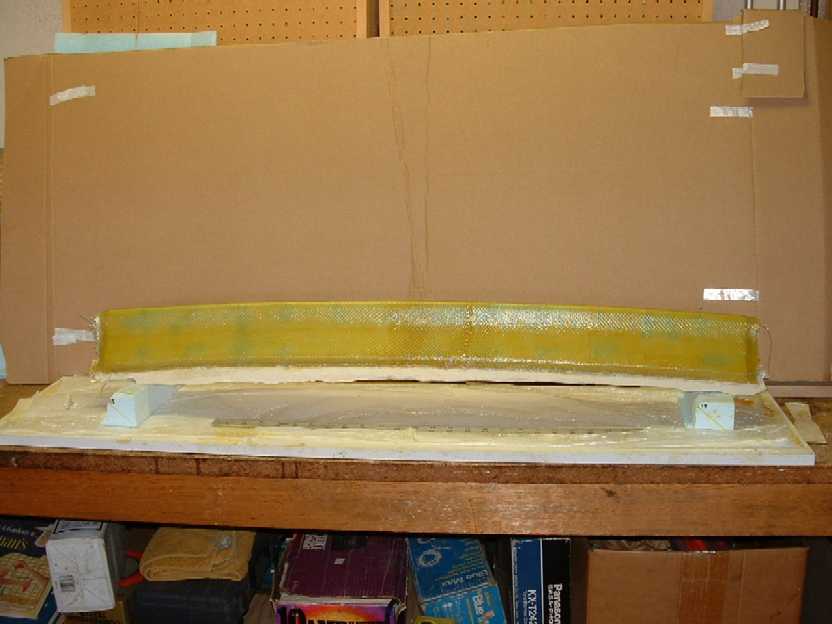
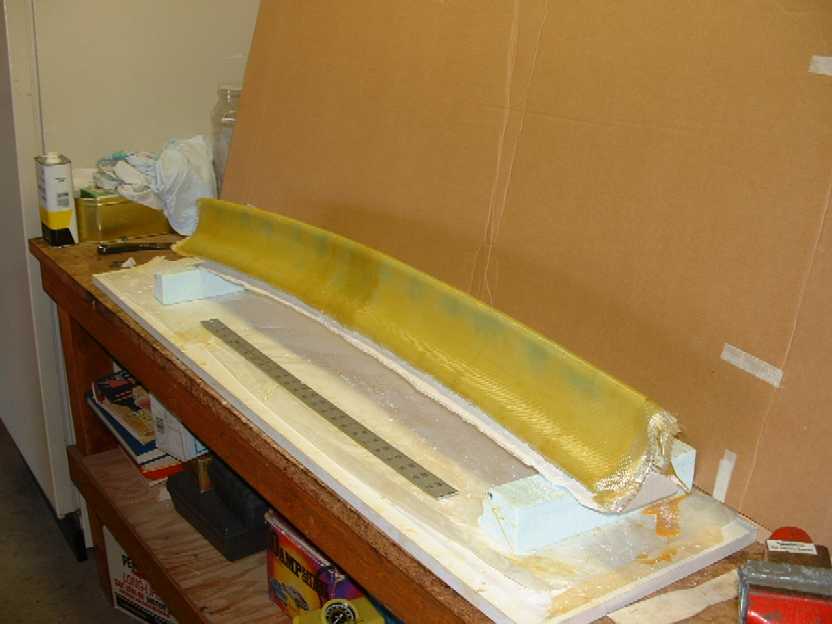
Lay-up the glass: This is a step that requires no messing around without good safety equipment. We used a full Tyvex Suite, Respirator, gloves and eye protection. The "E" glass is cut to shape, 3 layers of Bi-directional for the top and end pieces, 2 layers of Bi and 1 layer of Uni for the bottom. The Uni is what give the part its incredible strength and lightness. This is another area that we blew it, as we were ran short of glass and as a result had to use a lap splice. THIS RESULTED IN A HUGH AMOUNT OF ADDITOINAL LABOR TO GET A SMOOTH SURFACE FOR PAINTING. The only way to go on this is to use one piece of glass all the way across.
Carefully mix the Epoxy Resin per the manufacturers instructions, it must be dead on accurate or it will not dry correctly. Mix a little micro slurry and coat the Foam Core then lay the first layer of glass on the Foam Core top surface and squeegee in the Epoxy resin, continue with the next 2 layers.
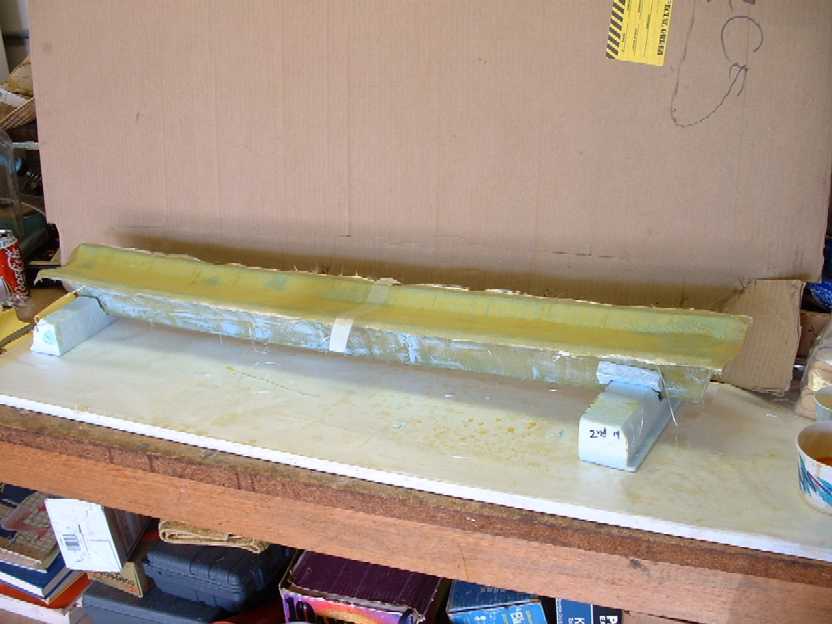
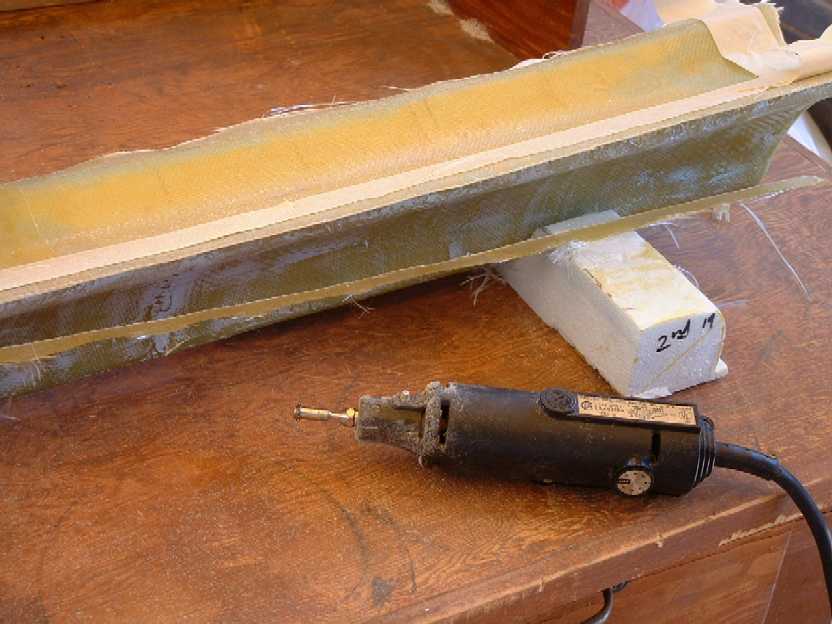
After the glass has cured, using the Dremel tool, trim the top layer to near net. Finish up with sandpaper and the Core is ready for the bottom to be glassed.
The bottom is glassed the same as the top except one layer of Uni-directional goes between the 2 layers of Bi-directional glass.
Again trim to net in preparation for the end pieces, glass the end pieces the same as the top. Finish up with a final trim and carefully sanding.
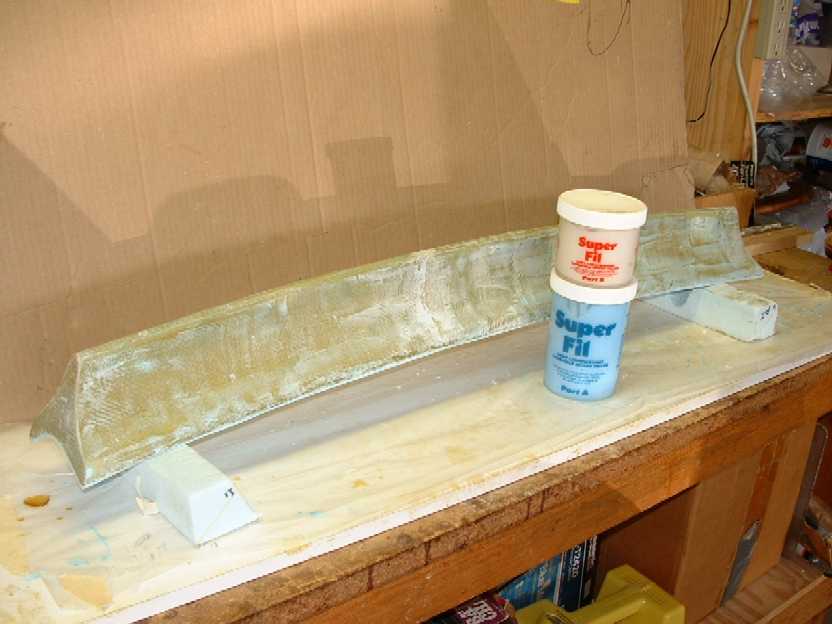
Fill the Glass weave with Super-Fil: This is one of the parts of the composite process that really takes a long time. Using a squeegee apply the Super-Fil by pushing into the weave, layer sand, layer sand, layer sand, the goal is to fill all the weave of the glass cloth and any low spots. Since we used a splice joint on our glass and had bumps where we used 5 minute Epoxy on the scarf joints, it took us forever to get a smooth surface. If we had not made these mistakes the fill process would have been much simpler.
1/29/03 Copyright 2003, skoshiracing