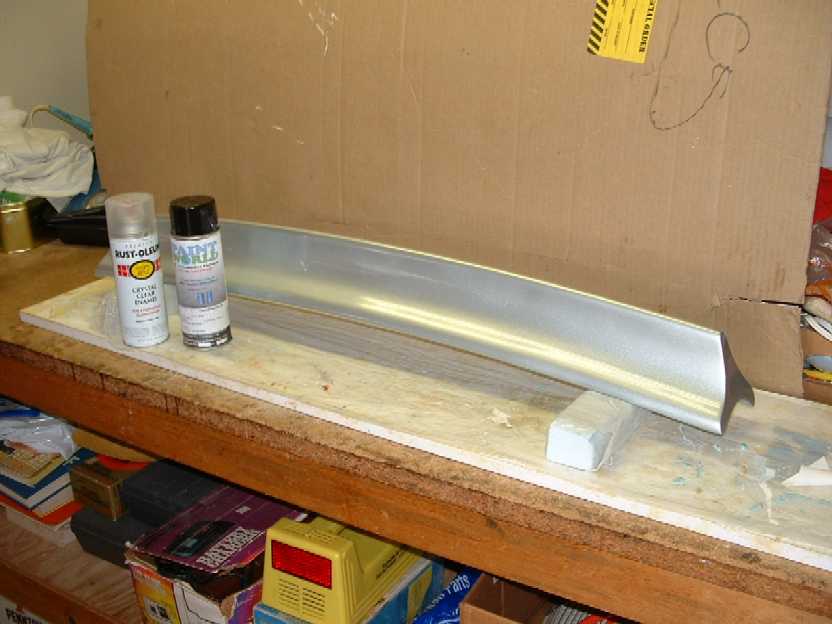
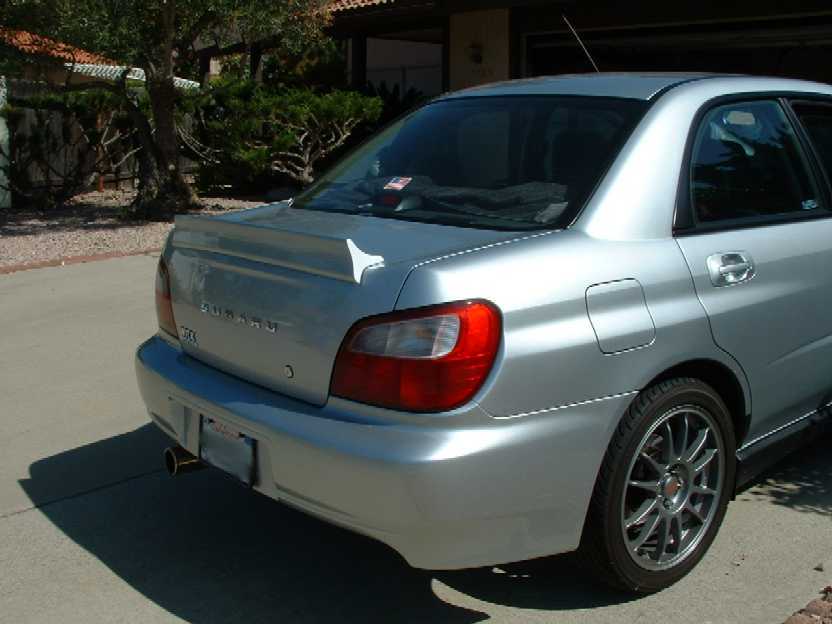
Topcoat with paint: Here we made another error, (but hey, that is how you learn!). We bought a can of paint from Paint World to match our Subaru Platinum Silver and applied 3 coats of paint to the Spoiler. The problem was that we really need 2 cans of paint and as a result we did not get the coverage that we needed before the clear coat was applied.
Clear-coat the paint: After the base coat thoroughly dries, (at least 3 days), spray on at least 6 layers of clear-coat. The important thing is to let the paint dry just enough between coats to provide a tacky surface for the next coat, then spray another coat. Pretty soon all the irregularities will be filled in and a smooth surface will be left.
Final buffing of paint: Wait at least 3 days then using buffing compound, buff out the clear-coat to a nice luster.
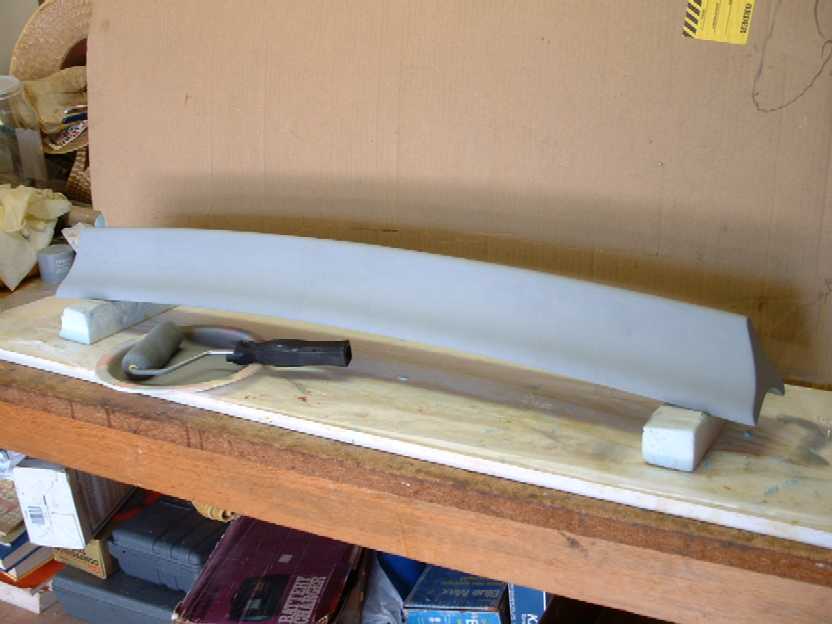
Take the Spoiler to a professional for painting: This is what we did because we did not get good coverage with the base coat and no amount of Clear-coat corrected the problem. We just did not have enough energy left to sand all the paint off so and start again so we paid someone to do it. (We do think that it is possible to get very good results with cans and careful painting but it is imperative to not be short on paint.)
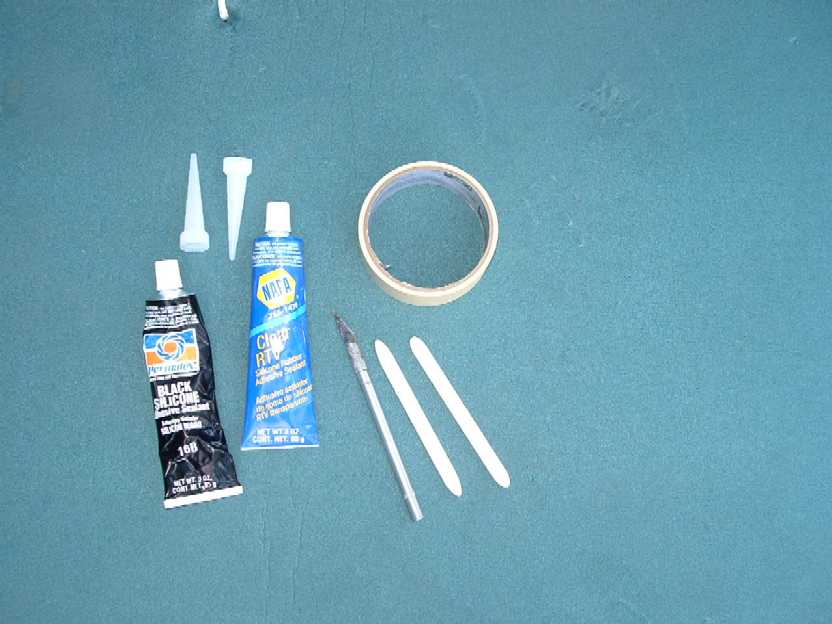
Bond the Spoiler to the rear Deck-lid: We did some peel and shear test that showed Silicon Adhesive would work very well to bond the Spoiler, it is strong enough, but could still be removed if necessary. Cleanliness is the most important thing here so all surfaces were washed with soap and water then final rinsed. Lastly Alcohol is used just prior to bond. Pre-position the Spoiler on the car then lay out a mask of tape around the Spoiler leaving a 1/16th seal line.
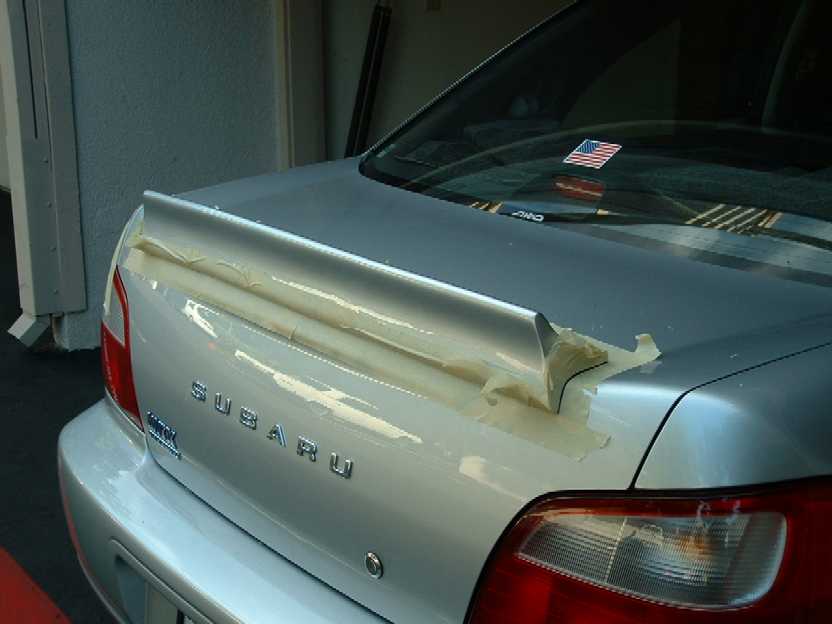
The Spoiler is removed and the Silicon Adhesive is applied to the bottom surface of the Spoiler. The idea is to get about 1/16th thickness of sealant to fill any irregular surface. We used clear Silicon in the middle and black Silicon on the edges so it would look like a gasket when done. Carefully center the Spoiler on the rear Deck-lid and push the Spoiler down until the Silicon squeezes out. Push hard, wait a few minutes then peel the masking tape off leaving a neat seal line. (IT IS VERY IMPORTANT TO REMOVE THE MASK WHILE THE SILICON IS STILL WET) Finally, hold the Spoiler in place with strips of masking tape while it is drying.
Final: Let the Silicon dry for at least a day, then remove the tape straps. Clean up any stray silicon with a plastic scraper.
That is it, wait a week or so before washing and waxing and the Spoiler is done.
Note: We intend on doing some aerodynamic testing in the near future and we will post the results to the website when available.
1/29/03 Copyright 2003, skoshiracing