The Solar Funnel
Cooker
Source: BYU Solar Cooker by Prof. Steve E Jones et. Al., Brigham Young
University
http://solarcooking.org/funnel.htm
So far, this seems to be the most practical solar
oven design for the Gambia. It cooks better then simple reflecting box
ovens and is cheaper and safer than the parabolic designs.
This would be good for general cooking, but would
also be great for science demonstrations.
Materials:
1x2 meter piece of cardboard
Aluminum foil
50/50 mixture of glue
(wood glue or local glue) and water
Wire brads, binding wire,
or other binding material
Cooking pot system (see
below)
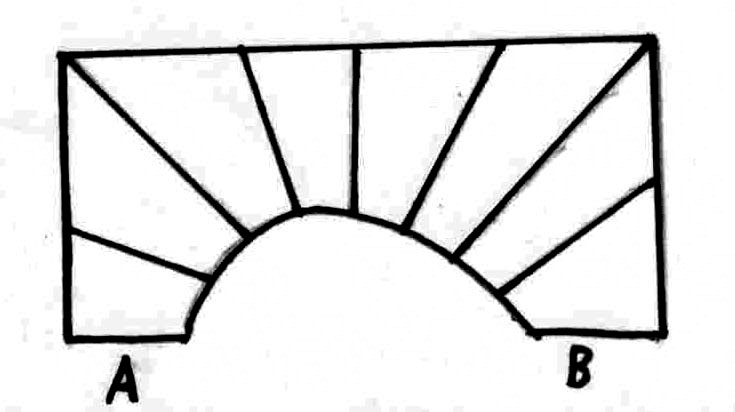
Cut a Half circle in the center of one of the 2 meter edges of the cardboard sheet. The radius of the circle should be equal to the diameter of the cooking pot.
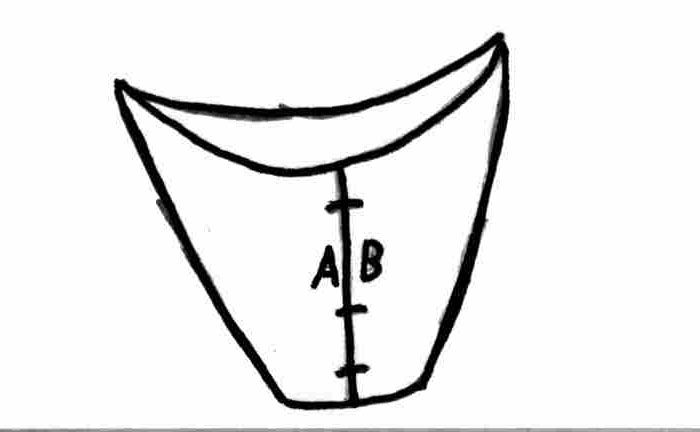
Form the funnel by bending edges A and B together. Bend and fold into the funnel shape. Make creases so the funnel shape will hold.
Glue sheets of aluminum foil (shiny side up) to the inside of the cardboard. Overlap the edges of the foil by about 2 cm.
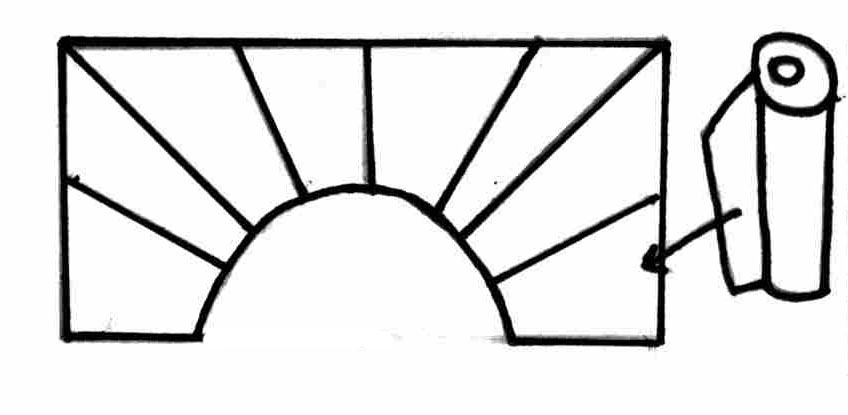
After the glue dries, bring A and B together to reform the funnel and the bind edges together.
Along the bottom hole, place a piece of foil shiny
side down.
Place funnel in a stand, box, or hole in the ground, set the cooking
pot system in the center, and cook.
Cooking pot assembly:
There are a couple of possible designs foe the cooking pot assembly.
Each one basically consists of a black cooking vessel surrounded by a clear
shield to keep heat around the cooking pot by eliminating convection and
encouraging a greenhouse effect.
System #1:
Materials:
Black pot or black painted jar
(leave a strip of the jar unpainted so you can see the cooking progress)
4x4x2 block of wood to act as an insulator.
Oven bag or any other high-density polyethylene (HDPE) plastic bag
Assembly:
Place the insulating block in the bag. Place the pot or jar on top of the block. Place food in the pot/jar. Blow into the bag to fill it with air and seal the bag.
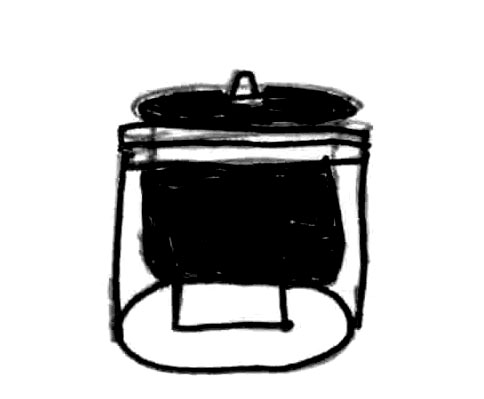
System #2:
Materials:
Black cooking pot with a securely fitting lid
Glass bowl or jar that fits securely around the pot.
Assembly:
Place the cooking pot into the bowl and seal them together
System #3:
Materials:
Cardboard
Plastic sheeting
Black cooking pot with a secure fitting lid
Aluminum foil
Assembly:
Cut 2 rings out of the cardboard that securely fit around the top edge of the cooking pot and a disk about the size of the cooking pot. Use the remaining card to build a stand for the pot. Cover the bottom disk with foil and cover the stand with foil, dull side out.

Create a plastic hood or tent with the plastic sheet. Sandwich the top edge of the tent between the two cardboard rings. Glue the bottom of the tent to underside of the foil covered disk. This forms a collapsable clear plastic bowl.
Glue the stand onto the foil disk. Place the cooking pot on the stand and pull the sides of the tent up so that the cardboard rings are around the top edge of the pot.
Recipes:
Vegetables:
Cut the vegetables into
logs or slices. No water is needed to cook them.
Cook for 1.5 hours.
Grains:
Mix 1 part grain to 2 parts
water (4 parts water for corn meal)
Cook for 1 hour, and stir
Continue cooking for an
additional hour
Pasta or instant soups:
First let the water cook
in the cooker for 50-70 minutes
Add pasta or soup and let
it cook for another 15 minutes
Beans:
Soak the beans overnight
Cook in water for 2-3 hour
Eggs:
Cook for 1-1.5 hours. No
water is needed.
Meat:
Chicken:
1.5 hr cut up
2 hr whole
Beef:
1.5 hr for small cuts of beef
2 hr for large cuts of beef
Fish:
1-1.5 hr
Breads:
1-1.5 hours
Cookies:
1 hour
Roasting seeds/nuts:
1.5 hours
you might want to add a
little oil
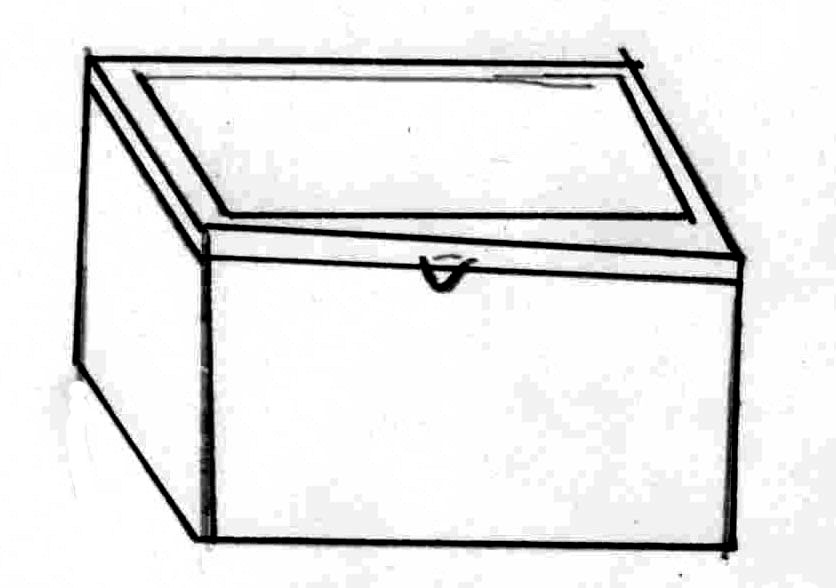
Here is one design
for a simple solar oven can be made to bake cakes, breads, cookies, and
other easy-to-bake foods.
Materials:
2 cardboard boxes, one that fits inside the other.
Scrap cardboard
Straw, sawdust, newspaper, or other insulating material
Black paint or empty drink box containers
Clear plastic sheeting.
Glue
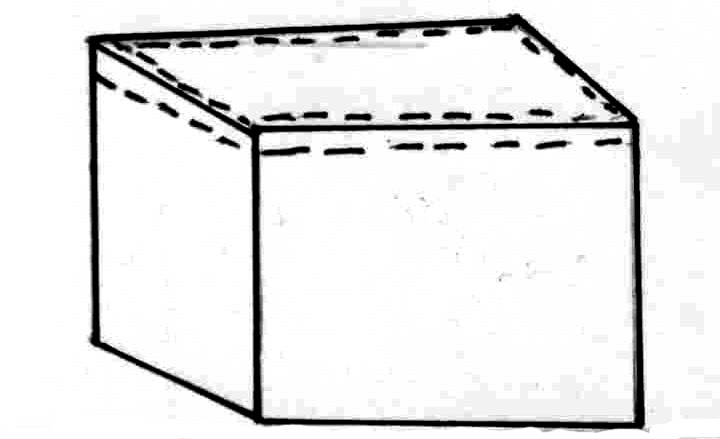
Cut the top of the larger box on 3 sides at 1-2 inches below the edge. Fold it back to form a lid. Now, remove the top edge and replace it with the plastic sheet. This will serve as the lid for the oven.
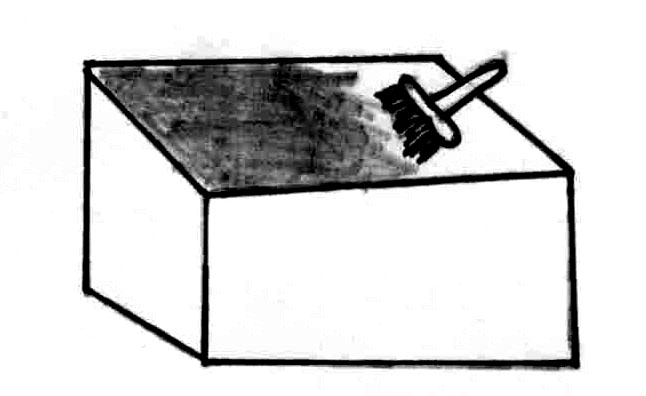
Next, either paint the inside of the smaller box black, or line it with the unfolded drink boxes, so that the inner lining of the drink boxes is exposed.
Place the smaller box into the larger box, and fill the space between with the insulating material.
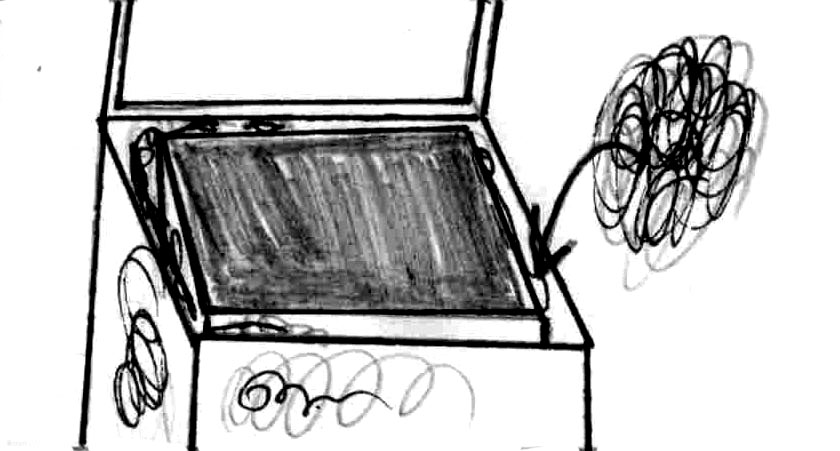
Preheat the oven in the sun, place the food inside, and bake.
A sturdier solar oven can be made using a wooden box. The top of the box should consist of an open frame covered with clear plastic. A thin rubber seal and a lock or latch will help to keep heat from escaping from the oven.