So once again a ventured off into "custom territory" with the expected impact on building schedule...
| Tail Fairings | ||||||||||||||||||||||||||
| Having completed the consoles, and swearing I would never deviate from the plans like that again, I moved to the tail fairings. Vans sends you a set of polyester fairings that need to be fitted and trimmed, and the ends sealed off. After scheming for a while on how to get the fairings to fit worth a darn, I started scheming other ways to do it. Since I had about three years experience working with composites, I knew how to do tooling, and knew that I could get a finished product that fit better and be more stable because it would be made with epoxy instead of polyester. So once again a ventured off into "custom territory" with the expected impact on building schedule... |
||||||||||||||||||||||||||
|
||||||||||||||||||||||||||
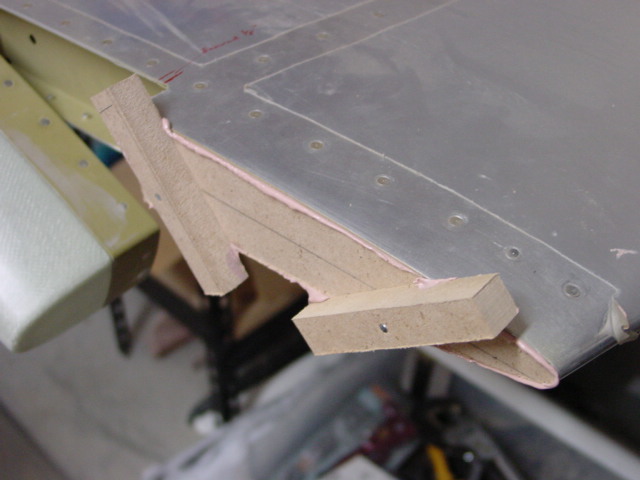
| Particle board and Bondo were used to create the "plug", which is basically an exact copy of the external shape of the object you are trying to create. There are solid foams available that make the job easier, but they are expensive and I was trying to do this on the cheap. The piece shown at right will form the flange that attaches the fairing to the inside of the vertical stabilizer.. | ||||||||||||||||||||||||||
|
||||||||||||||||||||||||||
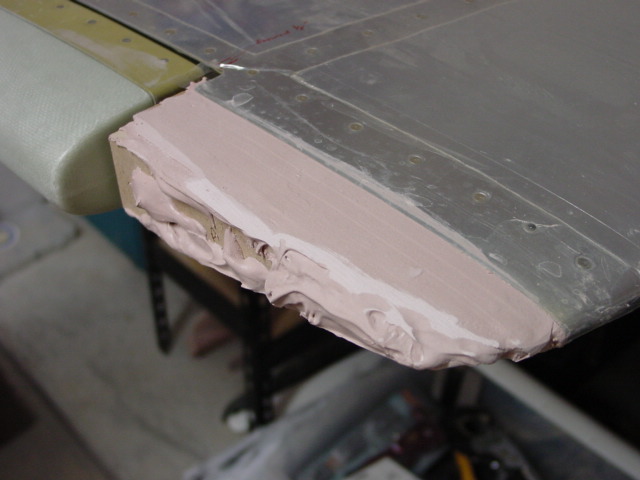
| Additional layers of particle board and Bondo are added to build up the basic shape of the part. I used the original supplied fairing as a guide, but made the shape fit the stabilizer better. Files and sandpaper were used to bring the plug to its final shape. | ||||||||||||||||||||||||||
| to page two | ||||||||||||||||||||||||||