 |
 |
 |
 |
 |
 |
 |
SAMUS'S TUTORIAL PAGE
GETTING YOUR IMAGES READY
Now that you have all of the files you need into one directory, now you must prep every single one of them!! Yes I know this may seem a little frightening at first, but this must be done. What I really recommend is a paint program, such as Paint Shop Pro or Correl Draw. If you do not have one, you can always check www.download.com for a trial program. It will be an invaluable tool once you get started. Now for my examples I will be going by the Paint Shop Pro menu, but all of the paint programs are basically the same.
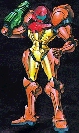
Now first OPEN your file, as you can see the picture will load and the background of the picture will most likely be black. Now for beginners sake, black (or color 0-0-0) will be the 'masking' color for all of your backgrounds, the 'masking' color will be the color that is not drawn in MUGEN.
Second you are going to DECREASE THE COLOR DEPTH to a 256 color (8bit) image. Now a problem may arise where if the black background that you want to be drawn may be misunderstood as the masking color. To check to see if this will be a problem, go to EDIT PALLETTE, then choose the upper-left color, which will be black 0-0-0. Change it to a bright color, preferably light red. If that light red shows up where you don't want it to (such as part of the background you want to keep) there is a quick way to fix it.
Here's how. First either hit undo or change the light red back to black 0-0-0. Now somewhere on the palette where a color is not defined (usually by white 256-256-256 or a gray) choose that light red again. Next INCREASE THE COLOR DEPTH to 16bit, then immediately DECREASE THE COLOR DEPTH to 256 color (8bit). Change the black 0-0-0, to something very very close to it... such as 0-0-4 or 0-0-8, then change the light red to 0-0-0. Again INCREASE THE COLOR DEPTH to 16bit, then immediately DECREASE THE COLOR DEPTH to 256 color (8bit), and the problem is solved!
Finally (this next one is easy) click FILE then SAVE AS. And make sure that you are saving the image in the right directory, and saving the image as a PCX - ZSOFT Paintbrush Image Version 5. And when you've completed this with ALL of your images... you're ready to move on to the next step!