

To throw the discus as far as possible using a sidearm throw that can be executed from a standing or spinning position.
Rules
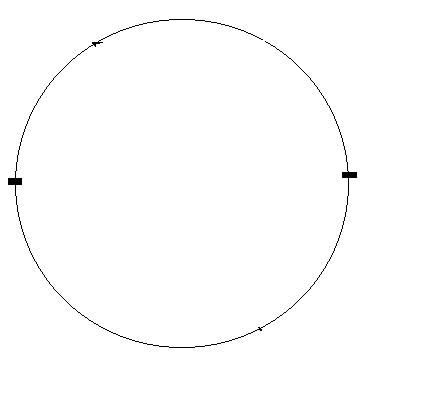
The throw must begin inside the ring and also end inside the ring. Click here to see an illustration of a discus ring. Any infractions are called "fouls." You must enter and exit from the back of the ring.
Basic Techniques of Throwing
Holding the Discus
Imagine that the discus is a clock face and hold it out from your waist with your left hand. Put your right index finger a little past where twelve would be on a clock face. Rest your thumb and your other fingers comfortably on the discus. The index finger should be over the edge of the discus. The thumb does not have to be. Click here to see an illustration.
Standing Position
Stand with your feet about shoulder width apart or whatever is comfortable. Click here to see foot placement. Bend your knees and get down as low as you can without bending your back.
Throwing the Discus
Twist your upper body around so that you are at least facing the back of the ring. (Your lower body should be in the same position as in the previous section.) Still keeping your upper body back, drive your legs and then your hips into the throw. Your abdomen should come next, followed by your left shoulder. Your left arm should be rigid and should lead your right shoulder followed by your right arm and the discus. The discus should come off of your index finger and out of the front of the hand. The important thing to remember is that this throw is a full body throw, not just an arm throw.
The Spin
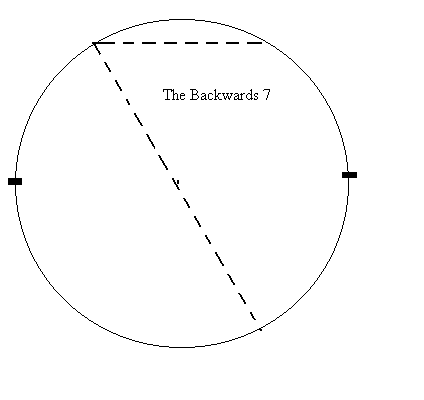
With the spin, you do the same as you did for the standing throw, only you add a simple spin before it. Your foot movement should go in the path of a backwards seven. Click here for an illustration.
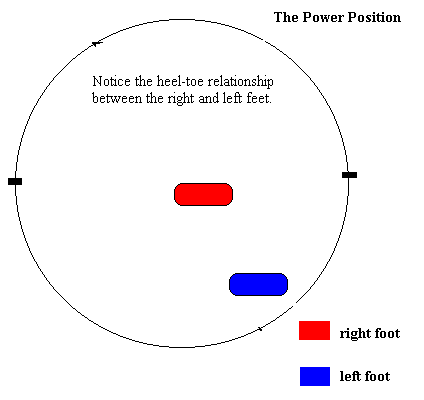
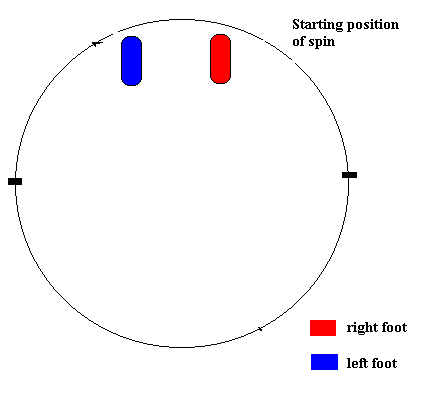
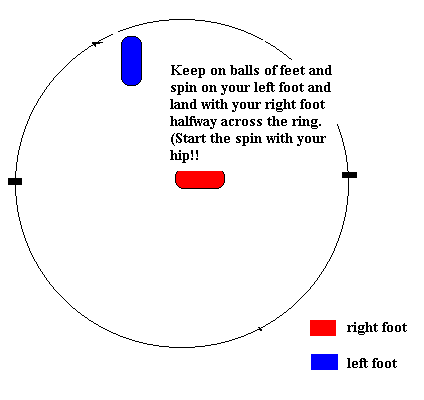
The spin should begin at the back of the ring with your body facing the back of the ring. Click here to see foot placement. Twist the body so that the upper body is facing the right side of the ring. (Your right.) Spin on your left foot, leading with your hip and not your left shoulder, and land on your right foot. Click here to see an illustration. Spin on your right foot and land with your left foot so that you are in the standing position. (Also called "Power Position") Proceed with the steps listed above.