
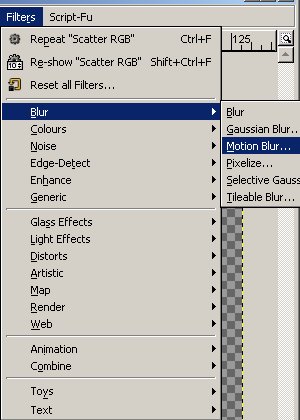
Now go to Filter>Blur>Motion Blur.


| Whorejones's Hair tutorial for Gimp Continued | ||||||||||||||||||||||||||||||||||
|
||||||||||||||||||||||||||||||||||
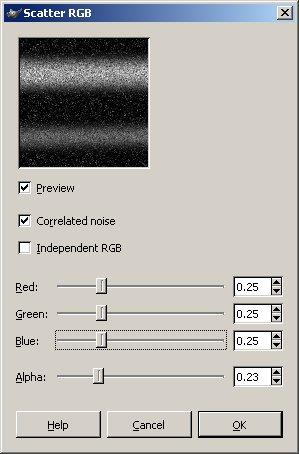
| Change the settings to these. | ||||||||||||||||||||||||||||||||||
|
||||||||||||||||||||||||||||||||||
| Alright good. Now go to Filter>Blur>Motion Blur. |
||||||||||||||||||||||||||||||||||
|
||||||||||||||||||||||||||||||||||
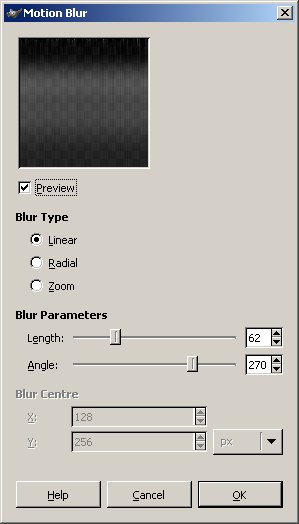
| Make sure the settings look like this: | ||||||||||||||||||||||||||||||||||
| Then click ok when settings match. | ||||||||||||||||||||||||||||||||||
|
||||||||||||||||||||||||||||||||||
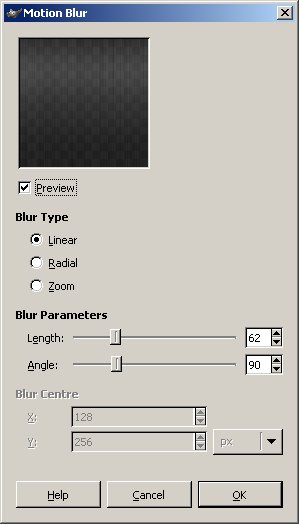
| Go back to the motion blur and change the angle to 90. Like shown below. | ||||||||||||||||||||||||||||||||||
|
||||||||||||||||||||||||||||||||||
| Here is what you should end up with. | ||||||||||||||||||||||||||||||||||
|
|
|||||||||||||||||||||||||||||||||
| You won't be able to tell from this picture but yours should be a little trasparent. When you save it will make it look lighter. | ||||||||||||||||||||||||||||||||||
|
||||||||||||||||||||||||||||||||||
|
||||||||||||||||||||||||||||||||||
| Add a solid black layer underneath. | ||||||||||||||||||||||||||||||||||