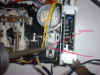
Top Wire Assembly

 On the top of the unit, you will see two red wires and two
blue wires neatly weaved through a plastic channel. You need to very carefully and gently remove these wires from
the channel. I take a very small
screwdriver and start at one end, one wire at a time. It’s easiest if you start the red wires on the right side
and then start the blue wires in the middle, and then left.
Just take your time and be very careful.
These wires are small and you definitely don’t want to snap one.
On the top of the unit, you will see two red wires and two
blue wires neatly weaved through a plastic channel. You need to very carefully and gently remove these wires from
the channel. I take a very small
screwdriver and start at one end, one wire at a time. It’s easiest if you start the red wires on the right side
and then start the blue wires in the middle, and then left.
Just take your time and be very careful.
These wires are small and you definitely don’t want to snap one.

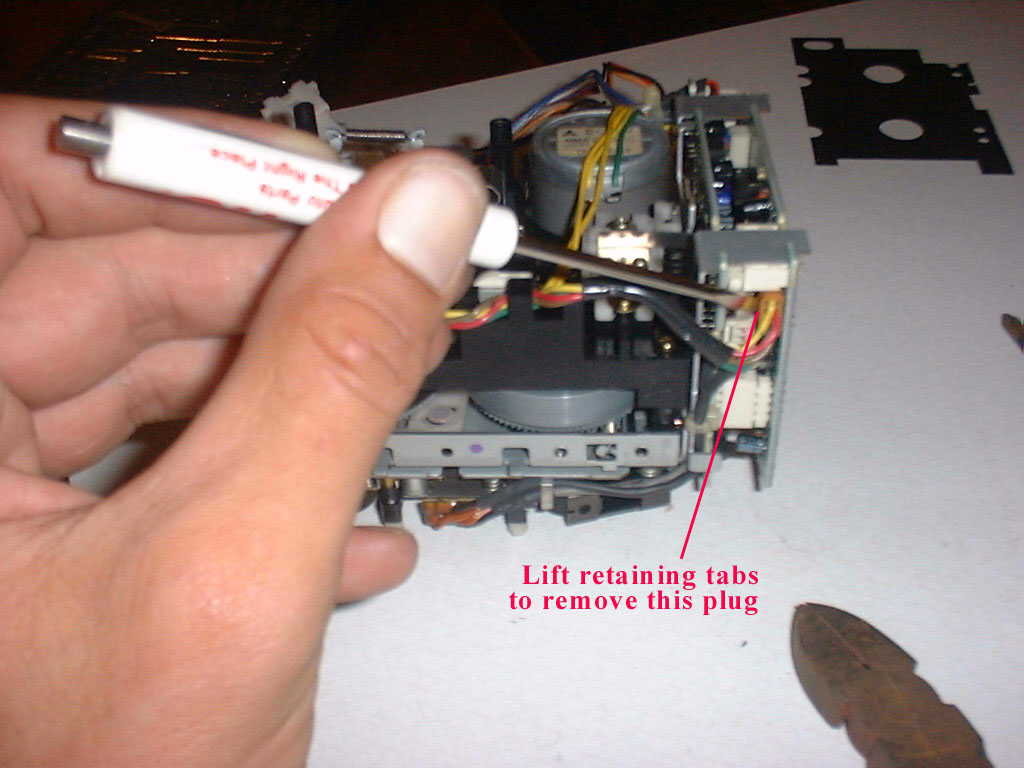
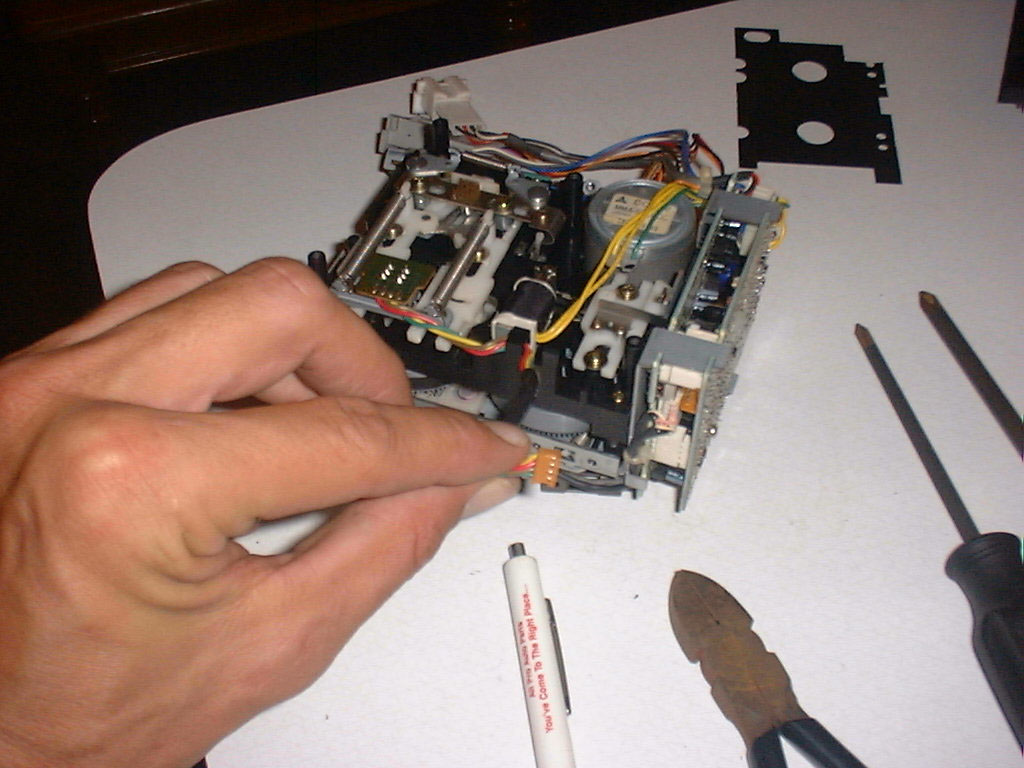
Remove the orange plug on the bottom right of the unit,
beneath the circuit boards. (see photo)
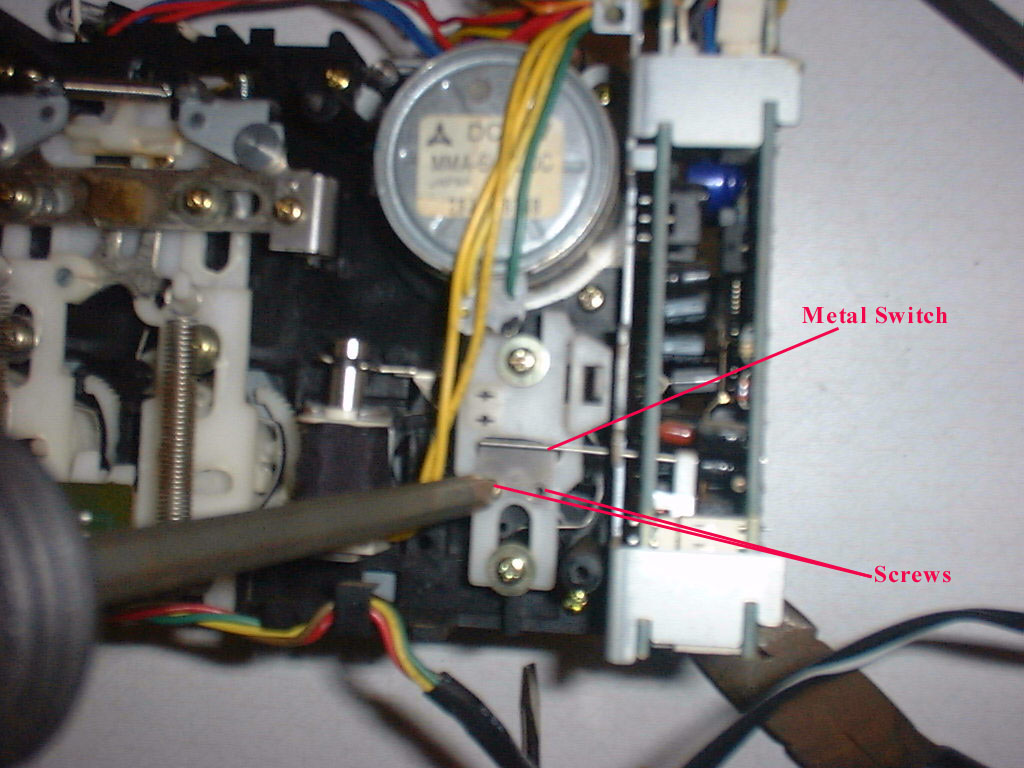
Forward / Reverse switch:
 With the unit face down, look directly blow the motor and
find a small metal flat bar that extends through the pc board to a switch.
The metal bar is mounted with two small Phillips head screws to the white
plastic assembly, which is directly blow the motor.
Remove this bar and slide it out. Now
your ready to separate the unit.
With the unit face down, look directly blow the motor and
find a small metal flat bar that extends through the pc board to a switch.
The metal bar is mounted with two small Phillips head screws to the white
plastic assembly, which is directly blow the motor.
Remove this bar and slide it out. Now
your ready to separate the unit.


 On the top of the unit, you will see two red wires and two
blue wires neatly weaved through a plastic channel. You need to very carefully and gently remove these wires from
the channel. I take a very small
screwdriver and start at one end, one wire at a time. It’s easiest if you start the red wires on the right side
and then start the blue wires in the middle, and then left.
Just take your time and be very careful.
These wires are small and you definitely don’t want to snap one.
On the top of the unit, you will see two red wires and two
blue wires neatly weaved through a plastic channel. You need to very carefully and gently remove these wires from
the channel. I take a very small
screwdriver and start at one end, one wire at a time. It’s easiest if you start the red wires on the right side
and then start the blue wires in the middle, and then left.
Just take your time and be very careful.
These wires are small and you definitely don’t want to snap one.