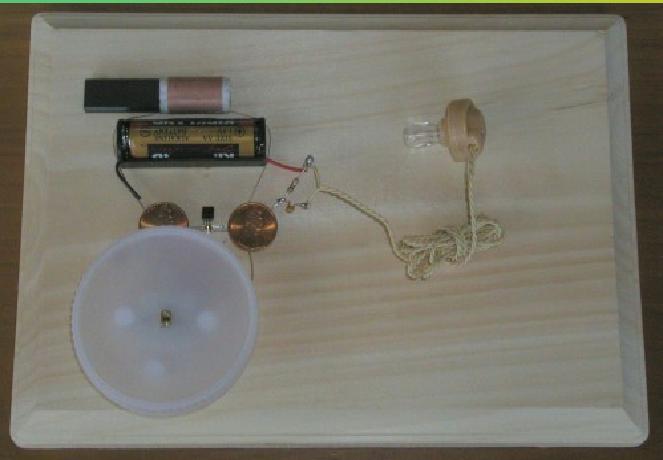
Now we finally get to turn the radio over, so it is right-side-up. The photo shows three push-pins placed around the variable capacitor. We will discuss why in a little bit. The capacitor is now glued down to the board. You might notice that we are now using a nice clean board, since we are done soldering.
The radio can be used as it is (we will add a finishing touch in a moment). It is tuned in two ways. First, you can slide the ferrite rod very slowly into and out of the coil. This is a coarse adjustment, and getting exactly the station you want can be difficult this way, since a tiny movement of the rod can change the tuning to a different station.
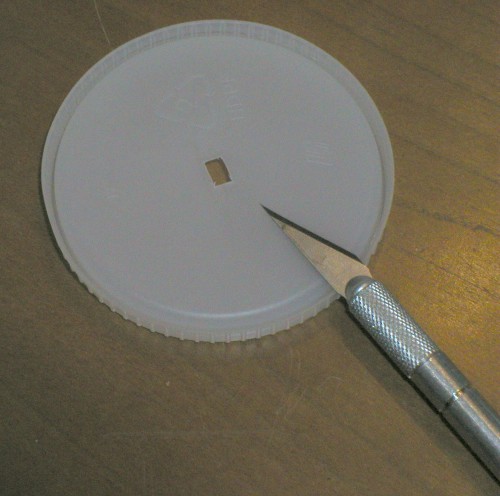
Finer tuning is done by turning the brass rod in the variable capacitor. To make this easier to do, and to make it easier to make fine adjustments, we will make a large knob out of a plastic lid from a jar or can that we no longer need for anything else.
With a small, sharp knife, cut a small rectangle out of the center of the lid. The rectangle should be just a bit smaller than the brass rectangular top of the rod in the variable capacitor, so it will make a very tight fit when we press it onto the brass rod.
The photo above shows the tuning knob in place. The three push-pins hold up the knob so it doesn't wobble. With the large knob, it is easy to select just the station you want to hear.
Since the ferrite rod is still loose in the coil, the radio is not yet very portable. At this point you need to find out where to place the rod so that all of the stations in the AM band can be tuned using just the variable capacitor. This is done by turning the capacitor all the way to the left, and then sliding the ferrite rod into the coil until you hear the first station. Now you can tape the rod onto the board, or glue it there with some silicone rubber glue. You can also glue down the battery holder if you like.
Your Three-Penny Radio is now complete!