|
This is my FIRST real tutorial
using my favorite filter, Sindeot's II made by Phillip Spoeth and you can download
the filter here for free.
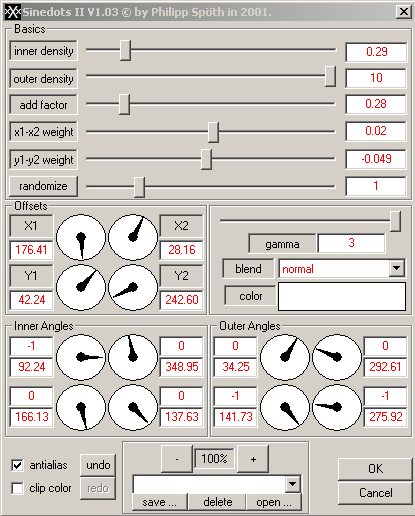
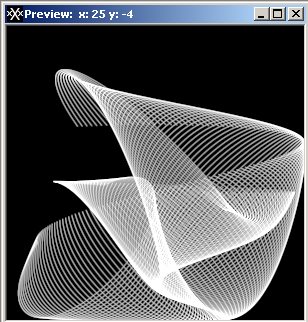
If you have any questions at all, please don't hesitate to email me at [email protected] (take out the periods first). Be sure to put the tut's name in the subject line so I will be sure to see it! OK now...here we go. This tut is written assuming that you have a full working knowledge of PSP (this tut was done with PSP7.4, but I'm sure it can be done with newer versions). I did put in a few screen shots hoping that they will help cover anything I left out. ANY thing that you find wrong, please let me know. OK...here we go. Open a transparent window 300x300 > Open Sinedots II > use the preset settings in the graphic below, except change the blend from normal to screen. I only used normal to give it a black background so you can see the sine design better. (click on the pix to see the larger version that is easier to read).
Change the size of the canvas to 500x500 by clicking on 'canvas size' to give yourself room to work. Add a layer below the sine image and add a dark color like black, so you can see what you are working with better.
Duplicate the sine image >
flip this image to the left using the mirror image tool. Duplicate the sine
image > use the flip image tool. (In newer versions of PSP these two tools
may be called the Image Mirror & Image Flip).
Using your mover tool, move
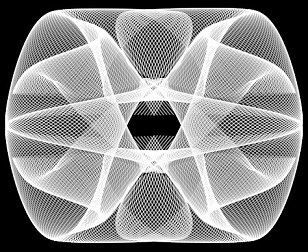
each layer until you get something that looks like this:
Hide the background layer,
highlight one of the 4 layers left and merge the visible layers. Now all you
have left is the background layer and the layer with your sine design on it.
Move your sine image into the
center of your window > rotate image tool > Direction Right > 270
degrees. Now you have your box.
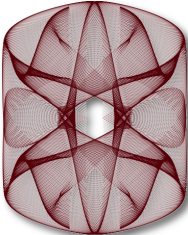
To get the color I wanted I
first hid the background color then clicked on the layer with the sine design
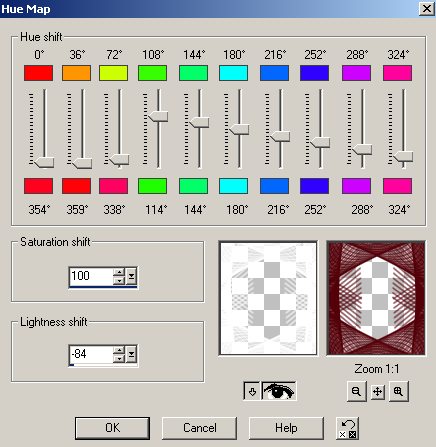
> Select All > Float Selection > I used the Adjust Hue
Map with these settings:
This works for some psp7 users but not others. In PSP X the only way you can color white is to float the image and flood fill it(or paint it with the brush), or lock the transparency and flood fill it. You may have to use a color to make your sinedots image to get the Adjust Hue Map to work. You can also use Blade Pro or Super Blade Pro settings to give you different colors and effects. Just play with your sine until you find something that you like.
Put a drop shadow (play around with the settings to get the effect you like) on the box and
deselect.
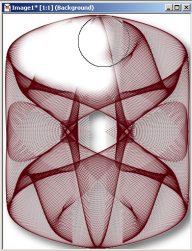
To make it end up looking like
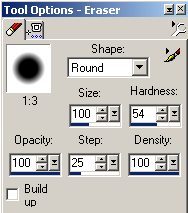
a box, I used the eraser tool using these settings:
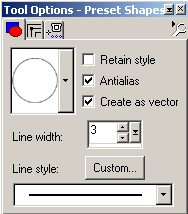
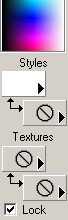
You can play around with what you do with the eraser tool to get different looks for your box. Using the preset tool with these settings; Color styles background set to no fill and stroke color to white.
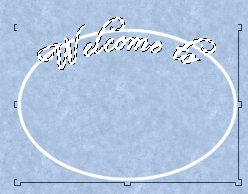
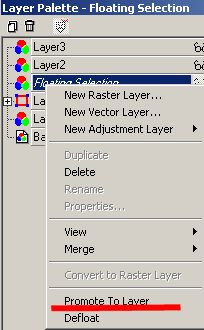
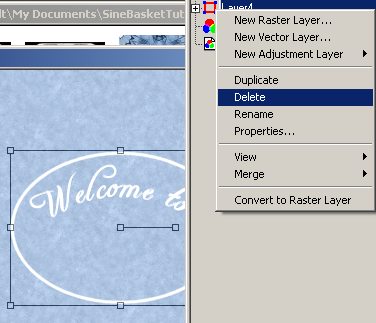
Draw circle/oval the size to fit your space, place your curser on the left side of your circle/oval until you see an 'A' then left click and type your text in. Go to your layer palette and promote your words to a layer by left clicking on 'promote to layer'. Now you need to get rid of your circle/oval. Click on your layer palette again and then click on delete.
This will give you the top words for your box. Now all you need is to put a tube into the design to give you the effect you want. I like to use a drop shadow to make the image stand out against the background. Thank you for choosing my tutorial!
* * * * * Thank you Sandra (please take time to visit her site - Essex Girl) for helping me get this tutorial straight and easier to figure out for those who use newer versions of PSP! You're the best. Here's the creation she made using my tutorial.
Below are a couple of graphics that my friend Inga made from this tut when she tested it for me. Thanks Inga! (Click on the images to see the enlarged versions.
If you would like to share this tutorial please copy and paste the url into your email rather than copying the entire tut, because this causes bandwidth problems.
|