 |
 |
 |
 |
 |
 |
 |
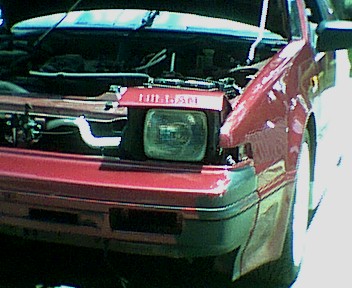
| These pictures are taken from the U.S. Pulsar NX SE model. Like mentioned on the previous page, jack up and support the car. Remove the grill and lights. |
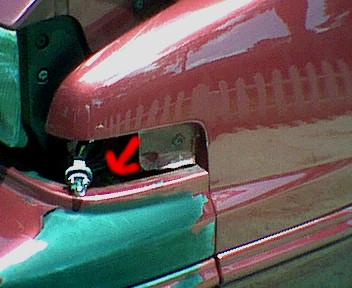
| All bolts being removed are 10mm. There is a bolt that is hidden behind the corner light. Remove both of them (one behind each light). |
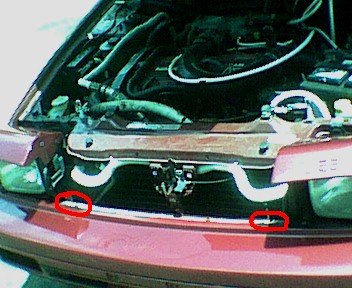
| Remove the bolts and the metal bar along the top of the bumper. Where the red circles are there are two bolts close together. Remove all of them. |
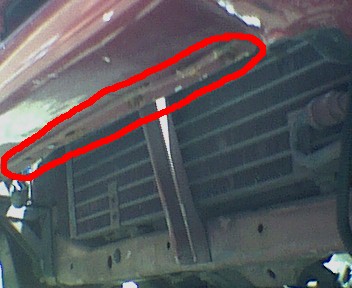
| Underneath the car there is another set of bolts and a metal bar. Remove them. You dont see this on my car because mine has already been removed when i cut out my bumper to have the body kit installed but there is a black plastic piece that is between the bumper and the frame below the radiator. You will have to seperate the plastic piece from the bumper. |
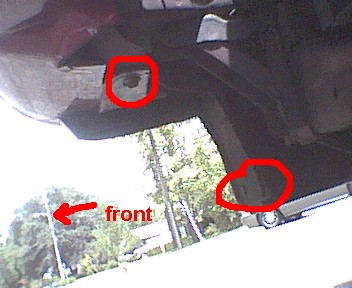
| There are two more bolts that need to be removed (one where the upper red circle is and one on the opposite side as well. The lower circle shows there are tow nuts that need removing to seperate the bumper from the fender (and fender extension on the SE model). The nuts are viewable from the back side of the metal bracket you see. |
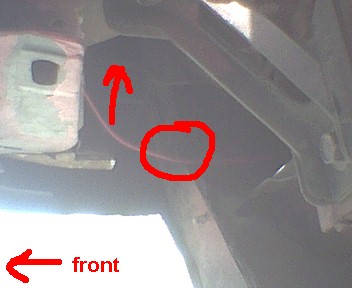
| Same view as the previous picture, just higher up. There are two more nuts to remove, one where the circle is and one higher up (not really viewable, you will need to feel around for it). |
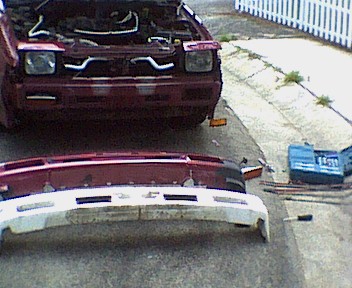
| After doing the same thing to the other side the bumper is ready for removal. |
| Front bumper removal |