

Here I have written down pretty much how to make a skim board. This goes through pretty much everything I know about making the best boards.
Buy Board, and anything else you think you could want from your hardware store.
Head down to the hardware shop and buy your board. Get a piece taller than your belly button from the ground. 8 mil thicknesses seem to be the go a good compromise between weight and strength can be achieved. Make sure that the piece you find is free off deformities as imperfection is the opposite of perfection. 12 mil has been used by me before and it created a board witch I thought was cool, but everyone else found it way too heavy. This board is known as the tank. That board was good because it was very stable and would really slide in the shallows and due to its weight you could really throw it into the shallows. I used this board for a year and have only just superseded it. It was unfortunately useless at doing airs and jumps. The eight mil boards that I have made have been very light and easy to carry although I have had to get used to throwing these boards a lot harder.
Design a shape
Get your piece of wood lay it on the ground. Find the centre longways at each end draw a line down the middle from end to end. Get a whole lot of A4 paper or bigger if you have any. A2 is ideal. Stick it down firmly onto to wood with tape running the edge of the paper along the line drawn down the middle of the board. Now you can draw out your board onto the piece of paper. Once Think about it. Any board should be at least as tall as your belly button. Aim to get plenty of surface area and as little drag as possible. Avoid dumb round designs that are oh so common.
Transfer it to the wood
Cut out your final design shape, stick it down and then trace around it onto the board. Make sure you stick it down well so you get it exact. Remember that it is very important that the board is symmetrical. Turn the paper over trace it to the other side of the boards.
Cut the board out
Clamp the board down to a workbench using guess what? Clamps. Cut around the outside if the line with a jig saw set the edge onto an angle. Around 45 degrees. Cut around the outside of the line if you can because if you try to cut around the line exactly you will probably cut over it, resulting in a non symmetrical board. If your board is not symmetrical it will be harder to throw and jump onto as it will always veer in the same direction.
Shape it
Get a plain plane and plane abound the edges taking off any excess wood. Then sand making sure it's all smooth. Sand the underside of the ends to make them turn up slightly.
Making the board kick.
Lay the board across a bench. Lay two bits of thin wood under each end. Then put two bits next to them towards the inside of the top of the board. Put clamps at each end of these pieces. The idea is to make the board kick up at each end, a little bit like a skateboard. It is best to leave it like this for a few days. I used to think that wetting the plywood during this phase would be a good idea, But its not so dont do that. Dont let it get rained on either. If it does the board will soak up all of the water and get heavier. Thats not a good thing.
Resin and fibreglass
Go to the Fibreglass - surfboard - boat shop and get your self some resin, catalyst, cloth weave fibre glass and an additive that makes the resin set harder and more sand able. I am not sure what this stuff is called, but any intelligent surfboard shaper could tell you.
Get your resin mix it with the catalyst and paint it over the top of the board. Make this a thin coat, but thick enough that it covers all the wood as it will really sink into it. Rotate and do it again once the top has finished drying.
Paint you boards base colour
If you want to paint your board, paint the base colour. Use acrylic paints. Water based paints will be obliterated by the resin use good quality paint. Getting the cheapest stuff possible will just make it harder to get a good finish as they will be too runny and not solid enough. I use automotive touch up paints.
Fibre glassing
Lay the fibreglass out over the top of the board. Get some help doing this because it must be flat and the glass will stick. Make sure its flat. The first step is to lay a layer of resin. Pour enough resin into an ice-cream container then ad a few drops of hardener. Paint on the resin and catalyst mixture. When you have paint under the resin the resin will eat through the paint in a few seconds so you have to make sure that you put enough resin down right away. Don't go dragging the glass over the paint with your brush. It doesn't matter too much at this stage, you can touch it up later. Just get used to doing it.
2 layers of glass on the bottom one layer on top.
Fine art on the board.
If you want to make your board look real funky you'll have to paint the top and the bottom too if you can be bothered. Its a bitch to do though. So you had better be patient. In my opinion after doing a skimboard / art project, i think it basically takes too long to do, and you want to make it look good due to the ridiculous amount of effort and time that goes into making boards.
Say You want to put a stripe running down the middle of your skimbord you would need to measure it, mask it then spray it. I personally like to make stencils so I can apply the paint quickly and easily. However when you are doing this you will need to make sure that you don't screw up because fixing up painting mistakes at this stage is difficult, and with the stencils it can be pretty easy to stuff up because you can smudge the paint, or spray over the edge of the stencil. Also trying to paint on crap days and at night also makes it harder.
Final Layer of resin
Paint a final layer of resin harder mixture only this time you will need a special additive for the resin. Mix in a tiny bit of this then paint it on quickly. Be careful not to drag the paint when it melts.
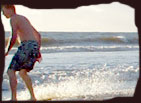
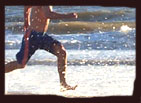
Give it sand - Go for a skim!!!

|
|
