Mission: Twin Turbo
This page will follow the set-up phases of installing the two turbos into the Commodore's engine bay. As this sort of combination isn't exactly of the garden variety, alot of thought had to be put into how we could efficiently and cheaply produce a system that would work. I explored the web looking for other blow-through carb combinations that may have been put together and surprisingly found a number. I recommend these for a look into how to make a good, cheap, solid combination :-
Twin Turbo Chev Malibu -
http://www.geocities.com/MotorCity/Garage/1378/GordysMalibu.htm
Mike's Home Page - Home of a budget twin turbo 351 Capri and other turbo and supercharged cars (bloody Fords though). http://www.geocities.com/MotorCity/Downs/8668/index.htm
Montzilla - Twin turbo 5.0
Fairmont in a nice tidy package.
http://www.geocities.com/MotorCity/Speedway/8408
Early stages - Part Gathering
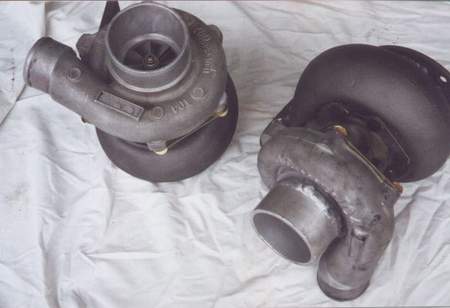
Here is a pic of the 2 turbos, cleaned, rebuilt and slightly modified by Mr Turbos so that they are pretty much exactly the same. Which they need to be as you can't have one bank boosting differently to the other, I don't think the engine likes that.

This is the pair of standard exhaust manifolds which I'll be using. I had the openings machined and steel plates made up so that I could attach the larger diameter 2½" pipe.
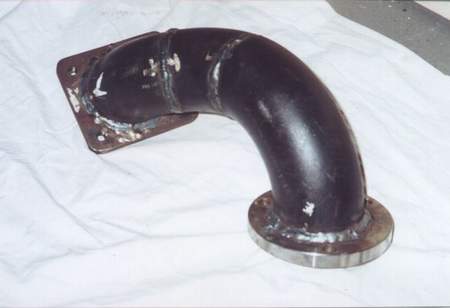
The adapter pipes that join the manifold to the turbo, and place the turbo in the best position in the engine bay, were made of 5mm steel bends in order to withstand the high temps of the exhaust gases. Thanks to Scott's old man for welding those up for me. Not real worried about their appearance as all the exhaust piping will be heat wrapped in a hope to minimize under bonnet temperatures, as well as improve gas flow.
16/11/2000
Uni finally finished for the year so it's time to get serious. Pulled the engine out of the car so that the sump can be modified for the oil return lines from the turbos. Also the brake booster needs to be moved slightly, the panels of the engine bay cleaned up where modifications occured to make the chev fit better, and the guards modified for the air cleaners.

One years service and still lookin' good
27/12/2000
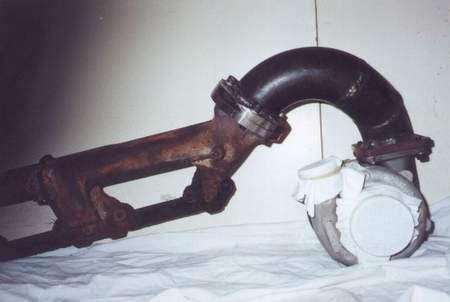
Progress has been slow due to most work being put into the passenger side manifold. First, the standard exhaust manifold could not be bolted on as it hit the valve cover. My mate JR cut out some 1 inch spacers to remedy this problem, and although they're not pretty, they do the job. Next on the bastard list was the fact that this same manifold exists pretty much straight up (as you can see in the photos), which meant that in order to allow the bonnet to shut I had to make a fairly sharp turn with the 5mm pipe as well as the right alignment to miss a main support of the bonnet.
It's ugly but as long as it works I don't give a shit
The pipe above was cut, welded and grinded more times than I care to remember in order to locate it in the right place. This particular turbo has to contend with the alternator, thermo fan, upper radiator hose and the fan belt so spot on location was important. I'll be interested to see how the above parts handle the heat. This is only the dummy fit as I need to pull it apart again when I will heat wrap the manifolds and pipes.

Spark plug access is a hell of a lot easier now, not to mention that bloody starter motor. There probably is room down there now for a proper oil filter setup as well as relocation of a starter motor to the normal side (chev in commodore requires the use of a remote oil filter and RHS starter location), but I'll leave it as it is for the moment.
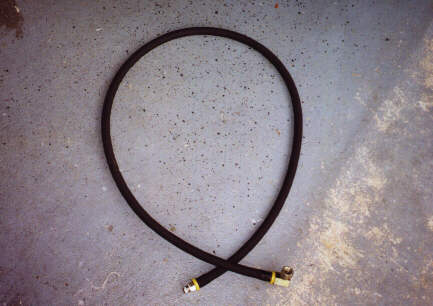
I used push-loc hose for the oil pressure lines into the turbos. Using a pair of T-pieces and an adaptor elbow into the oil pressure feed out of the back of the block, I was able to run both lines to the turbos away from the exhaust heat and out of sight to try and maintain a clean look.
23/02/01
It Runs!
Spent the last 2 months running around getting everything together. Waited three months for a pair of wastegates which didn't eventuate so Mick at Sub Zero whipped up a couple of 45mm gates in a couple of days for me.
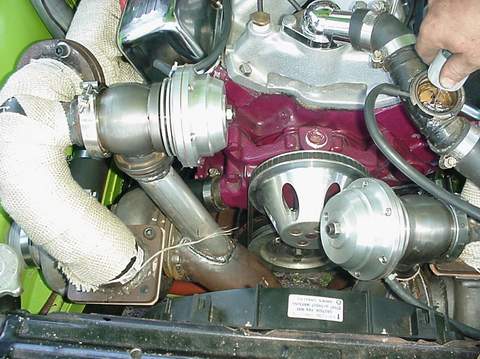
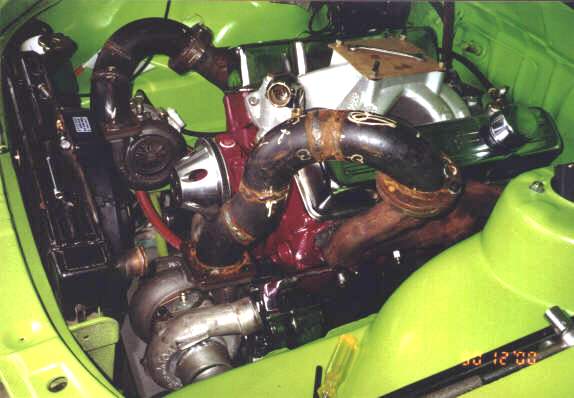
Above you can see the placement of the wastegates betweent he engine and the radiator. There is plenty of room and allows for the dump pipes for the gates to go virtually straight down into the exhaust. You can also see the header wrap which is great stuff. After almost half an hour of sitting there running the engine temp didn't even hit 180.

Here is a shot of the turbo dump pipes that I made up. I have a few better angles of how it goes, but basically a 90 degree bend out of the back of each turbo goes down and then under the crossmember, alongside the sump (as you can see), followed by a slight upward curve joining onto the original twin 3" into single 4" pipes.


![]()
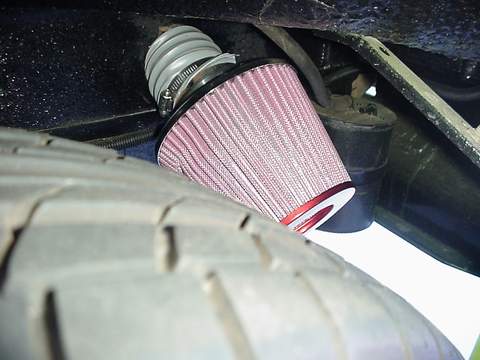
I ran a short length of flexible 3" pipe through a hole in the inner guard and clamped it to a 8" air pod. There is still a bit of movement with the piping and my mates JR and Ben pointed out the possibility of road grime etc. being flicked into the pod. A bit of thought may still have to be put into these...
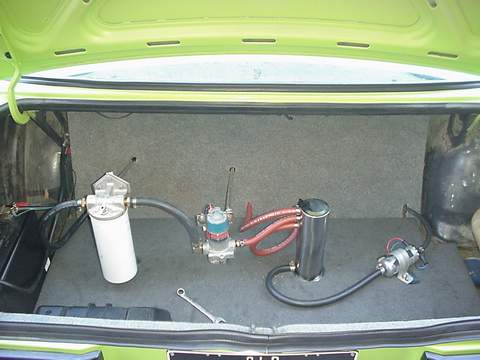
Here is what lies in the boot these days. Fuel is sucked through a Donaldson filter by the Holley Blue low pressure pump, which pumps into the Stainless Swirl Pot. A high pressure Bosch pump then pushes the fuel up to the Mallory 4309 regulator, which is currently set at about 8 psi, returning the excess pressure back to the swirl pot. The top hose on the swirl pot is the overflow line back to the main tank.

The intake tubing on the left is just some 2" exhaust pipe press bent into the approximate shape that I needed. Thanks to Owen down at Southport Exhaust for all his help with these and the exhaust pipes. You can also see the Bosch blow-off valve positioned just before the plenum that I had made up of 3mm alloy. The only problem with this setup I can see at the moment is that those intake pipes run about half an inch away from those exhaust manifolds and did get a bit warm after the initial startup and tune on Saturday. I think water-methanol injection may be required to try and cool the charge a bit.
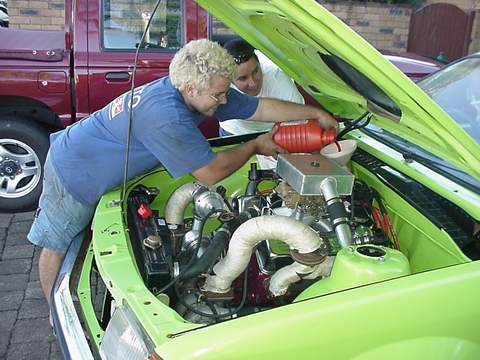
Thats Scotty (right) and myself getting the fluid levels right before we gave it a kick in the guts. Although ugly, those exhaust manifolds seem to be flowing pretty well and aren't getting that hot. Bonnet clearance isn't a problem either.
I am convinced the digital camera shots are a hell of a lot better than the scanned photos that I've had to use recently. A big thanks to Ben for providing his shithouse photography skills (you're a champion).
I'll have more images and hopefully some video action of the car in the next few weeks. I'm back to uni now so progress will again slow, but I'm confident of having it tuned and on the road in the next couple of weeks. Then it's off to Willowbank to try and get a number out of it.