Twin Turbo Update No. 1
August 2001
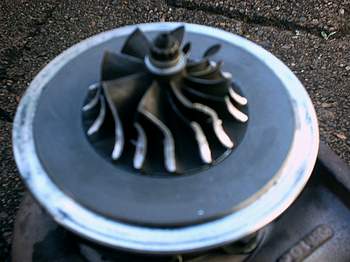
Pulled the engine out to inspect the damage caused by the faulty turbo. Turns out the nut which secures the impellor on the shaft came loose and subsequently so did the impellor, hitting on the housing and sending a heap of aluminium metal filings into the engine.
Lifted the heads and was quite relieved, and as I've been told numerous time, very f*%#ing lucky. I was only able to find a small amount of very fine alloy dust on the bores, tops of the pistons and chambers of the heads. there was no metal below the rings, in the oil or in the filter.
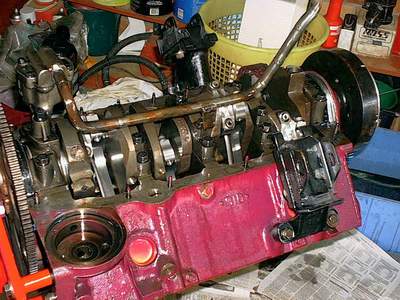
I've been thinking about a cam
change recently and decided that while she's out I might as well
do it. Gave Phil at Surecam a call for a custom turbo grind as he
had success with the cam he designed for the Judge twin turbo
holden motors. He was also able to identify a few other areas
where I could easily improve on, mainly head exhaust flow. As you
can see from the cam cards below, it is quite different to the
original blower cam I was using, and hopefully will contribute to
a power increase.
When I pulled the exhaust manifolds off the engine, I was able to see the degree to which they were restricting the primary flow out of the head. There was about 5mm of overlap which was protruding into the path of the gas flow, so out came the die grinder and it was time for a serious port job.
I also sourced another convertor to match the new camshaft. Also, with the amount of torque the motor was making, we were sure that the old 4500 convertor must have been flashing really bad (one proposed problem for my dyno tune problems), and that a nice tight 3000 unit would be much better. Well, I'll give it a go.
September 2001
Other work to occur was to the heads. As I mentioned above, Phil's instructions were for more exhaust flow in the heads, so off they went to my mate Matt, who weaved his magic and increased the lower and mid-range flow capacity. Up high wasn't a problem as the intake already flowed 593hp, and it was also suggested that the current setup was also contributing to the heating dramas due to the exhasut gases not being able to escape real easy, i.e way too much back pressure.
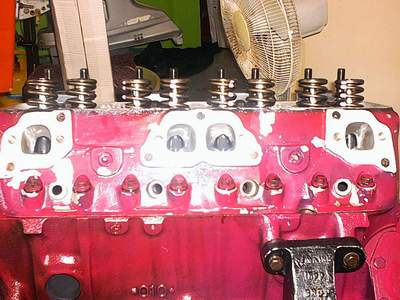
Not the best pic, but a rough idea at the flow through the improved exhaust ports.
New set of valve-springs for the new cam.
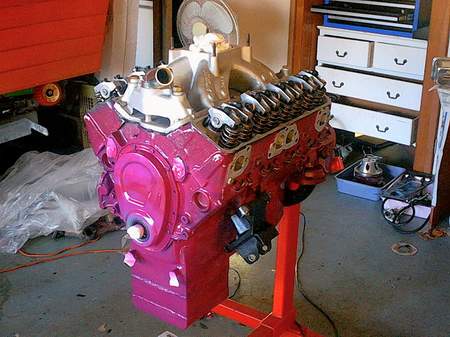
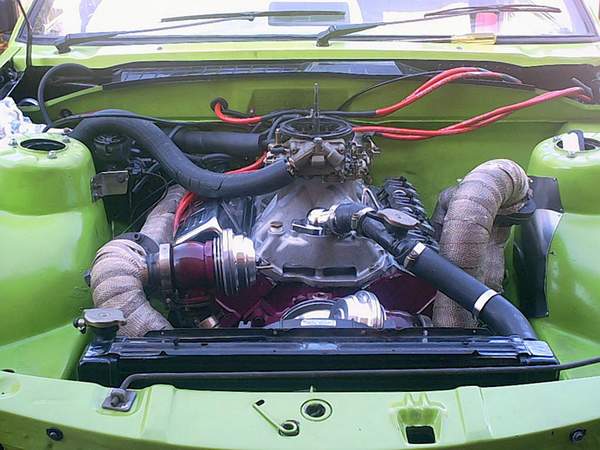
Another job I had to do was re-fit the vents and respray the bonnet. On the only pass that I made, the left vent flew out at about quarter track and went about a mile in the air. I also riveted some stainless steel sheets, which my mate Garbs provided, to the inner strut towers in order to combat the blistering which was destroying my paint. To clean things up a bit I also hit the exhaust pipes with some GM Black, and gave the engine another coat of Magenta.
Here you can see the stainless work on the inner guard, just enough to shield against the paint-killing heat.
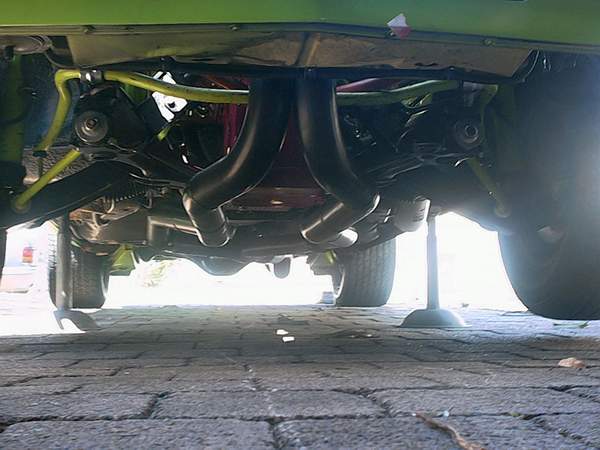
A nice shot of the underside of the car, good shot of the path of the exhaust pipes.
