|

Thanks For Joining Me. The First Thing We Need To Do Is Figure Out What We Will Need For This Tutorial. You Will Need At Least A Working Knowledge of Paint Shop Pro. I Have Outlined The Other Tools That Will Be Needed Below, along with Links To Where You Can Get These Tools.
You Will Need Blade Pro or Super Blade Pro Which You Can Download Here
You Will Need Eye Candy-If You Don't Have It You Can Get The Free Version 3.1 Here
Hoods Sparkle White Tube and Blade Pro Crimson Glow Preset-Download Here.
Ok, Now That We Have Everything We Need....Let's Get Started!
Here Is What We Will Be Making

The First Thing We Need To Do Is Make Our Button.
Twinkling Stars Tag Tutorial
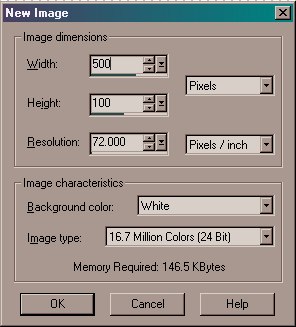
Open New Image 500X100, White, 16.7 Million Colors as Shown Below
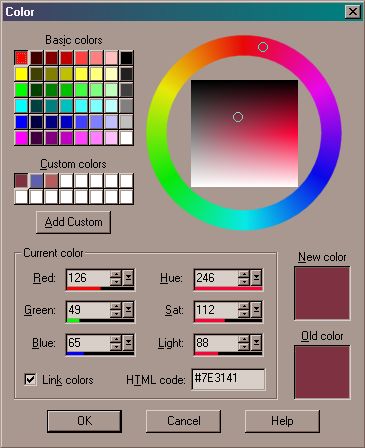
Click on your Paint Can Tool and Flood Fill with Color #7E3141 as Shown Below
Add A New Layer and Flood Fill with White To Make it Lighter.
Go To Your Layers Palette and Change The Layer Blend Mode on your New Layer to Lighten and the Opacity to 42 as Shown Below.

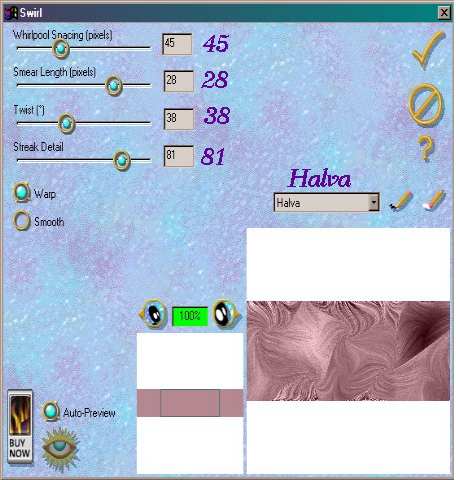
Merge Layers and Go To Effects Plugin Filters Eye Candy 3.1. Set the Drop Down Menu to Halva, Whirlpool Spacing to 45, Smear Length 28, Twist 38, Streak Detail 81. Make Sure Warp Is Selected (It will be Bright Green when Selected) As Shown Below.
Go To Selection/Select All. Now we are going to Contract That Selection. Go To Selections/Modify/Contract. Set the Number of Pixels to 15. Click OK. Now Go To Selection Invert. Your Image Should Look Like The One Below.

Flood Fill Your Selection with Color #7E3141. Your Image Should Now Look Like the One Below. Leave Selected.

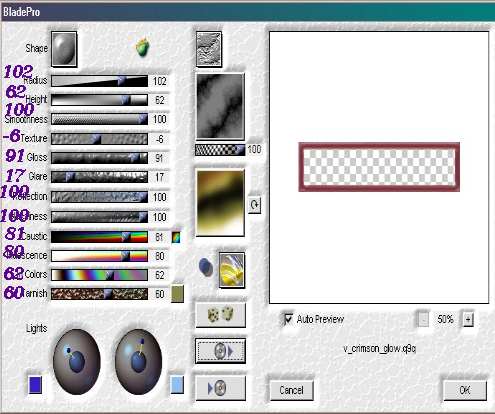
Now That We've Got All Of that Finished, While it is Still Selected, Go To Effects/Plugin Filters/Flaming Pear/Blade Pro and Click on The Button with The CD and Right Arrow on It to Open v_crimson_glow.q9q and Use Settings As Setting Below.
Go To Selections/Select None. If You Haven't Saved Your Work Yet, Now Would Be A Good Time To Do That. Go To File/Save As and Save This as TwinklingStars1.psp
Now, We Have Made Our Button for Our Welcome Tag....to Continue to Part 2 of Our Tutorial Click The Next Link Below.
Next
|
|