Creating Morph Targets for Poser figures using Carrara
This example uses Poser Pro 4. (though I believe it should translate
into previous versions of Poser without problem)
Morphs using Carrara are pretty simple once you understand the steps. I
find that making morphs are certainly easier outside of Poser rather than using
Posers "magnets". (all personal preferences.)
This page was created after finding my original web source with this
information disappeared. (I don't like giving these instructions on
messages boards or e-mail unless I really have to)
Best of luck. Hope this helps.
| Step 1.
Open Poser. |
| Step 2. Open
the figure which you wish to create a morph with. |
| Step 3. Go to
FILE EXPORT and select WAVEFRONT OBJECT (obj) |
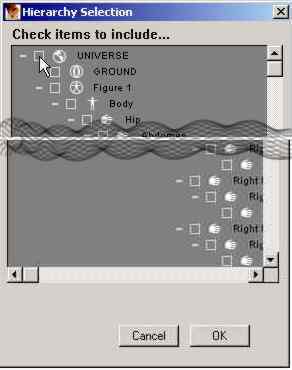
| Step 4. Select Export
single frame from the dialogue box.
In the next dialogue box "Hierarchy".. DESELECT
universe.
This will remove all of the checkmarks on all the individual components
which make up the Poser Scene you are in. |
 |
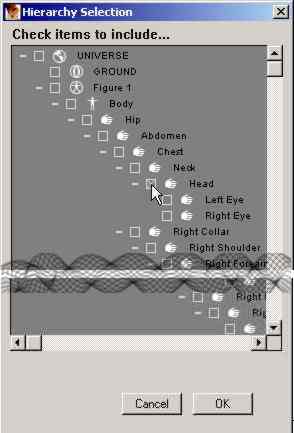
| Step 5. Now Select the
HEAD from the Hierarchy Menu. Click OK. (obviously this
applies to only this example and not what you may be working on)
Note: You can only select ONE item while doing a morph target. eg.
You cannot select Head and Neck and do a morph.
|
 |
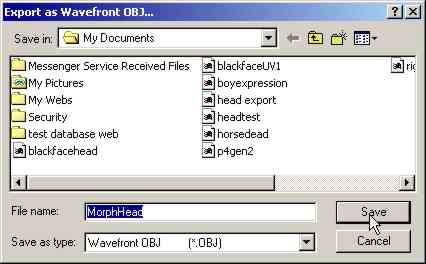
| Step 6. In the EXPORT
as WAVEFRONT OBJECT dialogue box create a name for the actual Object with
which you are working.
In this case I am calling this MorphHead. Be unique in naming
what you are working on to save yourself time in finding files later.
Note where it is that you are saving files to ! Good idea
is to make a new folder and start saving everything you are working on
with morphs directly into it only.
Click SAVE. |
 |
NEXT