If you want to ask me any questions, you can reach me at [email protected].
For those of you that have been following my journal, first off, I would like to thank you for taking the time to share in my aggravation as well as success with this project. Secondly, as I add to this journal, I often go back over the previous pages to make changes, corrections and additions. If you wish to use my journal as a sort of guide then may I suggest you review all the pages each time an update is made. That way, you can benefit even more from, and maybe even be entertained by my trials and tribulations in assembling this kit. Since I make so many changes and corrections, most of them very minor and almost insignificant, I can't list them for you. I will give you one example, on page 11 I added some stuff about the wheels. In any case, keep in mind that this isn't just a "write and don't look back" kind of journal. Also, in the days that follow the addition of another roll of film, I usually make changes, etc., to those recently added pages too.
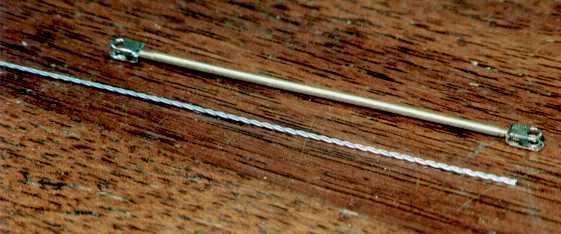
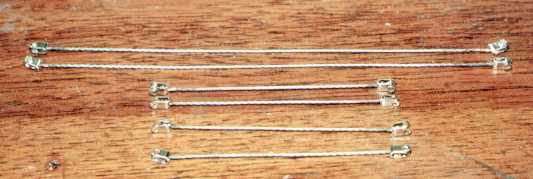
Ok, with that said, I have an announcement to make. You may want to have a bottle of Champaign or a .45 revolver ready depending on if your happy for me or jealous ;-). I finally succeeded in making the infamous diabolical brake system function! That's right, after countless hours and weeks of work, the brakes on the Rolls do what they're intended to do. I mentioned earlier that the key was getting the rotational motions to translate the maximum amount of travel laterally and to minimize the amount of slack where possible (this is one of those additions I talked about earlier). I also mentioned that I would be replacing some of the rods with cables for authenticity and in the hopes that it would perform better. Well, it did, and, as someone on the Scaleautoworks message board stated, it was far more work than what the sane person would do. I actually started with his suggestion of narrowing the rear axle housing just a tad to bring the linkage mechanisms inward a bit as well as shortening the linkages on the transmission. That got better performance but not the level of performance I wanted. So, what is a less than sane person to do? Why, the insane, of course. I started with the cable you see here with a rod for comparison.
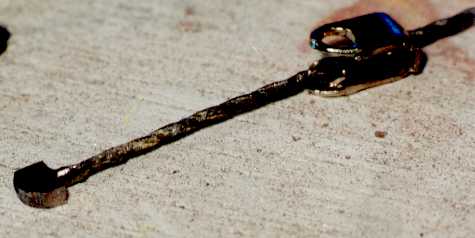
Using copper solder (I believe it's an alloy consisting of copper, zinc and silver??) and a torch, I soldered a blob of solder on one end and machined it down to an anchor that would fit inside the clevis supplied with the kit. I chose to do it this way incase it didn't work, I could cut the cable in half, slip off the clevises and go back to the rods supplied by the kit. Also, the copper solder is much stronger and has memory compared to lead, not to mention that it's far less toxic.
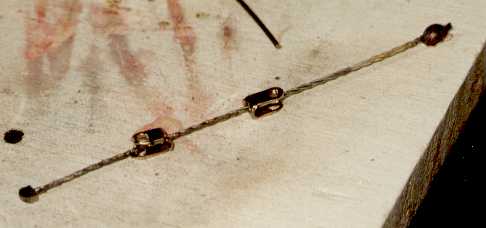
I cut the cables to be nearly the same length as the original rods with the clevises on them. I figured I could always machine any extra length down if I had to. If you wish to join me in my world of insanity and make your own set of cables, then the next step is very important. Remember to slip both clevises on the cable before soldering on the other anchor. Believe me, I found this out the hard way, I was so involved with making one of the cables that I had forgot to install the clevises. If you plan on doing this, practice on a few pieces to get used to how the solder behaves, etc., before doing the real thing. Here are both clevises on a cable with one anchor machined and the other end freshly soldered.
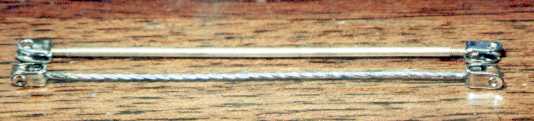
When machining the other anchor, I had to make sure that the orientation of the anchors matched each other. It would suck if you had gone and spent about an hour working on the other anchor just to discover that the clevises wouldn't line up. Anyway, here goes the original rod with clevises and it's new replacement. Not too shabby if I do say so myself.
After a couple of weeks, I had manufactured a full set of cables ready for installation.
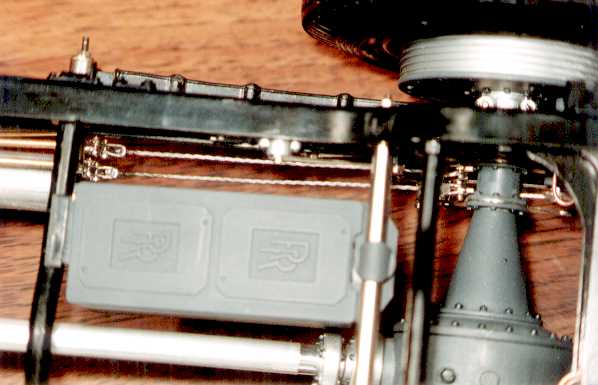
To hold the clevises in place and to prevent the nuts and screws in the braking system from loosening up, I used a non-toxic all-purpose arts and craft glue that has great elastic properties and adheres really well but won't mar a surface. It's called Aleene's Original Tacky Glue. It's also easy to remove should the need arise. Here go the rear cables installed.
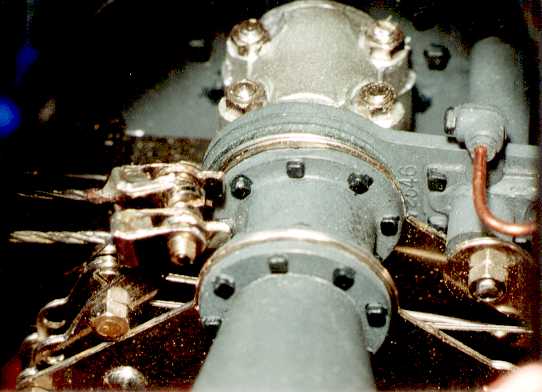
Another thing that helps the brakes to perform better is to tighten the screws on the clevises as much as possible without shearing them and without causing the clevis to bind (clamp) onto the part it's attached to. This prevents the clevis from shifting around and possibly catching the shoulder of its neighbor. This next photo may help to illustrate this point.
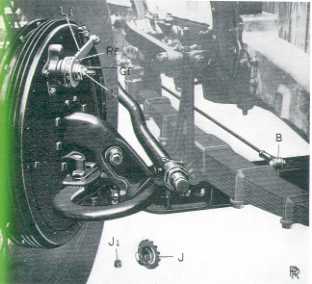
Here goes a photo of the cable attached to the front axle compared to the actual car.
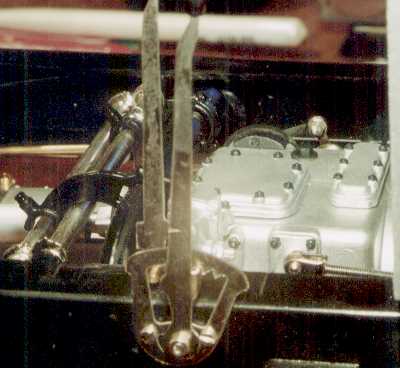
One thing that wasn't clear in the instructions was the hand brake handle itself. I suspect that the extra piece of metal near the base of the handle was bent in to engage the serration on the guide next to it as shown below. By the way, this is similar to the angle of the photo from the owner's handbook shown on page 13.
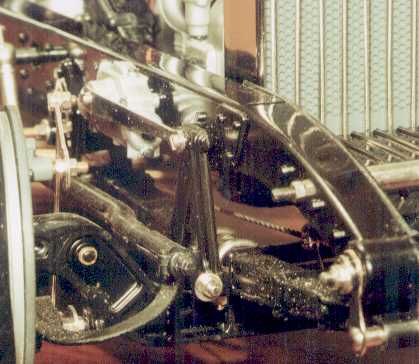
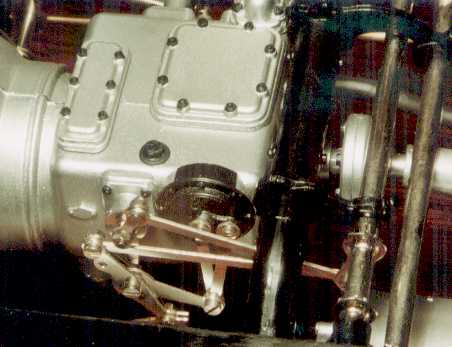
Here you can get a better look at the linkage on the transmission.
Once all the linkage was together and working nicely all I had to do was adjust the shoes so they would engage the drums when the brakes were applied. This is where I realized that I should've saved doing the shoes till last, oh well, live and learn. Adjusting the shoes involves bending the little actuating rods that fit into the cam on the backing plate. A few more hours of careful tweaking and the brakes actually prevent movement of the car when applied (Imagine my excitement). Again, if you want to share in my lack of sanity then you too can get your brakes to work. The only difficult part about adjusting them was getting them equalized so they would engage evenly (both shoes per wheel) and at the same time (each wheel). There were times when I would think that this one tweak was the final adjustment only to discover that I was only fooling myself and three more tweaks would be needed (AARRGG!!). Obviously, the hand brakes were much easier to adjust than the foot brakes. As the Boyd supplement says, with patience, you can get the brakes to work and it adds a nice "show-off" feature to the completed kit. Once that was done, I breathed a deep sigh of relief and a feeling of accomplishment came over me, "I came, I saw, and I conquered the brakes." I celebrated by taking a day away from the kit, tidying up a bit and shot off some fireworks.