Above, a little better.
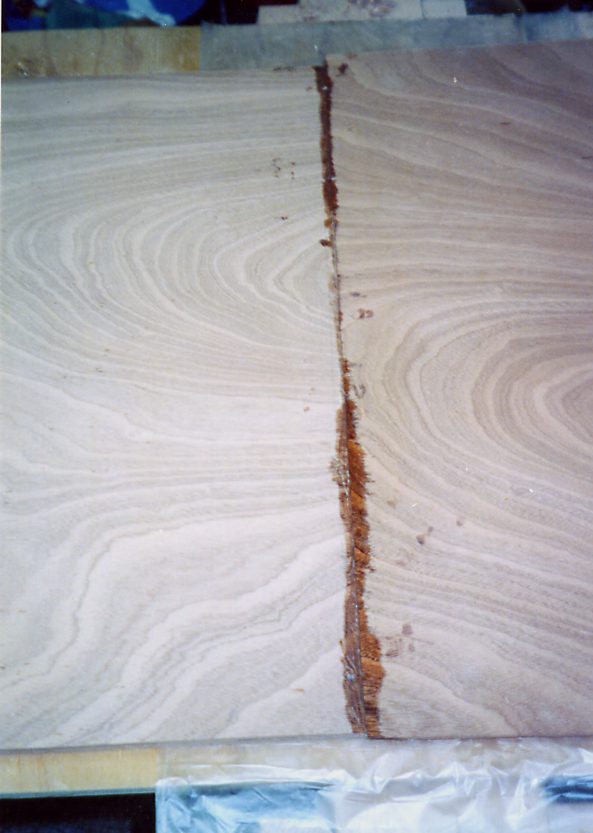
I cut two sheets of plywood in half lengthwise (8 X 2) and cut two 5 X 2 pieces from the remaining sheet, so I would end up with three 2 X 13 panels to cut planks from. Then I stacked the sheets stair-step style on lines signifying the correct scarfing ratio. Just like the books. I started planing off the edges to get a nice, flat scarf, and I planed and I sharpened and I sharpened and I planed and things were going well. Then I saw a little tearout starting on the feather edges. I kept going and saw a little more tearout. Some of the scarfs still looked a little high and bumpy, but I was terrified of wrecking the veneers on such ultra-thin plywood. So as any devotee of Norm Abram would, I thought, �Better a little high than a little low. I�ll just smooth them out with a sander.� Mistake #1.
Mistake #2 was using some tarp plastic I had laying around the shop between the laminations, to keep them from sticking to themselves and the bench. It bunched up like Saran Wrap, and with sticky, rubber-gloved hands and plywood all over the place I couldn�t unbunch it.
Mistake #3 was clamping all the scarfs down in one stack. 4 mil is really thin, bendy wood. I got good contact between the two pieces at the top, but the bottom one was pretty wavy and wobbly since all the imperfections from above seem to imprint themselves below. I think a stack will work at 6 mil and better, but not with this cardboard-like stuff.
I ended up with ugly, rough scarfs with globs of epoxy all over. I thought, �Boy, I�d better get out the big random-orbit sander to clean up this mess.� Mistake #4. As Ian Oughted says in the book, the sander will eat through the veneers and leave the epoxy as is. He is exactly right. I burned through the top veneer before the sander was even up to speed and I still had a mess.
I have a BA and two masters degrees and am not dumb about most stuff. But it took me three days of agony to figure out what to do with the scarfs, since I was determined to finish this boat bright. I tried scraping � no good. I tried a sanding block � no good. I tried my Dremel grinder � no good. Finally I woke up in bed with the solution � I was making 13-foot planks for a 12-foot boat. I could simply cut out the bad scarfs and start over! I felt so stupid.
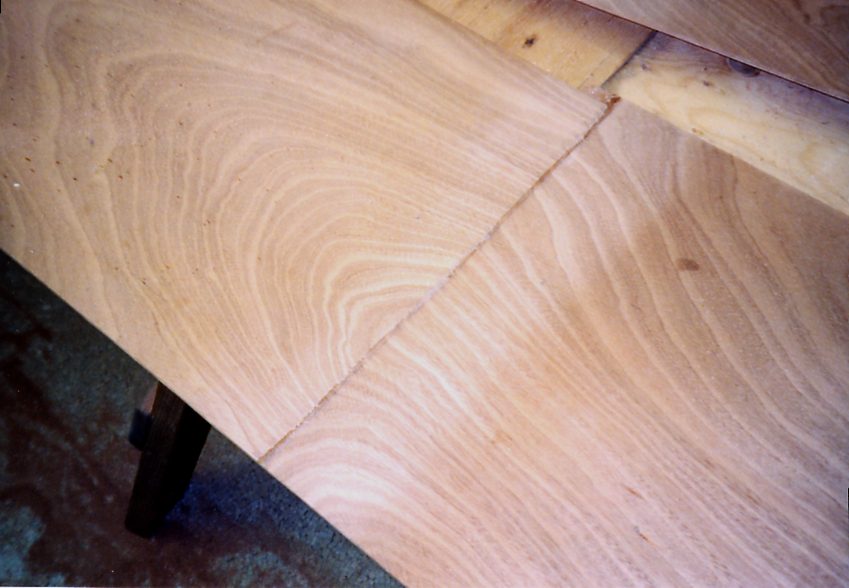
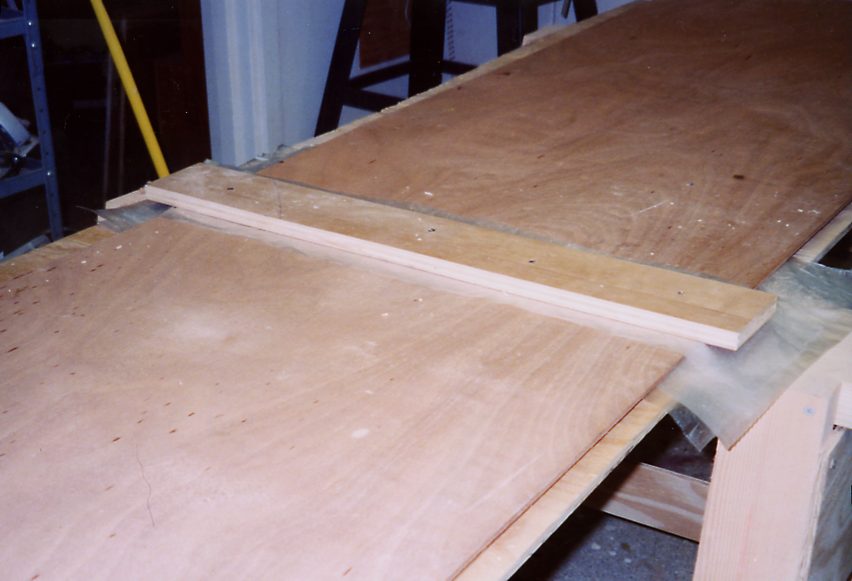
I did things the right way on the second scarfing run. I planed the angles into the panels two at a time. I made sure I was working the plane at the correct angle to the wood to stay away from the edges until the last part of the process. I glued up the planks two at a time to get plenty of nice, even pressure on the joint. And I used good old Cut Rite waxed paper between the joints.
You can use the standard scarfing techniques with thicker plywood or a painted boat. But this thin stuff is fussy and needs care. On the finished boat, you can�t even see the scarfs unless you really look.
Biggest Lesson: DO NOT LET A POWER SANDER NEAR ONE OF THESE BOATS. IT WILL TEAR THROUGH THE VENEERS IN A MILLISECOND.
that worked