Mabel's Webpage #3
A few even newer pictures... 07/24/01
will post more when available...
PAGE 1
PAGE 2
PAGE 4
PAGE 5
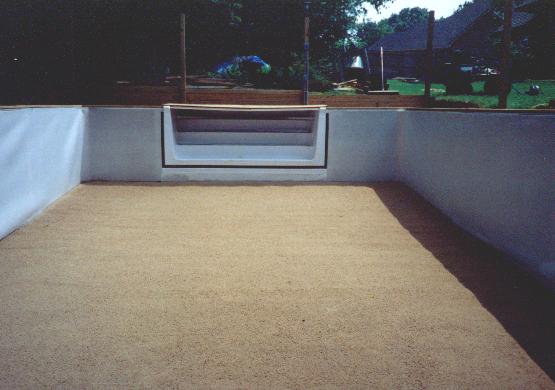
Protective wall foam installed.
Sand bottom level and smooth.
Plywood with a strip of bead receiver nailed to bottom
side - to hold liner in place over steps.
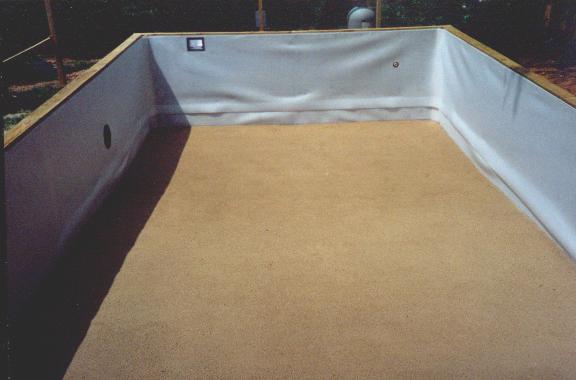
looking toward deep end...
The wall foam laid down real nice (flat and smooth)
after the water was added.
The foam is 48" tall, so I had to overlap it on the taller wall panels.
The overlap is noticable when filled with water, but appears
to be just another seam in the liner - no big deal
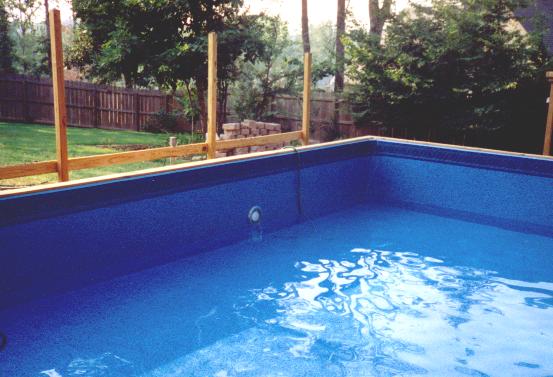
Here the water had reached the point to install the 400 watt light.
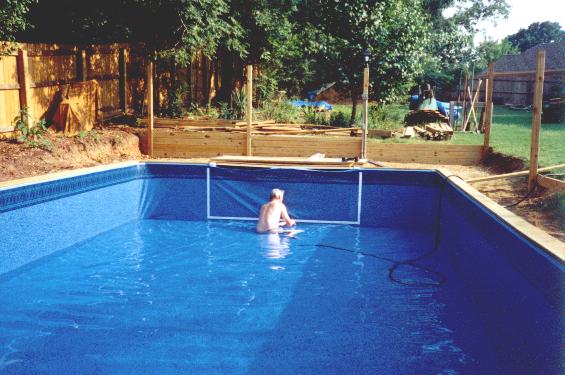
Working out the wrinkles, installing the light, and installing the step trim plates
did require getting into the pool... so yes, I do have lots of shallow footprints in the sand.
Fortunately, none are visibly noticeable due to the liner pattern,
and I had expected this.
I will add that the footprints are less severe than in the AG pool I
had a few years back (or in other AG pools I have seen). I attribute this
to wetting (soaking) the sand bottom just prior to liner installation.
I believe wetting the sand firmed it up somewhat.
(wet sand on a beach is firmer than the dry sand, right?)
Installing step gasket seals.
Cutting an 8' hole in a $1000 liner was not nearly as unnerving as I had expected...
'cause I got to practice on the 11" hole for the light first.
My parents and in-laws helped hang the liner while Mabel was tied up, and wife was at work.
THANKS PARENTS AND IN-LAWS ! ! !
It only took about 15 minutes for the 5 of us to stretch it out and hang it. Then the 3 guys
spent almost an hour getting it hanging as straight as possible, working out as many wrinkles
as possible. Then I (with Dad's direction) began working out wrinkles in the bottom as water was added.
The "dewrinkling" process continued until the entire pool floor was covered with water. Not hard work, but
tedious work. (at least I was in some water) Final result..... one wrinkle about 12" long that I never could get rid of. I worked it up into a corner
at the shallow end where the wall meets the floor. He's a narrow little guy too, but I never could make him go away.
(only we know it's there.... oh well)
While the pool filled with water, I began finishing up the plumbing... Skimmer to pump to
filter to return (with chlorinator hoses each side of filter). As luck would have it, I finished the plumbing about
the time the water reached the skimmer. My plumbing system is a VERY simple loop, like in a AG
pool... just using heavier equipment and sch40 pvc, instead of flexible hoses.
As of 7-24-01....
Liner installed.
Full of water.
About 80% of the backfilling is finished.
Now balancing chemicals (and swimming).
Need to get deck and fence built.
Need to work on landscaping.
AT LEAST NOW WE CAN USE IT ! ! !
THANKS FOR VIEWING OUR PAGE !!!
PAGE 1
PAGE 2
PAGE 4
PAGE 5
