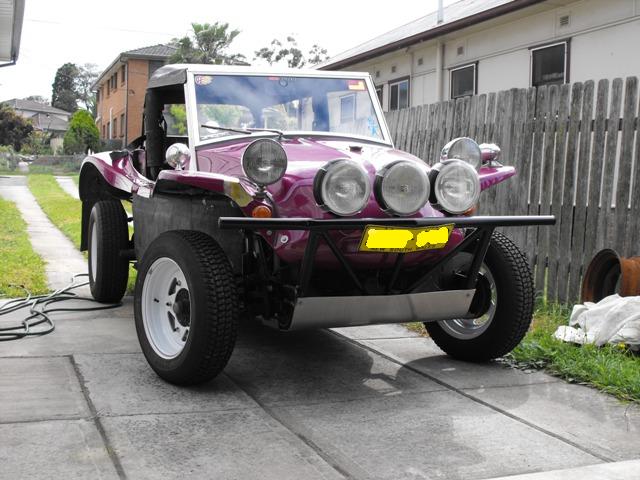
Finally back on the road!
October 15th, 2008.
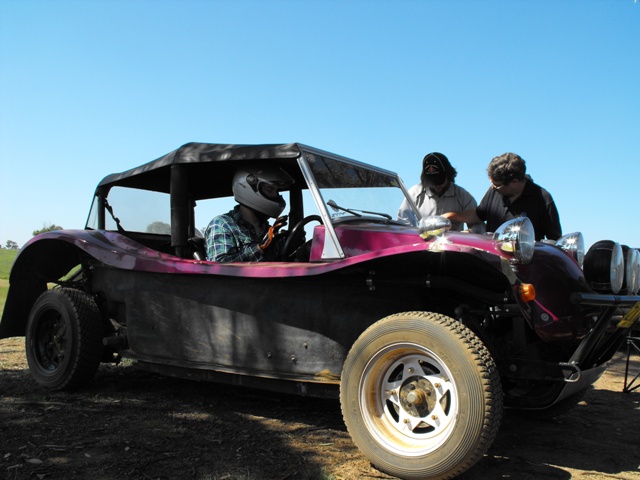
Well, today was D-day for rego, but after a week of holidays and solid effort, Zak was registered on Monday with no dramas. But then again so he should have been. There were all sorts of dramas with the sump, big thanx to Mark R for tig welding it up again. The gasket is still leaking a little, but who cares really. The other big drama involved bleeding the brakes. It took me four goes to get a decent pedal and even now I think they could benefit from another bleed in a few weeks. The big drama was really the cutting brake. Because the main rear line to the cutting brake is almost as high as the top of the reservior, getting the fluid into the cutting brake and out the other side was a drama. The other things is, there isn't really any way to bleed to the air out of the cutting brake short of cracking the fittings. Although I have to say this worked very well. Big thanx to the guys on the offroad section of shoptalkforums. They know this problem very well and the brakes now work better than ever before I reckon. They also convinced me to adjust the brakes differently and the difference is amazing. I think the back brakes are actually working properly for the first time. The trick is to adjust the shoes up so the drums can't turn whilest you bleed the system. Then back the adjustment off so the shoes are just touching the drums. The amazing thing is, not only is the pedal much better, but the handbrake was instantly adjusted right back up as well.
Finally back on the road!
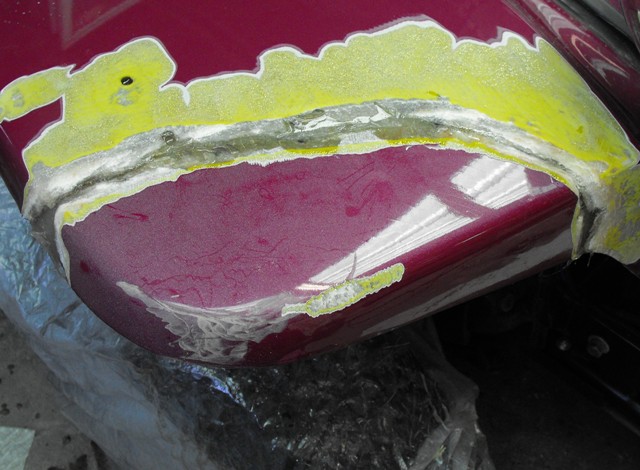
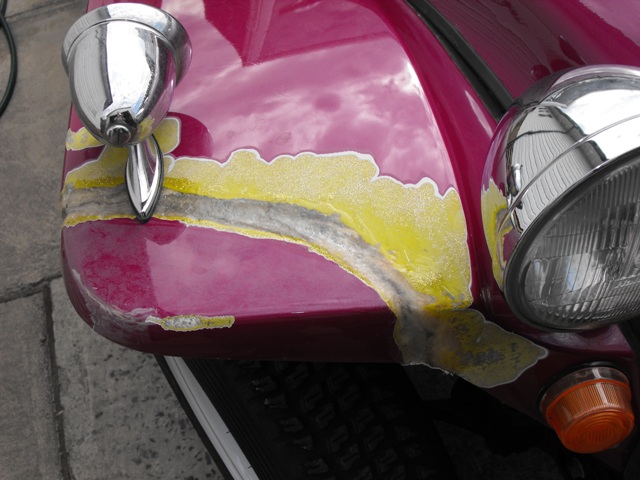
As you can see from the pics, the front fender has been fixed. really, I'm such a procrastinator. I should have done this 12 months ago, it was so easy. Sure there was some itchiness involved and some fumes, but it was not hard at all. The trick is preparation, like most things. Grind back the gell coat and broken bits and cut enough mate to do the job. I used some flexible plastic (from a new collared shirt) and some packing tape to hold the broken piece back on and then ran a few strips along the top of the gap to hold the resin place.
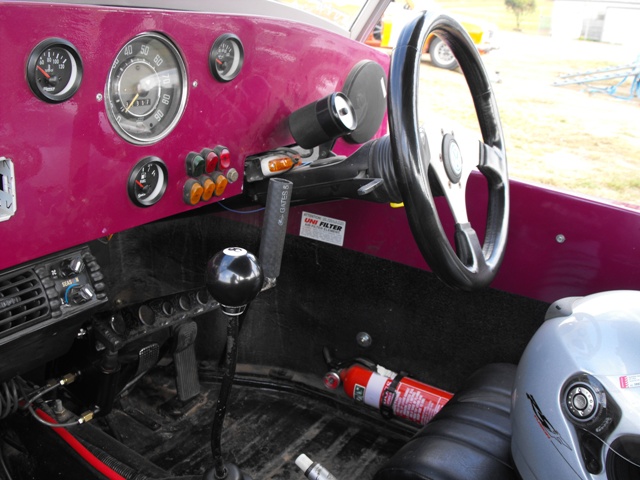
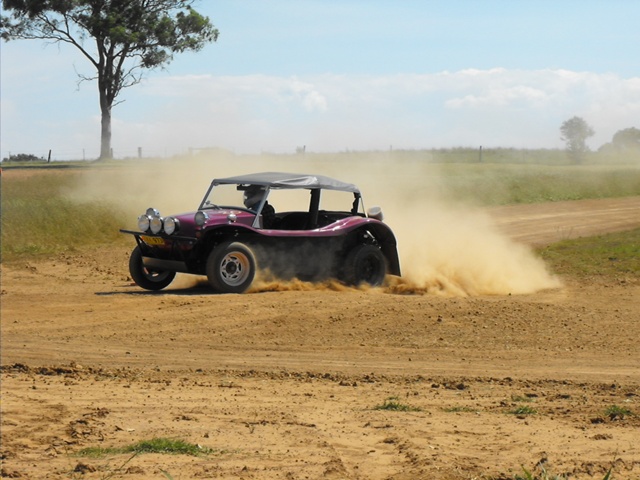
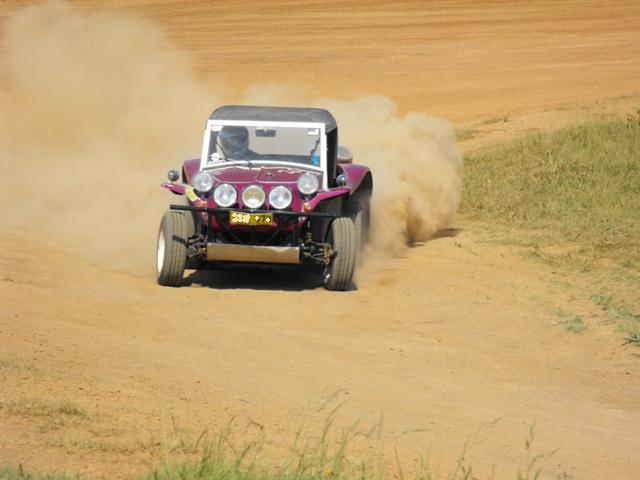
Before I go any further, let me tell you about driving Zak now. One Word, SENSATIONAL. Eight months of careful upgrades and sensible mods have paid off. The chassis is SO MUCH better than before. The whole rear of the car is tighter the rear suspension works (rather than the chassis flexing). The whole car seems a tighter package. The shift mechanism is smoother and the difference in gates means finding 2nd is a breeze. I'm loving it. There was some initial clutch slip on the first outing, but this seems to have stopped, which is a big relief. The other nice surprise is that the bias valve also works. I tested it tonight on a bit of dirt and the back brakes are getting the bias they should have now. I'm stoked. And driving him at speed? Well lets just say, without overdoing it tonight I was reminded of how quick he is. All those cubes are gentle but quick at low trottle. At high trottle it's electrifying!
There is one down side to all the new found stiffness in the chassis and powertrain mounts and that is in the way of noise. The car is now roughly twice as loud in the cabin. I either need a much louder stereo or a set of intercom headsets. I think the latter makes more sense than the former. The funny thing is, at idle the car is quiet and I suspect it's overall noise factor from the outside is quite low. It's just that the bathtub structure of the car and lots of flat surfaces amplify the noise and vibration lots. In a way it's kind of frustrating, in another way, the car feels and drives like a serious competition car now.
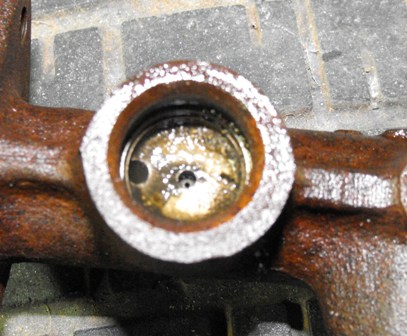
Speaking of competition cars, there are always breakages. After 8 months I finally pulled the nose cone off the old trans to see what had broken in it. My expectation was that the front mainshaft bearing had colapsed and I wasn't dissappointed...if you know what I mean. Check the pic below.
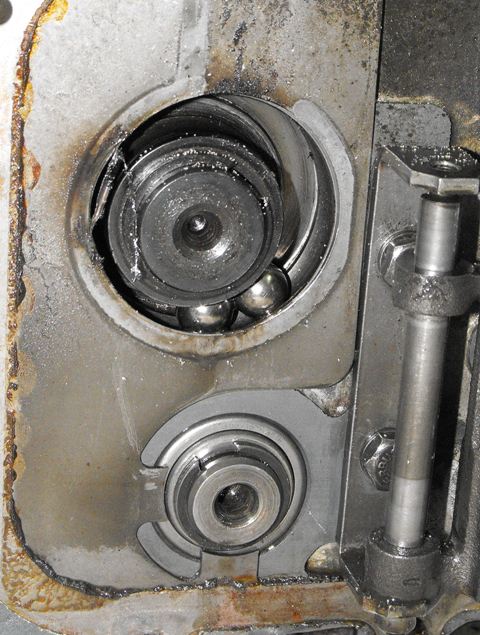
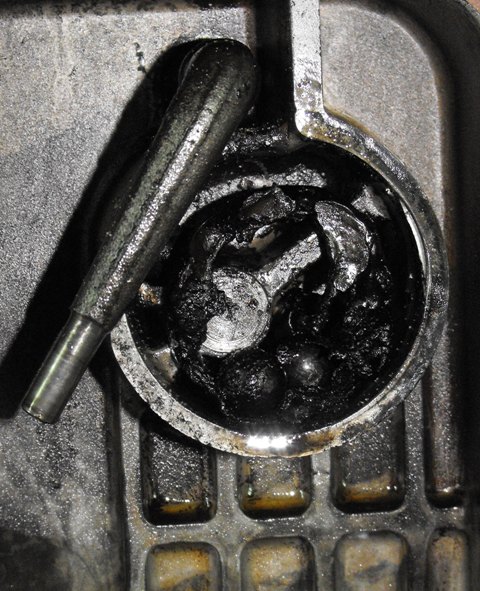
I found the rest of the balls and the cage huddled in the nose cone looking very sorry for itself. The upshot of this was that the gears literally pushed themselves apart. My hope is that there is a least something useful left in the trans. I know for sure that 1st and 3rd gears will be stripped as I drove on both of them as the bearing was collapsing. I just hope that something else is savable. I guess we'll see.
Bring on the khanacross this saturday!!! :oP
October 18th, 2008.
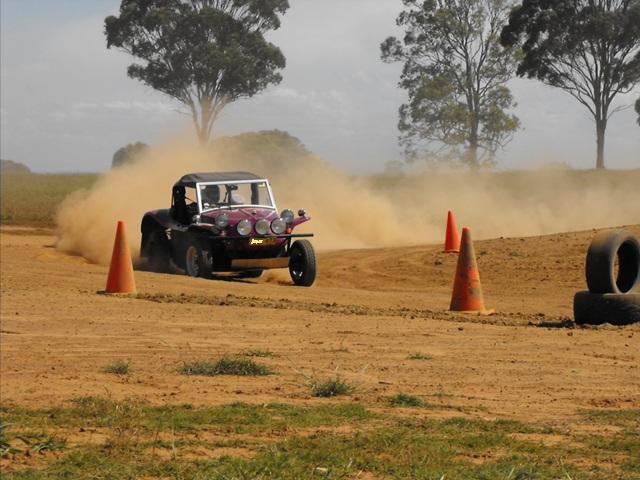
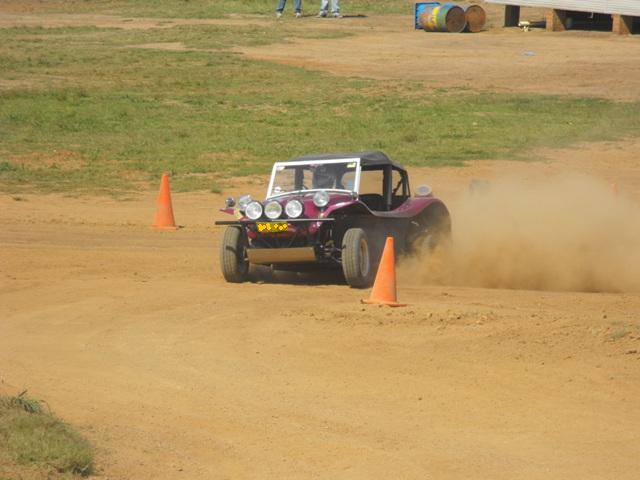
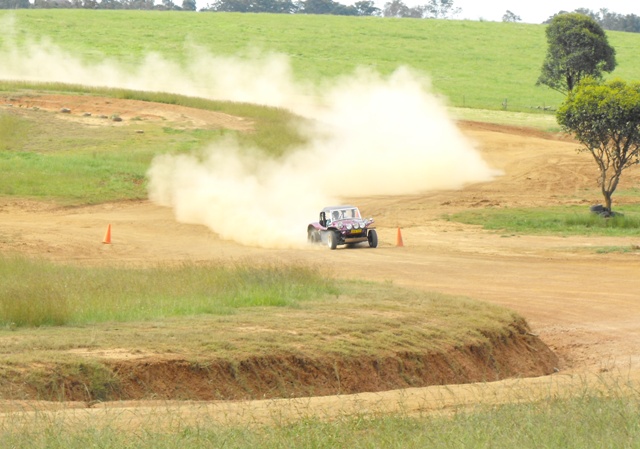
What an awesome day! Lower Blue Mountains Christian Car Club ran another multiclub khanacross at Oran Pk on the 'Eights' dirt course out the back. I have to say, I think this course is my fave track. The great news is that even though Oran Pk raceway has been officially sold to housing developers, the actual site won't be closed and demolished until the end of 2009. What with the stock market crashes of the last month and the investments needed to develop it, it may even wait until the end of 2010. But I digress let me talk about buggies not real estate. Today's khana was a CORKER! Let me first let you know about some new stuff I made.

The handle that came with my turning brake was the wrong shape and angle. So using some pre-racingholed flat plate 3mm steel and some 4x16mm strip to reinforce it down the side, I fabbed it up in an hour and voila! One turning brake handle. The current setup sees it very close to the gearing shifter. Infact, there is some interferance when shifting from 3rd to 4th gears. However, I'm not too concerned about that because I never use 4th in khanas and it forces me to take the handle off the for the road, which is a good thing, because using a turning brake on the street is a no no.
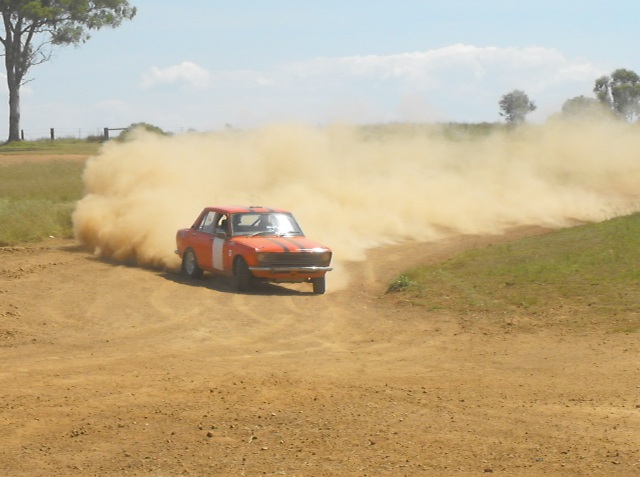
This is my mate Chris. Chris is frightening fast. His 1800cc Datto no doubt left me for dead. He was one of the fastest drivers on the day.
I don't think I've ever had so much fun racing. The combination of all the upgrades has made Zak a much easier car to drive. My biggest drama was more lack of spine rather than lack of car. In fact, the car is now almost neutral to drive at speed. There were some instances of slight understeer, but for the most part, understeer seems to have dissappeared completely. Trailing throttle and stabbing the brake supplied predictable oversteer to set the car up for corners. I DIDN'T USE THE HANDBRAKE AT ALL. This is the most stunning thing. Up until today, I needed to use handbrake on any corner that was approaching tight. But today, there was no need for the handbrake at all. Scandinavian flicks and momentum turned every corner except a few hairpins in the early in the day. Which brings me to the turning brake. The turning brake is fantastic. I still don't have the hang of it and I know I can go much faster using it. It doesn't work well at very low speeds, but with some momentum...and on a broken surface, it's quite something. I'm looking forward to having a go with it at some motorkhanas. But back to today's khanacross. I started quite conservatively trying to preserve the clutch so I could drive to Goulburn at the end of the day (for my nephew's birthday). I'll explain later why that didn't eventuate. By lunchtime I was realising that the car could take whatever I threw at it. The suspension was well up to the track. I gradually got more confident and threw the car harder in corners as well as pushing harder on straights. It became apparent that the car was capable of being driven in third gear on faster sections of the track. By the end of the day, on the more open tracks, I was using third gear extensively and driving at high speed. The car was fantastic, and arrow straight.This is the big difference between rear engined cars and and front engined cars. All the datsuns and escorts spent the day visibly sideways. I spent the day in a gentle drift with the front wheels pointing almost straight ahead. The rear grip is prodigious. The car just squats and shoots where you point it. There are a lot of pundits that proclaim dattos to be the best rear wheel drive rally car on offer. I think a well driven VW has a lot to offer in competition. I'm not saying that I drive well, but the car is respectably quick.
The other great thing was that there was only two other guys in my class (D class 2000-4999cc). The guy in the galant was going well, but a few badly placed mistakes against my careful consistency mean I think I won the class. Still I'll wait for the results to come out before I start counting my chickens. The only downer of the day was the front brake circuit failing AFTER the final run for the day. This mean't driving home on rear brakes only and not driving to Goulburn. It was a bit of a dissappointment, but master cylinders are cheap enough so I can cope.
My fave pic of the day. Chris is a great Photographer too.
Till, next time...
October 23rd, 2008.
I thought I give you a quick update. The results from the khanacross showed up on tuesday afternoon. Turns out all the conservative driving early on actually made for a good result. I was expecting a first in class D (2000-4999cc). What caught me completely by surprise coming FOURTH OUTRIGHT 2 seconds in front of my friend Chris (who scored 5th outright). See I knew the car was fast but I didn't think it was that fast. Looking closer at the times from each round showed me driving consistently quick across the whole day. Other competitors lower in the order made noticable mistakes. Chris himself lost 15 seconds across the whole days in silly muck ups. One involved driving through a puddle and mud obscuring his vision, the other was uncertainty about the direction of the test. I actually felt very sorry for Chris because without these two thing happening I am sure he'd have come 2nd outright. Anyway, I'm still elated at my performance. Considering I was driving safe I reckon the car has heaps of potential for the future. Anything that I can do from here on in is a bonus.
The clearest thing is that Zak is now a serious threat to the datto brigade that dominate the NSW branch of CACA car club. I am looking forward to class wins or close in most khanacrosses and I haven't even done a motorkhana with Zak's upgrades, but I'm confident things will be much happier there as well. My only concern being whether I'm forced into the "specials" class by using turning brakes. That can't be so bad though, once I get the hang of them the car should be a real threat at motorkhanas too. Chris' comment was that I should look into getting the car CAMS log-booked and try some rallysprints. I think he has a point too. The Eights at Oran Pk are really more like a rallysprint than a khanacross course. I suspect Zak may need some more cage for that, but I'd been considering that anyway. I'd just put in some bolts in bits to complement the rollover hoops that are currently there.
I guess what I can see is that the car is really still in a very basic format. Stock motor, ECU, clutch, basic cage. Anything I do from here on is bound to be an improvement. I suspect that as much as 30hp might be extracted from bolt on components while leaving the motor internally stock. The clutch will be replaced by something better at some stage. I'd say a ceramic clutch. ECU, well that might wait quite some time. They're very expensive.
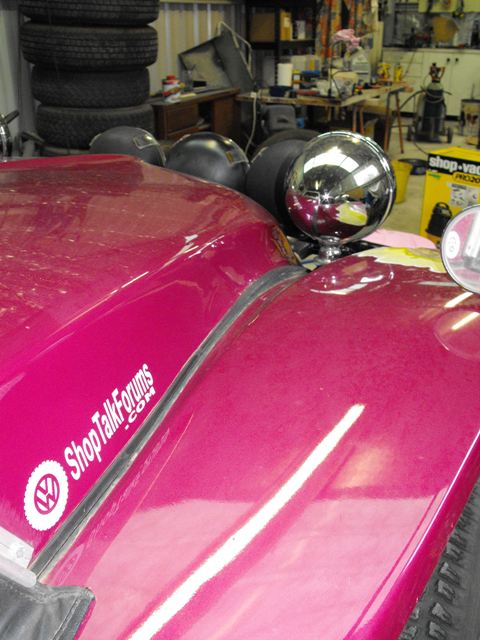
For now though, I am very happy. I'm keen to get out there and do some more driving...course the master cylinder needs changing first. I got these stickers the other day from the Offroad section of ShopTalkForums.Everyone knows they are worth at least 25 virtual horsepower and an extra 4 inches of virtual travel. lol :oP
November 4th, 2008.
I've finally pulled a few things apart and now I know why the front brakes weren't working...
Hopefully I can go and put the first coat on tonight.
Till next time...
November 6th, 2008.
A few things to show you...
Freshly powdercoated back rims to match the new rims I bought from the US.
This too is now sandblasted and powdercoated.
But I digress...here's my progress so far.
Packing tape is awesome. Resin peels straight off it and it's very strong in 3 or so layers.
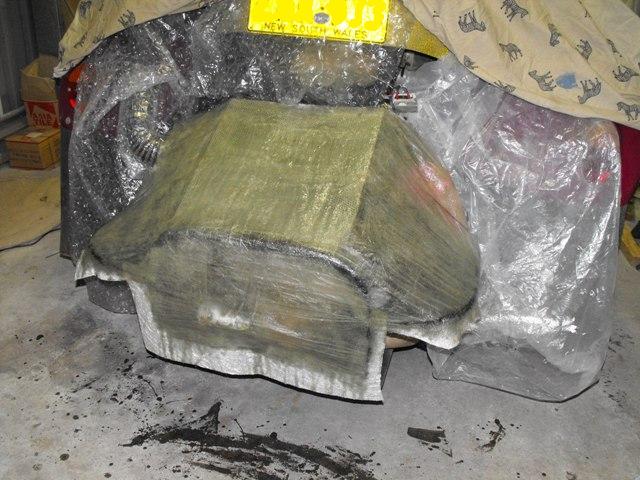
First layer on. A bit too much hardener saw me in a rush though. One more layer and it will be ready for some filling and some painting.
November 8th, 2008.
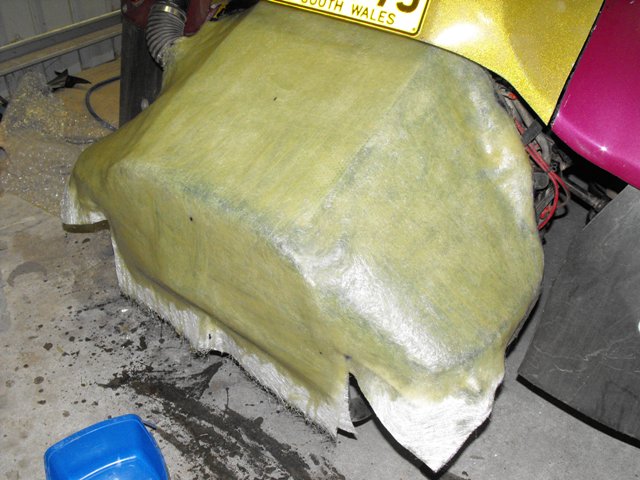
With some more polyester resin in hand I set to and put the second layer of matt and resin on the engine cover this afternoon. The added bonus was some hints on how much hardener to use from the man at Fibreglass Material Supplies at Seven Hills. Let's just say that I had plenty of time to get all the resin on this time and ended up with far less waste. I should also say at this point that [b]two[/b] layers of matt and resin layed in this method are incredibly strong. The radiator scoop the car formerly had was constructed the same way and scooped air off the top of the rear guard at 90mph (theoretically, ahem)without even cracking.
The next trick it to put the new master cylinder in. More soon...
November 10th, 2008.
I added another coat of resin to the outside of the cover to smooth it out a bit. As you can see it's also been trimmed mostly. I used a die grinder with a cutting wheel for the most part although the top edge is still be trimmed. The die grinder is really good coz wheel spins fast, but if it jams it stops rather than ripping things up like a grinder would. The grinder was used for a long straight line, but I found it tended to make the fibreglass so hot that it smoked. I have to say, cutting fibreglass is my least favorite part of making things like this. No matter how hard you try, there is always some dust that gets in somewhere and makes you itch somewhere. BTW, I should mention too, when cutting chopped strand matt, wear gloves. I forgot this and ended up with some nasty sore spots on my finger where short strands of glass had gone in and broken off. The annoying thing being, you can't see them to dig em out. :o(
The plan is to get it running for saturday to drive it to my nephew's birthday party. He and his brothers love the car.
Later...
November 25th, 2008.
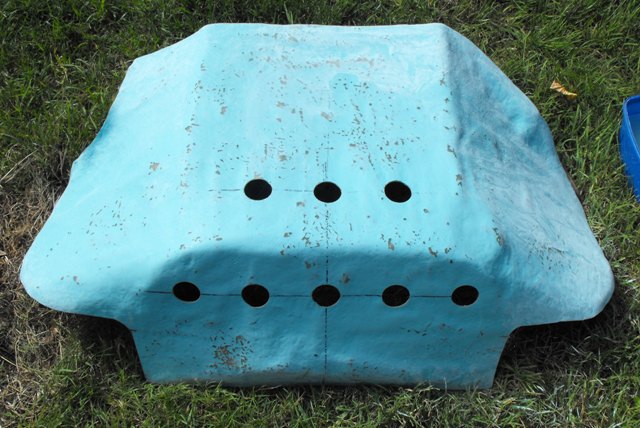
A few things to update you on. First up is the engine cover. After some more trimming, two coats of spray putty and some sanding, it was ready for some paint. Which was just as well, coz it was starting to look like a plastic rock off the bottom of a swimming pool.
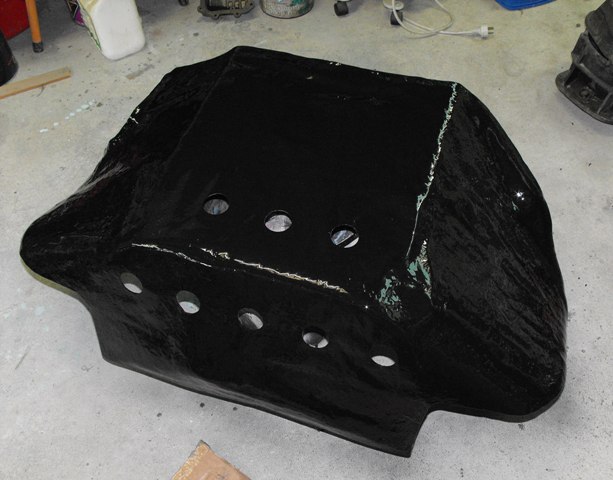
You might notice the presence of some holes in the fibreglass. I elected to do this in order to help some heat evacuate from the exhaust area. The plan is to fill them with some expanded aluminium mesh (ricer mesh, lol). That way the air can get out but the little fingers can't get in. Now for some paint. The paint I elected to use is VHT black wrinkle paint. This allows the fibreglass to appear natural with being perfectly flat or having a smooth surface.
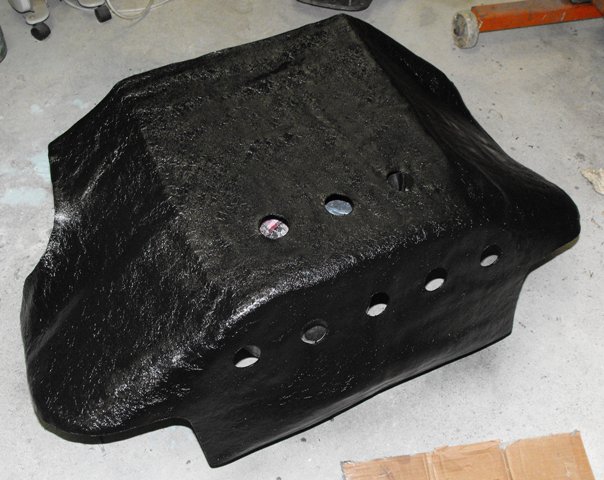
The first picture shows the paint still wet and flat. In the second you can begin to see the wrinkling. The paint won't be fully dry now for five days.
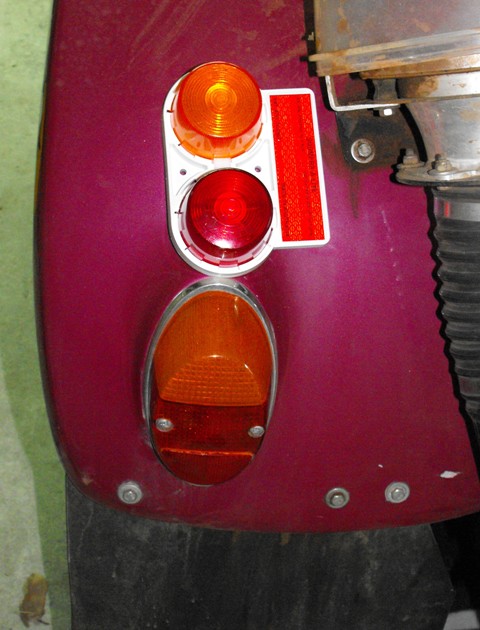
The other thing I've been working on is some different tail lights. The problem I've been having with the VW units is two fold. First up, they are slightly open at the back and so fill up with dirt and water as well as the contacts being unreliable. Secondly, the brake lights and the blinkers are very hard to see during the day. So I've been on the look out for some new ones for some time. I was thinking about some LED powered units, but I came across something else. I found these in a boat shop for a very nice price. I'd seen them on a boat trailer a few years back and liked them. On closer inspection I discovered they were also submersible. Hence the name "submers-a-lite". Now, I don't pan on dunking the car up to it's tail lights anytime soon. However, I am very attracted to the idea of a tailight I could hit with a hose full bore.
As you can see, the first thing I did was pull them apart and cut off the reflector. I'm sure it's useful for something, but not on the buggy. Once this is gone, the next step is sand them back properly and hit them with some black paint to get rid of the 80s toothpaste look. Thanks to Mark G for the use of his bandsaw.
In other news, the sump is leaking again. I have to say, I'm really over this. This will be the third time it'll come off. I'd put it off, but I'm concerned that I might coat the brand new timing belt in oil. Ah, the fun of oil leaks. :o/

Hopefully I can get some pinstriping put on them too.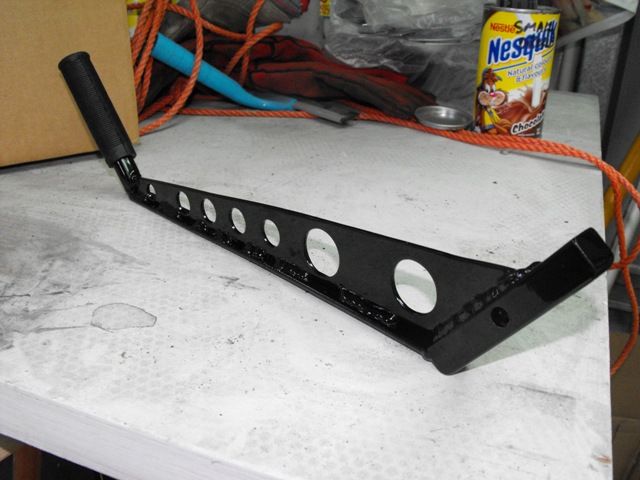
My boss told me today he thought I'd bought it from a shop, the highest complement in my opinion.
A $5 rubber handle from Clark Rubber completed a classy bit of leverage.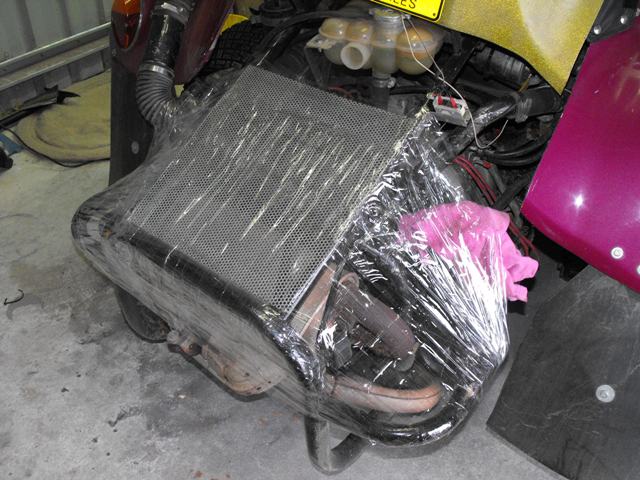
Driver side view of the cover.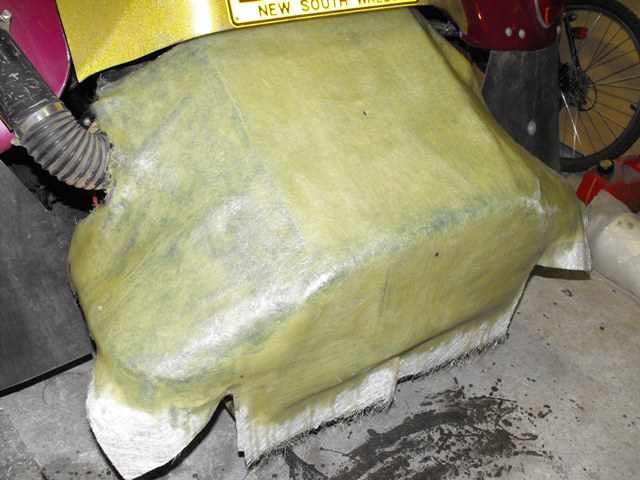
Passenger side view of the cover.
The next move is some spray putty, which I have.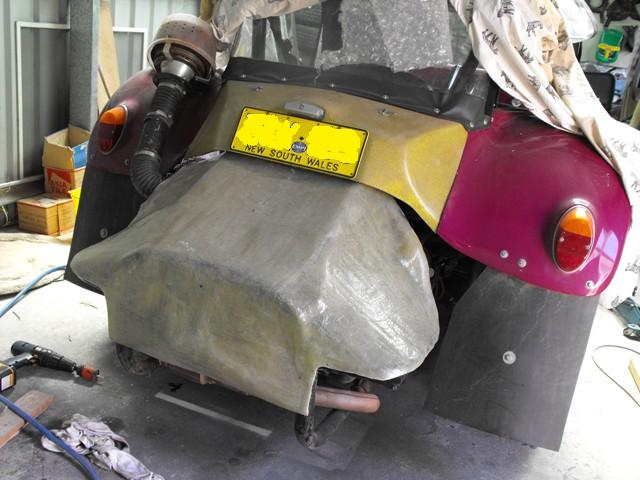
Trimmed and in position.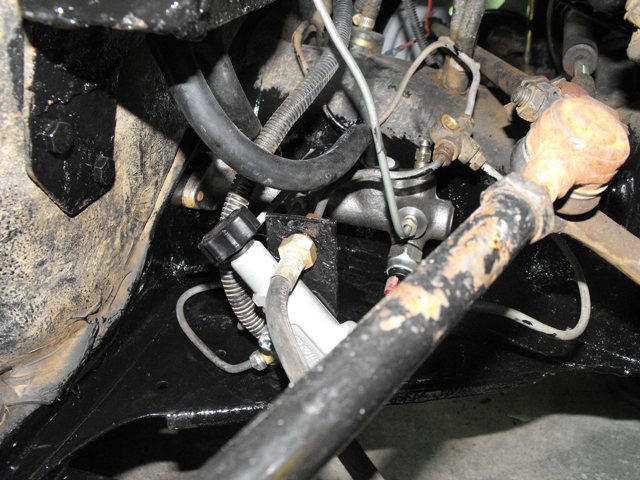
After a lot of mucking around it's finally in.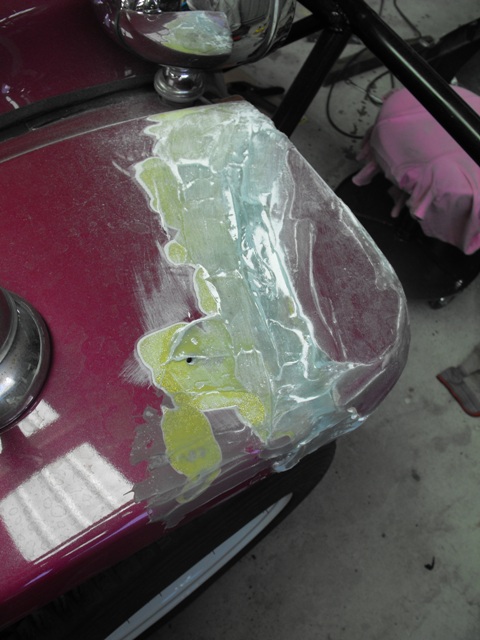
A little filler in the gap in the front fender.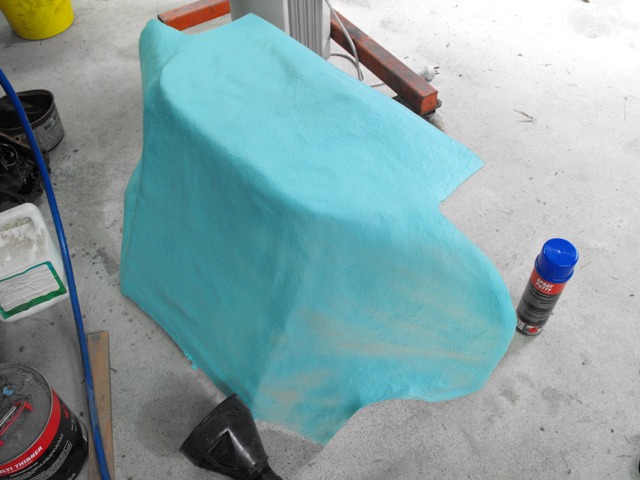
Next to the old ones...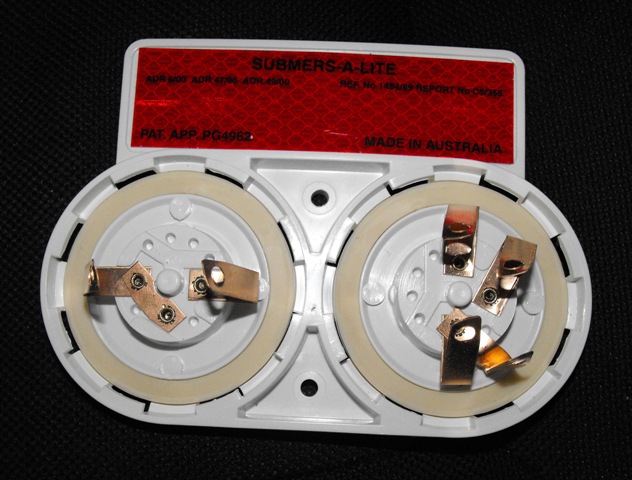
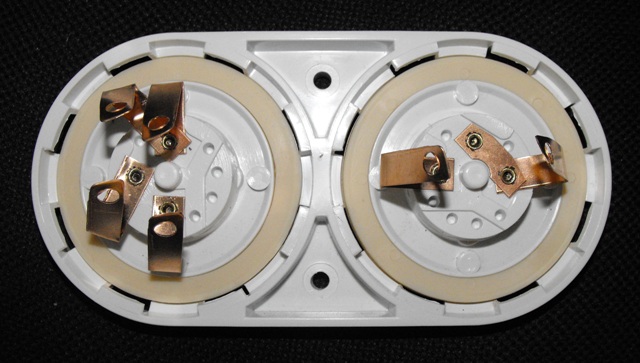
With and then without the lame reflectors...