Buggy Project 20
June 25th, 2008.
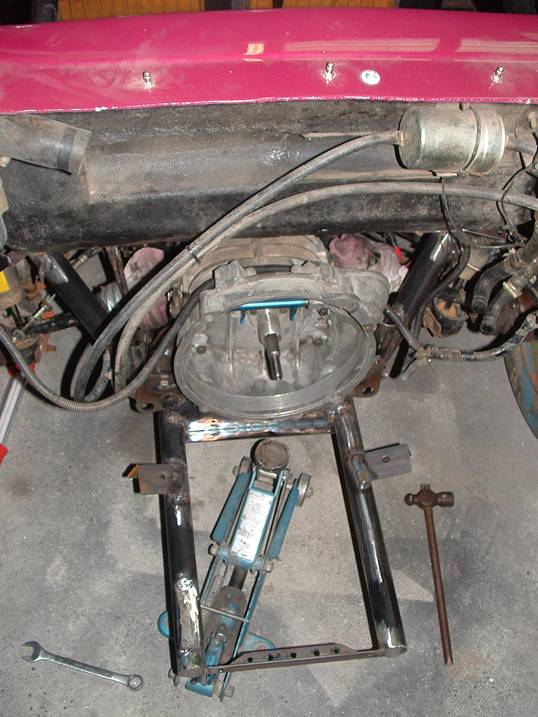
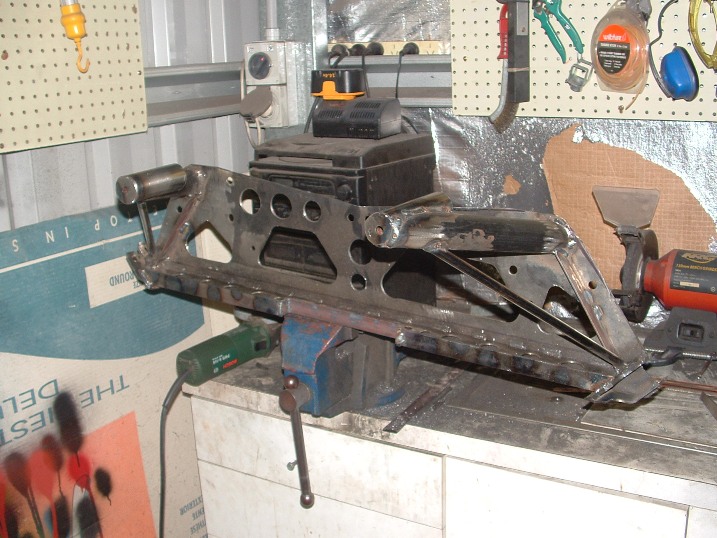
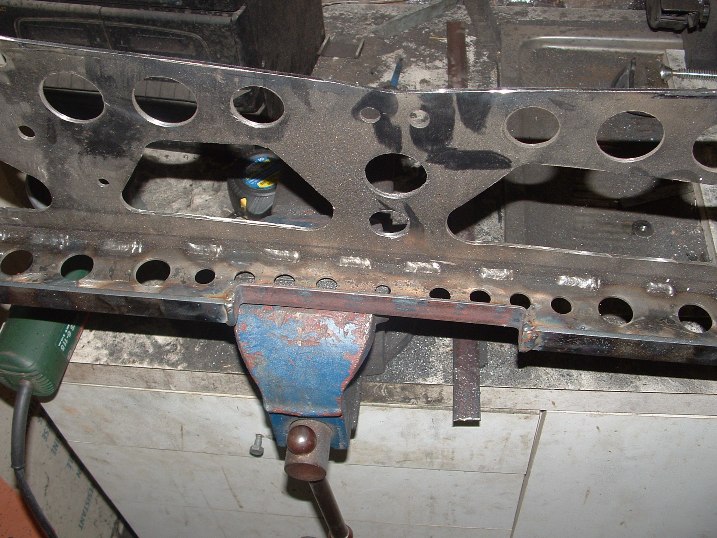
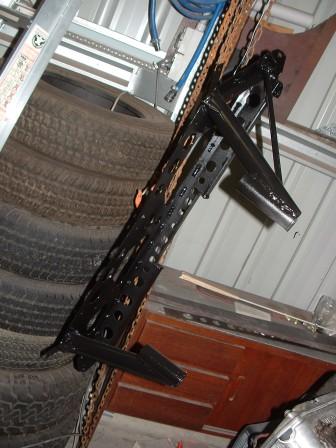
The work on the rear subframe continues. All welding and such seems to be finished, I'm just trying to find ways to minimize the amount of metal and weight. Ie. I'm trying to find ways to cut more off and places for more speed holes. The pics below show how I've gone...
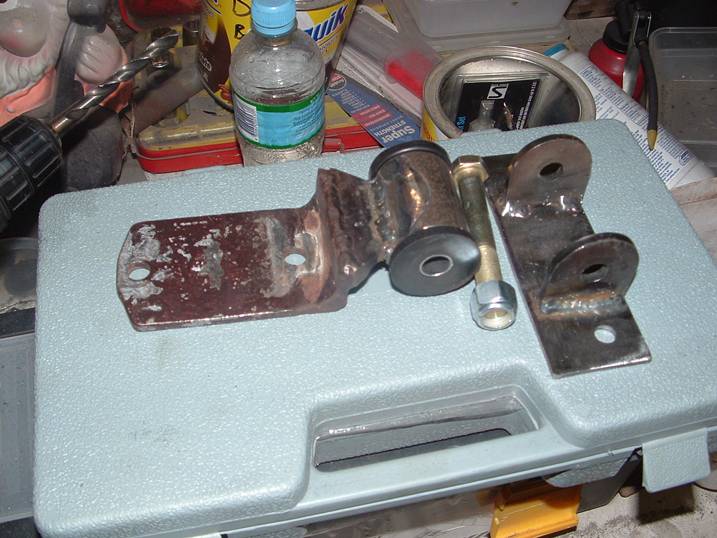
I agonized for several night before coming up with this solution for how to mount the diagonal bars (which connect the rear rollover hoop) onto the chassis forks.
The solution came in the form of checking a CanAm racing photobook I have and looking at the cams regs for cages.
A piece of tube with flat steel welded on the end is bolted onto these and the diagonal bars then came off these.
Hopefully everything is well lined up. All seemed good at the time I tacked it together.
You may wonder why I didn't just weld this subframe on. There are a few factors. The first is, it would involve taking the body off and turning the pan over to get most of the welding right. I don't have this luxury. The other thing is, the new gearbox mounts mean I need to be able to pull the plate that joins the forks in order to get the tranny out. I'm not entirely sure about all the clearances, so making it removable means if I need to pull it out I can, there by avoiding much swearing and sadness in the future.
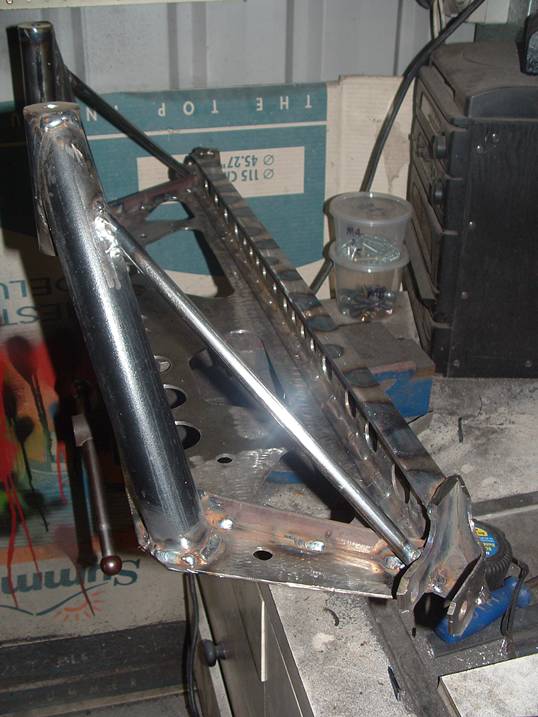
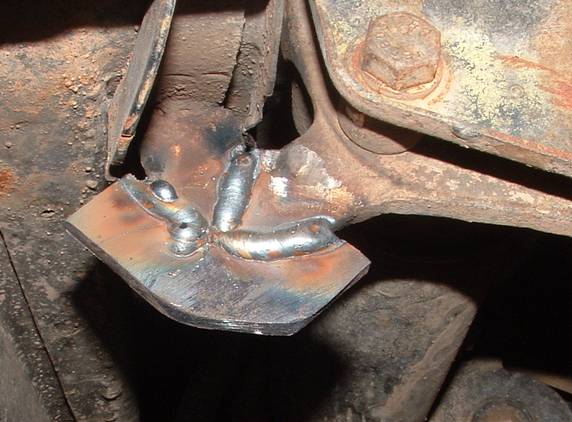
As you can see, there is a triangle between the three elements on each side. The plate (reinforced with 20x2.5mm bar), the 15mm pipe and the main cage support. The I-beam section of the plate ties the shock-towers together and both bolts are in double-sheer.
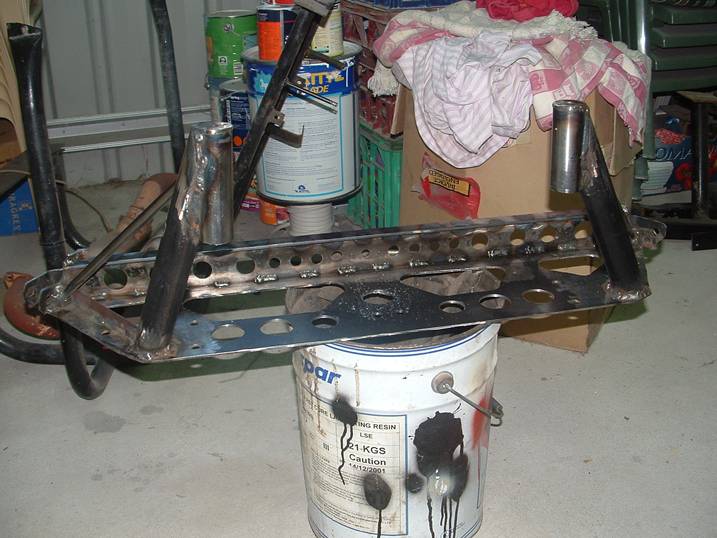
Now if I can just rid of some extra weight....
All it needs is a light sand and a lick of paint. Next is the tranny mounts.
Till next time...
June 30th, 2008.
A little more progress. A little anyway. :o/
Seven hours of work yielded this. Fabricating is always like this in my experience. You get it alright just to discover it needs to be 10mm long or 5mm wider. And I can't tell you how many time I hefted the gearbox in and out using a jack that was just too short for the job. I hate working when you haven't got the right tools.
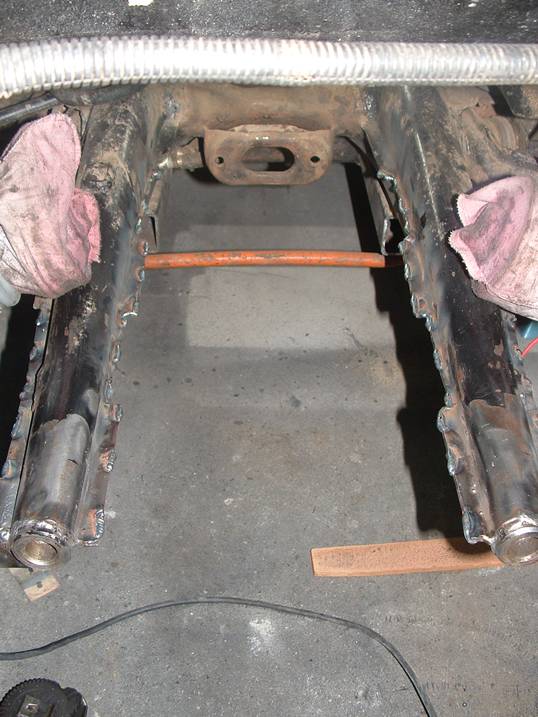
The slots cut out of the seams on the frame horns was clearance for the 091 kombi box. The tranny mount kit recommended it. At the same time the insides and outsides of the frame horns were seam welded to strengthen them up. You'd be surprised how much flex the framehorns are capable of. The kit involves moving them a little closer together to get the holes in the end plate to line up. They are out by about 2mm. getting them to flex this much is no dramas at all, which tells me something not so good about their strength.
Next up was the weld on plates for the rear tranny mounts. These slope back a little to allow the shift rod to sit in the same position. The end plate will be modified to allow for this too.
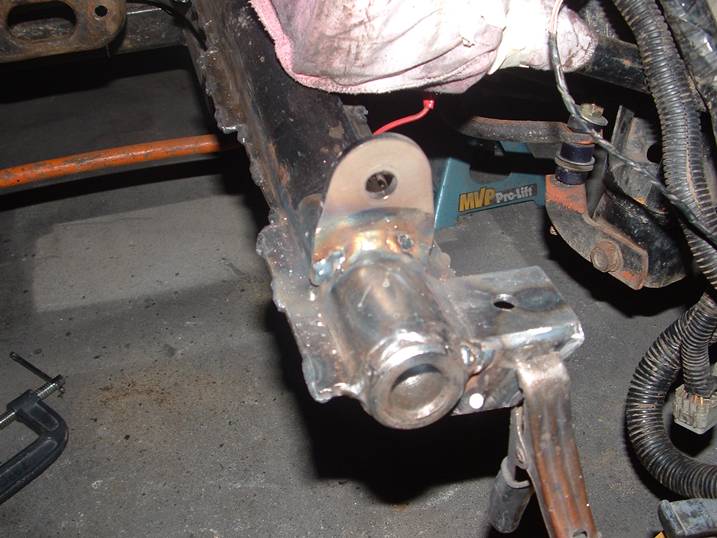
This mount is quite different from the one originally supplied and consists of a combination of parts from the old mount and the new kit. The reason being I didn't want the front of the tranny to sit so low and I felt more than a little hesitant about cutting off the factory mount. As it is, I can easily revert to a beetle box if I ever want to and this mount is far easier to remove from the car if I want to pull the engine and tranny out quickly. The one pictured above was the second attempt after the first model didn't allow the tranny to sit far enought forward. :o(
This last pic is part of a wire (just over half an inch long) that used to be in the wire wheel attachment for my grinder. I found it embedded in my chin over an hour after using the wire wheel on the frame horns. It was stuck in about 2mm deep. I serious doubt I'll be using the wire wheel again. Flapper discs are so much more effective and a lot safer, even if they wear out. It also made me think, "what would have happened if I wasn't wearing safety goggles". A sobering thought. Make sure you use safety equipment.
My next trick is to ascertain how I'm going to brace the torsion tube to the pan subframe and to make up some engine mounts. I can't see the engine mounts being a real test, afterall I can just turn the engine over on the stand and make them up in situ. THen all I have to get right is the position of the pipe supporting them under the car and weld it together. The torsion tube bracing is a little different. I laid in bed from midnight till 4am the other morning (thanx to pseudoephadrine cold medication) trying to figure out how to do this best and I still don't have a definitive answer. I don't want to weld anything to the tube, but I may just do it to simplify the process. It's obvious to me that the stock bracing is next to useless as the pan just flexes when the torsion tube moves. Hopefully my bracing system, whatever I do, has the opposite effect.
My welding is also improving. A bass student of mine who is a fitter gave me some tips the other day and while I'm no expert, I can see that the penetration and look of the welds is getting better and better. The seam welding was a pain at first but I even got the hang of that quickly. Hopefully this will all contribute to a much stiffer rear end and more tunable rear suspension.
Till next time, stay safe...
July 12th, 2008.
With the way things are going one might tempted to think that I was accident prone. Allow me to fill you in on the latest incident. On tuesday evening I was in the garage performing some mods on the subframe. This involved using the cutting wheel on the angle grinder. Now cutting with a grinder is always a bit dangerous. I've had the odd situation where the wheel has grabbed and then disintergrated. This has been the case lately after I bought some cheap cutting wheels not realising how bad they'd be. However, what happened on tuesday was completely unprecedented.
The metal I was cutting wasn't clampled down, but being heavy, I didn't think was an issue. So there I was, donned in goggles, ear muffs, long weldign gloves and being extra careful. Mid cut, the grinder grabbed again, but this time the wheel stayed in one piece. Unfortunately what it did was leap out of my grasp and attach itself to my leg. It took me a moment to realise what was going on because it happened so fast. Lucky for me, the trackpants I was wearing took most of the hit. The grinder cut them and wheel wrapped itself up in them, the wheel colapsing as it did so. This jammed the grinder and allowed me to turn it off and free myself.
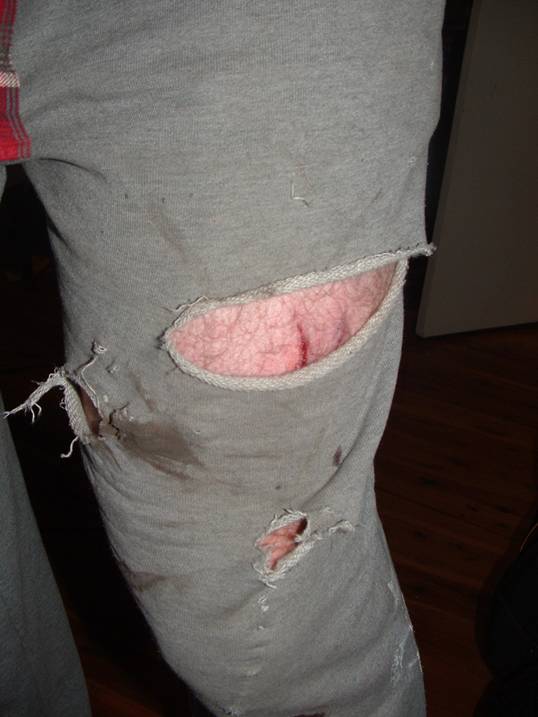
Here is what it did to my trackpants.
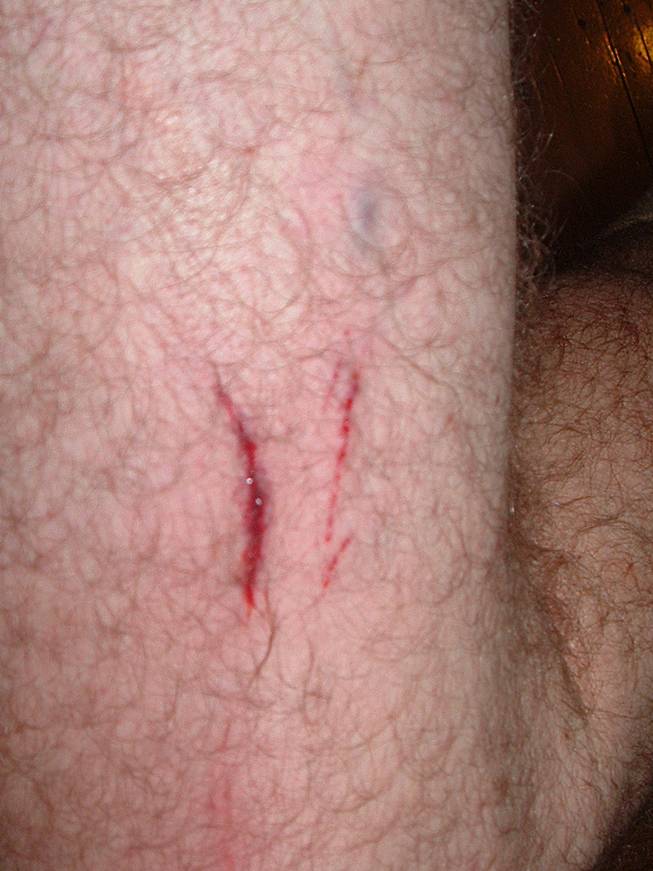
My leg was damaged. The gash (pic below) is about 2 inches long but only a few millimetres deep. There's bruising around it but its ok and seems to healing up. The thing that made me think was, imagine if I was wearing shorts...mmm, don't want to think about that too hard.
 Anyway, onto happier thoughts.
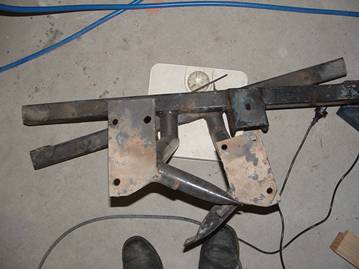
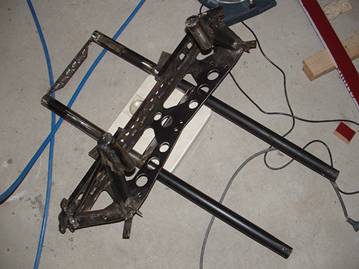
I know all I seem to be posting is pics of the subframe, but it has taken hours and hours to build and I think really very effective. I've cut off as much metal as possible and have modified the middle so that is clears the gearbox properly.
I've since tested fitted the frame. There is a little fettling left to do, but it's generally ready for paint. I think I'll be getting it sandblasted to try and clean up all the oil and gunge on the surface before painting it. The frame seems to substanstially stiffen the rear of the car.
The new engine mounts for the car are also almost finished. Just a bit of grinding to do here and there and then a lick of paint. I'll post some pics of them soon. Whilest test fitting everything, I've noticed that the engine has dropped about 10mm relative to where it used to be. It's also about 10mm further back than before. So I loose a little weight distribution adavantage on the one hand, but on the other, the centre of gravity is lower, as are the CVs (giving me more ground clearance) and the tranny mounts are soooo much better than before. At the same time, the barwork in the back end should be lighter too, so it should be a winner overall.
Till next time...
July 15th, 2008.
The progress is slow, but I am getting there. However, in some ways D-day has come. Today, Zaks rego is up. I now have two months to get him pinkslipped and re-registered. The complication is that the new baby is due in two and a half weeks. So Im kinda caught between the devil and the deep blue sea. The good news is that today saw me finish off a whole bunch of things. The subframe and the new engine mounts are ready to be sand blasted and then painted. The rear engine cage is almost finished too. Id like to cut some more metal off that cage, but Im still thinking about how much before I go crazy with the grinder again.
Check the pics below for more details.
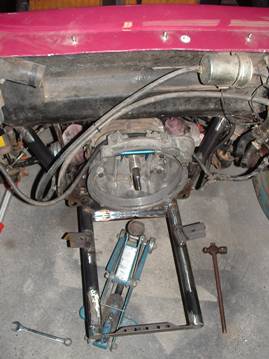
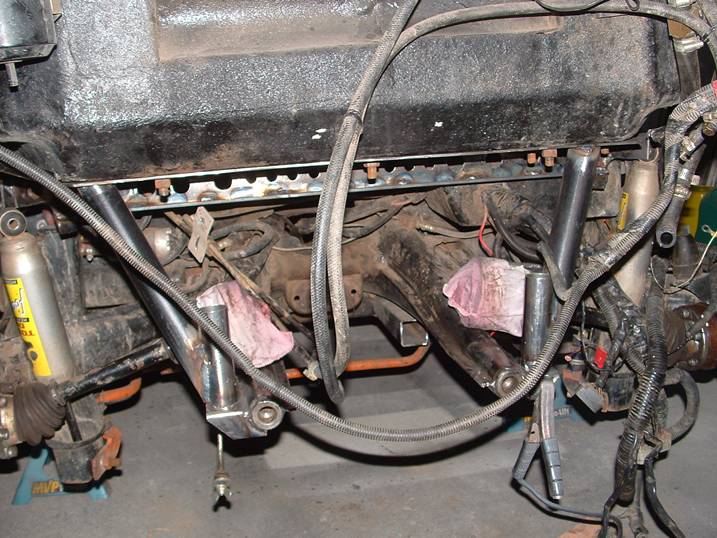
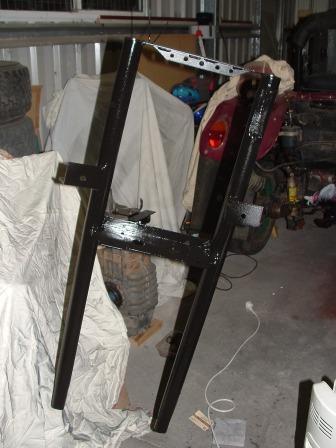
Here you can see the new engine mounts in situ along with the new subframe.

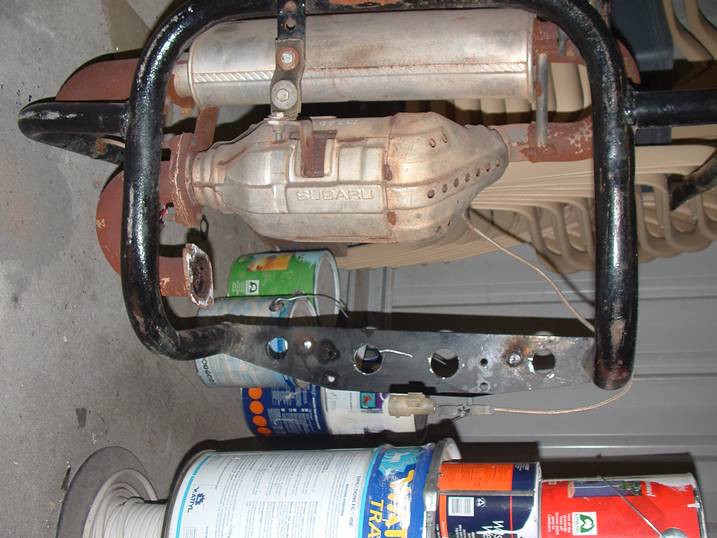
For those that saw it before, you can also see how much I've trimmed off the backing plate on the engine cage. It's 6mm plate, who knows why I chose anything that heavy in the first place, but anyway. Now half of it is drilled out or cut off.
The great news however came when I weighed the old subframe/engine mounts and the new subframe/engine mounts. I was hoping that the new system would beequal or only slightly heaver than the old subframe and engine mounts. I assumed this might be the case as the bracing system for the chassis forks and shock mounts has a lot of metal in it. So inside to get the bathroom scales and stack the old against the new. Check the pics below, and see what I found!
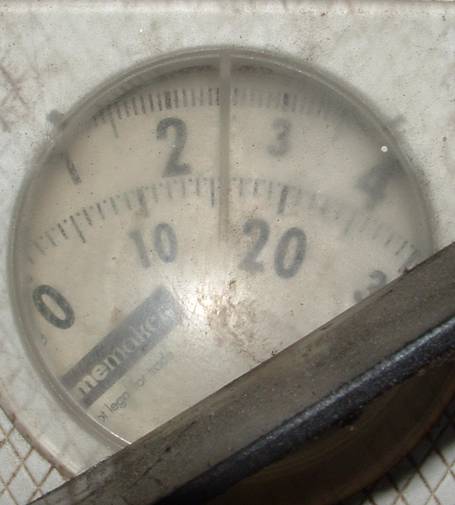
The old is roughly 16kg barring any extra metal it lost when I cut it up a bit.
AND THEN CAME THE SURPRISE!!!
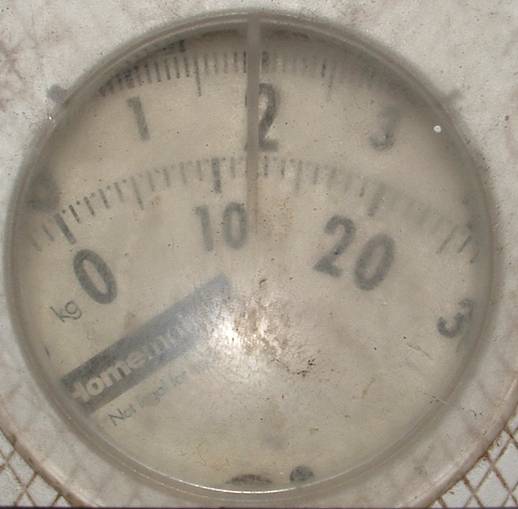
The new setup is just 12kg!
The new setup is FOUR kilograms LIGHTER than the old setup. To say that I was happy was an understatement. I justifies all the time I have put into designing the parts and fabbing up things from scratch out of light plate rather than just using heavy tube in obvious sorts of ways. It also justifies all the holes I have drill, which took AGES to drill. If I don't see a hole saw for a while, I won't miss it. But the proof of the pudding is, of course, in the eating. So it's off to get these cleaned up now. However, I cant wait to see how much difference it makes to drivability and things like axle tramp.
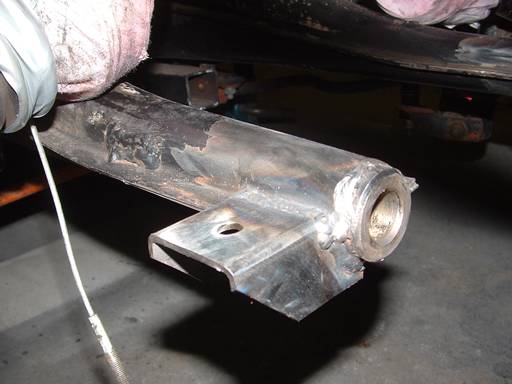
At the same time, I have fixed the gusset between the pan and the rear torsion tube on the passengers side. The gusset was broken, and the torsion tube had sagged about 3mm. So between a jack and some extra gusseting, the stock gusset has been re-welded and moved back where it should be. This of course involved welding upside down, a pain at the best of times. Im actually very happy with the outcome and the welds. I may yet add some extra gusseting to avoid stress points though.
 The next thing to do is related to fixing engine oil leaks. Oh what fun. :o(
Till next time...
July 17th, 2008.
Well, today's new is more of a diary of pain than anything else. I don't like to whinge and whine so I'll keep it as short as possible. However, the appearance of the box pictured below has been expected for some time and has caused me quite some greif.
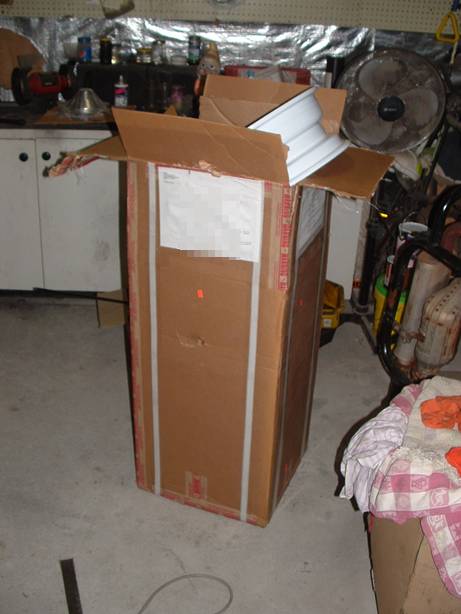 The box in question contains my new wheels. I sourced these rims through the same company that supplied me with my new gearbox mounts and cutting brake lever, Pitstop Autos.. I should start saying that Chris from Pitstop Autos has been very helpful and extremely obliging through what has been a serious of very frustrating situations with a freight company. The initial idea was to ship the rims to Sydney Airport where I could pick them up. The plan in this was avoid having them shipped to my door and the extra cost associated with this, aproximately US$200. The problem began when the freight company informed me of their arrival at the same time as informing me that they had not been processed through customs. I was advised that I would need a customs agent. The freight company could organise this at a cost of course. This was the first omen. Then I spoke to their customs department and the new got worse. Not only was there the cost of customs, which was more than twice the going rate, but I was also due some "airport handling fees". They should have just called this highway robbery, because this was more than five times the going rate. However, the freight company had the upper hand and I was left with no alternative than to pay the extra costs if I wanted my wheels. Chris from Pitstop very graciously offered to pay more than half these costs as he felt somewhat responsible for the misunderstanding of the terms and conditions. Truth be told, he had deliberately asked, "so my customer won't have to pay anything else on pickup?" and the freight rep in the US told him flat out, "No". Chris said it had seemed a bit too good to be true and guess what...
Anyway, then came step two of the process. The freight company called me just before the weekend to ask when I was coming to retrieve the goods. On the Monday, I drove out to Mascot (over an hour both ways not to mention tolls) only to be told that Australian Customs had put a hold on the goods and no one knew why. A day later and various phonecalls on the part of the freight company to customs yielded the answer, "we need proof of payment for the goods shipped". So one copy of a Visa bill later and another 24 hours wait, the rims were finally cleared and I was able to pick them up. The final sting was the GST the freight company had forgotten to tell me about before. Their organizational skill and the state of the warehouse were also matched by their ability to communicate. It took them fifteen minutes to find my box when I picked it up. That was after they'd already dug it out once. Atrocious is the word.
Suffice to say, the first thing I did was to make sure that the bits were all there and what I ordered. I shouldn't have worried of course. Everything was in order and Chris had yet again added a few US VW magazines. A nice surprise again.
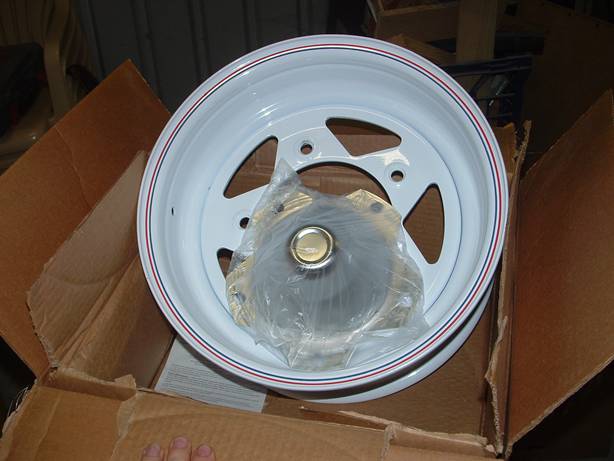
The rims are 15x6" steel rims. As you can see, I have also got some Chrome hub caps to go with the rims. This seemed like a no brainer really. At US$7 each they were an obvious purchase to keep the car looking decent. The rims themselves are rudimentary. Not as light as a centreline, nor as flashy as a BTR. However, I was told recently by an industry expert that they are the strongest most durable wheel available. If bent they can be straightened, if they get roughed up, I can repaint them. And at US$70 a rim, they cost less than quarter of the both the afore-mentioned rims. Landed in Australia they have cost me about $165 each, which is cheaper than anything I could get made up here (from second hand rims) and they are brand new and freshly powdercoated.
Anyway, this tale of woe is over and I'm off to clean some chassis horns ready for paint. Hopefully the other bits are sandblasted now too.
Till next time...
August 1st, 2008.
It's been a big week really, but not so much in buggy terms. Healthy, young Simeon Wood was born on tuesday (it's now friday) and we've all been getting used to his prescence. For the most part it's been good but Liz is recovering and we all know how baby struggle to sleep sometimes. However, a few things have been happening between nappies being changed and two other small children needing extra attention. There are also some thing that have happened since I last updated.
Both the subframe and the engine mounts have been sand blasted and painted in the last few weeks yielding acceptable results in my opinion. It was my first go with thinners based paint and it's not perfect, but it's ready to go back together.
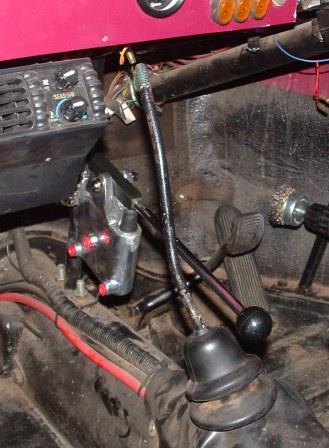
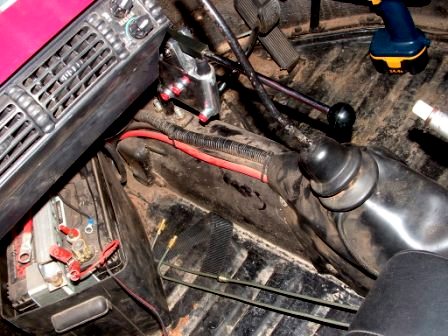
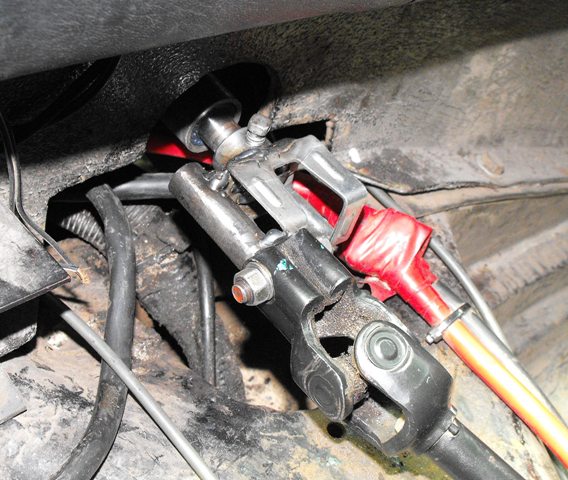
Next up was the installation of the turning brake. After literally agonizing about the location, I put it under the dash. This was for a few reasons. First up there wasn't any room for it anywhere else that didn't compromise the safety of the lines (in terms of passengers/drivers feet) or my driving space. I will need to make up a different handle or mod the current one, but I'm happy with where it is. Can't wait to get the lines in and put the car back together for testing! The lines themselves are another story. Turns out that it is just as cheap to have new hard lines made up as it is to buy second handies from the wreckers. This sadly (and the excuse for overcharging) means I won't be going back to the wrecker that was once my favorite. It really sticks in my craw when business people I don't know from Adam expect to me listen to their sob stories. If you don't like the business or it's too hard, then get out. No such thing as customer service these days, like I owe him MY custom! [breathe] anyhoo...rant over.
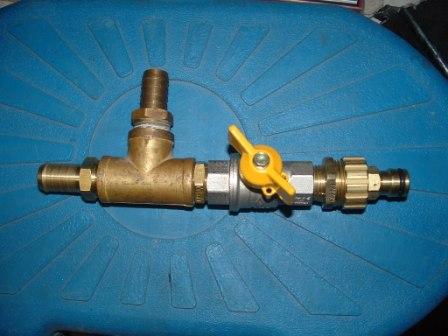
What you see above is an attempt to speed up the whole "bleeding the cooling system" drama. At the moment it takes a few hours and various start up and cool down proceedures. The system should and does bleed (eventually), but not quick enough for me. So my solution is to add this tap and male hose connector to the lower heater hose. The process should work as follows. I will put it all back together and fill the system with the heater tap shut. Then I will hook the garden hose onto the fitting and apply full pressure (which in my suburb is very good). I'll open the tap above and then the heater tap. I'm hoping the combination of the this is that the air bubbles will be pushed to the filler tank where I can bleed them off by cracking the cap on the tank. The whole thing should be much quicker only needing a few top ups. I've seen a few people with this setup and it seems to be quite useful. It only cost me about $30 in brass fittings. I'll let you know how well it works. The main drama at the moment is fitting it to the car in such a way that it looks neat and isn't in danger of being knocked off by flying rocks and such.
Till next time...
August 19th, 2008.
For some reason, three children seem to cause more hectic-ness (if that's a word) so working on zak has been coming a distant last. However, last week I managed to make a big leap forward and now the new transmission is in place and the CV and axles all hooked up again. As it turned out, being anal about cover the open CVs was a good thing as they just need a wipe and an extra gob of grease. I toyed with the idea of pulling them out and regreasing them, but the car has done less than 10,000km since it went on the road, so I just didn't think it was worth the effort or the expense.

My other recent quest has been to try and get some wheel studs to go with the new wheels. It's been difficult to say the least, the combination of radiused lug faces in the wheel and shallow metal that the lugs go into in the drum/disc has made it very difficult to find a solution. In the end I got some of these washers from pitstop autos in the US. These allow me to use holden commodore spec nuts and studs sourced from my local parts/hardware store (thanx Jeff). I should buy shares in this shop. The process has taken a few turns including buying some porsche wheel nuts. These were the only nuts I could find that has a ball taper. Unfortunately, I couldn't find any reasonably priced studs that would do the job. I have to say this local porsche specialist were very helpful and bought the wheel nuts back when they didn't do the trick. There were a number of very tasty rides there as well.
I guess the next trick is to sort the flywheel out. It needs some refacing and cleaning. The gear shift also needs some mods and the sump needs a bit of brazing. Turns out the leak I was suffering in the sump was actually the drain plug. Any, I'm a bit sick, so it won't happen tonight.
Till next time...
September 19th, 2008.
If it seems like a while since you've heard anything, it's coz it's a while since I written anything. Sorry. Things have been very busy round here in the last month or so with a new baby and an album 2 weeks from release date. You'll be encouraged to know that after my wife (rightly) hammered me the other night, things are moving along on Zak again. I have about 4 weeks till I have to get him regoed and I'm beavering away at things between being sick and very busy.
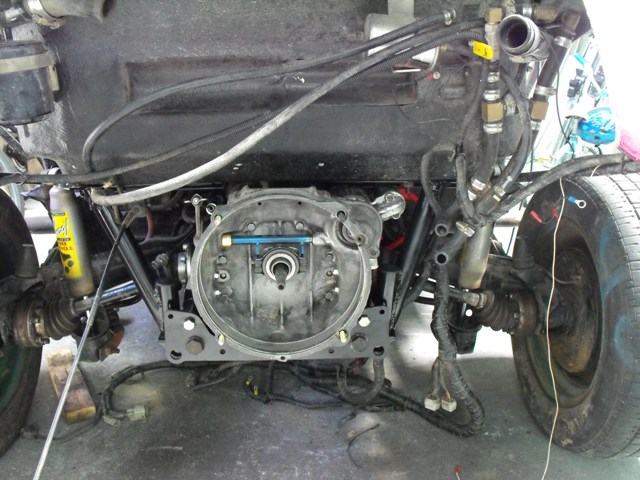
As you can see the trans now has the thrust bearing in place AND some relevant sleaves installed in the urethane mounts (gee I'm happy I discovered that before I put the motor in). The other thing I discovered was, I'd lost two engine mounting bolts. So the engine did not go in on friday night, despite it's readiness to do so...
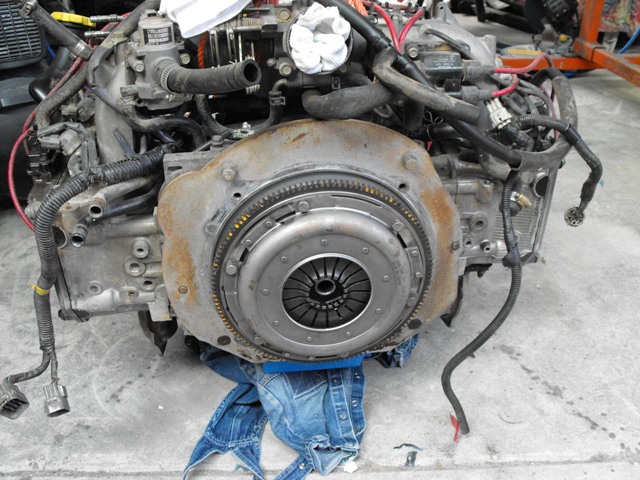
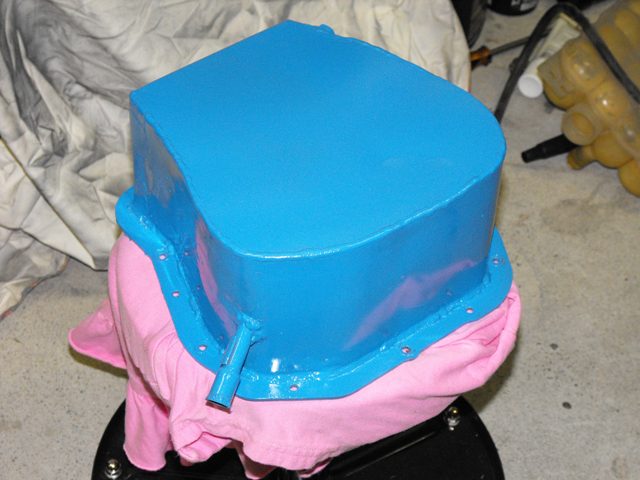
The flywheel has been resurfaced and all friction surfaces cleaned with brake cleaner as there was some oil on the clutch plate. Hopefully all is well with the clutch now. You may also notice from the picture that the sump is a lovely shade of blue. This was done in aid of seeing oil leaks in future. It now doesn't leak anymore. Thank goodness for plumbers.
Whilest not being able to do anything about the engine still being on the garage floor, I was able to make up the coupling adaptor for the gearbox. After a lot of welding and fitting it seems to work well enough. I think the throw could be a little bigger, but I'll need to make a new one for that so it can wait till the car is regoed. One thing I have notice is, the gate springs on the 091 are MUCH stronger than on a 002. I guess the old ones might have been stuffed but the difference is palpable. I severely doubt I will be have the same issues with 1st to 2nd and 3rd to 2nd gear changes now. Can't wait for that. The other thing is, the box is much, much tighter than the 002 ever was. I guess this is what happens with a new box. Be interesting to see how it is after a few months of driving. I've never had a new (fully rebuilt) VW gearbox before. I look forward to the experience.
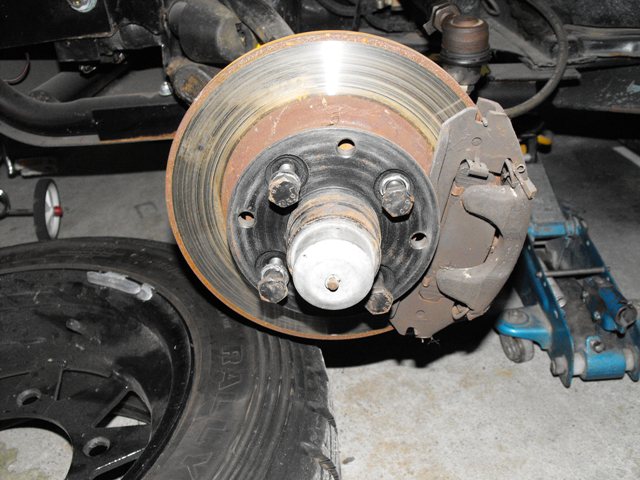
I've also been painting a certain brake assembly matt black in the interest of not hanging out like the proverbial. It's full installed now. The lines need a few clamps and the brakes are in need of a good bleeding and should work well I think. That nasty bent tie rod has gone and been replace with a suitable donor. I was going to try and straighten the bent one, but I really think it may be beyond it. Poor old thing. Long Tie rod VS turbo diesel landcruiser + snatch strap = sadness and bent tie rod.
Pulling out the fibre glass matt the other day for my father in law yielded just enough in the way of offcuts the fix the front panel, so I'll dig into that soon enough. It all needs to be mobile and registered by the 15th of october so the clock is ticking. Otherwise I need a blue slip inspection...and I'd rather avoid that thanx.
Till next time...
October 10th, 2008.
Lots going on this week. I've had the week off and the main idea is to get the car back together before next wednesday..when I run out of chances to just get a pink slip. :o/
All was back together on monday and I even got the motor started. Then I realised the sump was leaking AGAIN. :o( Anyway, off the sump came again and back to Mark's place to be tigged up completely. I't now a loverly blue again and back on the car...
The other thing I've been wresting with for the past few days is the new wheel studs. Suffice to say, it seems to be sorted now, three different drill bits later and some thread lock too. Don't ask. All that is left to be done is a little clearancing on the front adaptor plates.
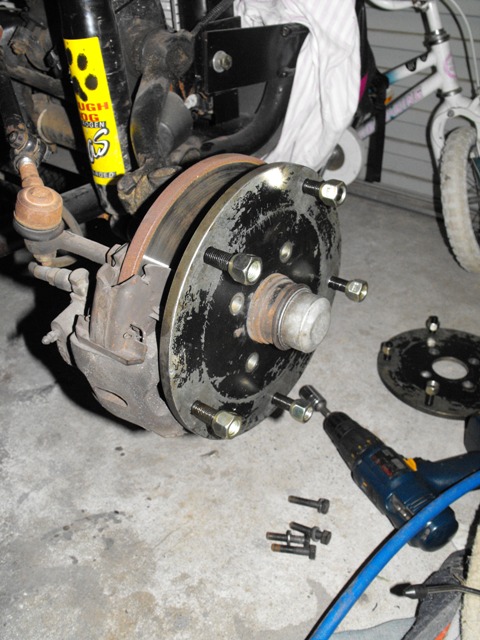
The other thing I discovered is that behind the plates lies a front hub designed for a 4 stud pattern. Be worth figuring out what the configuration is at some stage.
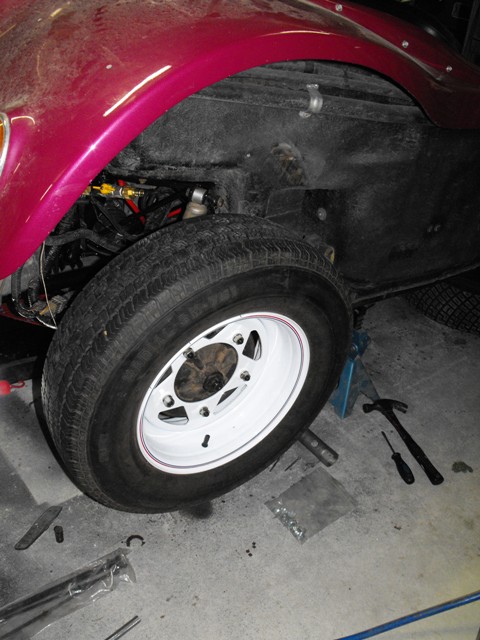
I also finally got some rubber on the new rims. I'll be throwing these on for rego.
Click here to see more.
Click here to return to Pete's Volkswagen Web Page.