 |
| Paper Piecing - Foundation Block The Quilter's Thread June Block of the Month |
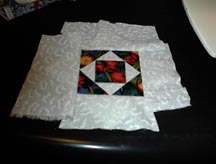
| Block: Square in a Square Size: 6.5" unfinished Pattern: printed from HERE Level of Difficulty : |
| Beginner Intermediate Skilled |
 |
 |
 |
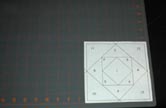
| Step 1 |
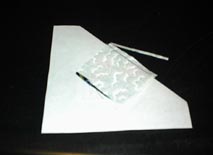
| Step 4 |
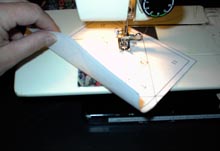
| Step 3 |
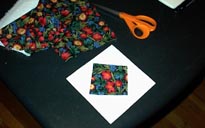
| Step 2 |
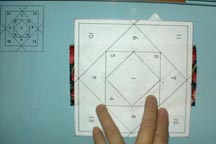
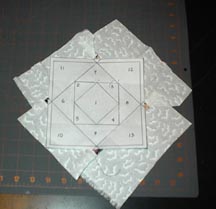
| Trim the excess paper from the pattern making sure to leave the seam allowance all the way around. Measure your pattern and make sure it is the size you are looking for - the paper should be the unfinished size of desired block. HINT: Printing patterns with grayed areas and numbers is the easiest but not always available on-line or in books. |
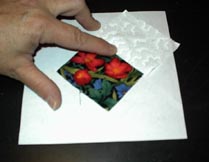
| Starting with the area on pattern labeled 1 - cut fabric to size plus seam allowances OR use a piece that is WAY to big (and we will waste the extra as you learn the concept). This illustration is a dark fabric 3" square. ------------------------> Using a piece of double-sided tape, attach the wrong side of fabric to the back (non-printed) side of pattern. HINT: Holding the paper up to the light will allow you to see the lines through from the other side and help you place your fabric correctly. |
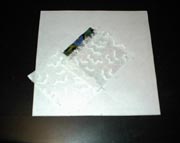
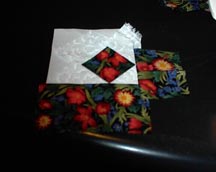
| With first fabric attached, hold pattern to light locating area labeled 2. Using a contrasting fabric (as shown) put Right Sides Together lining with edge of dark fabric so when sewn and opened, the light fabric will be on top of the area 2. HINT: Hold to the light to see where your seam will be - you will be stitching on the line of pattern between areas 1 & 2. |
| 2 is under here |
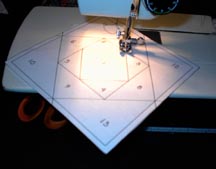
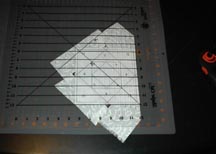
| Carefully invert pattern and fabrics as to not move the pieces. Place under sewing machine foot lining up the stitching seam on pattern with guide. YOU WILL STITCH ON THE LINE PRINTED ON THE PAPER between area 1 & area 2. Illustration shows fabric under the pattern. (the stitching line isn't visible in photo, sorry) HINTS: With needle down on one end of stitching line, lift paper up to expose fabrics and you should be able to estimate if your fabrics are in the right place for stitching. It also helps to start and end your stitching before and after your stitching line so it goes OVER intersecting lines. |
 |
 |
 |
| Steps 7&8 |
| Step 5 |
| Step 6 |
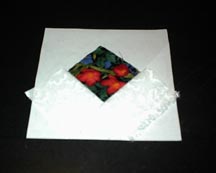
| <----Clip threads and look at fabric side of project. Clip seam allowance to 1/4". Finger Press open------> HINT: Folding paper at stitching line as shown in illustration helps you trim the seam allowance accurately. |
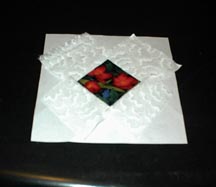
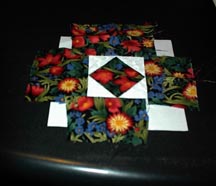
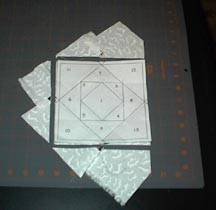
| Locate area 3 on the pattern and set next piece of light fabric to stitch the same way you did in Step 3. With RST, stitch on paper-side of project on line between area 1 and area 3. ------------------> Finger press open after trimming again. Do the same for areas 4 & 5 stitching on printed lines after finger pressing and trimming. Open and finger press all pieces as shown. HINT: You should be seeing the points of the inner-most square of pattern appearing as these 4 pieces of light fabric are stitched in place. |
| 3 is under here |
 |
 |
 |
 |
| Step 9 |
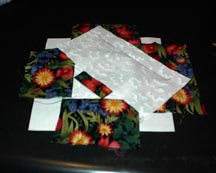
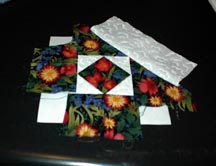
| On the reverse side of printed pattern take a dark piece of fabric and line up edge with stitching line for area 6 RST with light fabric.. Area 6 will stitch to the light fabric already stitched in areas 2 & 5. HINT: Illistration shows the dark fabric RST under the paper pattern as it is held to a light. Look closely to notice the top of almost-hidden dark fabric - it is seam allowance above the stitching line. |
| stitching line |
| Step 10 |
| Step 11 |
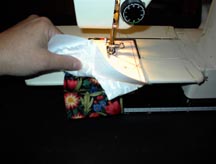
With paper-side up again, stitch on line as planned in Step 9. Peek under the paper to make sure your seam is where you want it on all your fabrics. HINT: If you have gotten this far......you are getting it! Keep up the good work! |
 |
 |
| Clip threads and trim seam allowance once again. Turn to finger press. -----------> Look at that point! WOW! |
 |
 |
 |
 |
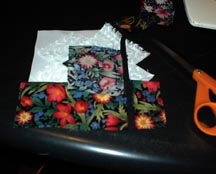
| Place next piece of dark fabric (area 7) to stitch as before. Turn over and stitch on paper once again. Clip threads and trim seam allowance ----------------------------> Repeat last step to continue stitching dark fabrics in place. |
| WOW! All those points are perfect! Why did you wait so long to try this???? Finger press all the dark fabrics away from the lights. ONLY 4 MORE PIECES TO GO! You are doing great! |
| Finger press open. |
| For the last four pieces, lighter fabric will be used. Place light fabric RST to stitch in piece 10 as shown. |
 |
 |
 |
 |
 |
| Finger press open after trimming seam allowance. |
| You are getting the hang of this! Now follow the previous steps to add pieces 11, 12, and 13. |
| The sewing is done at this point.... you can breathe now. |
| Turn block over fabric side down to cutting board and smooth out pieces. <--------- |
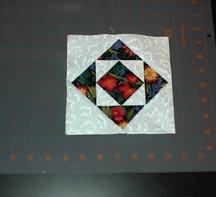
| Using a clear ruler, trim the excess fabric from around the pattern making sure to leave the seam allowance all the way around for future use. |
| trimmed all the way around |
 |
 |
| Turn over and admire! You did it! |
| Just wanted to let you know I didn't do this all myself....LOL SweetPea thinks she is a paper-weight! |
| Thanks to Quilting.About.com for the pattern used and, of course, SweetPea |
| Please let me know if this pattern was easy for you to follow along and to complete. I am interested in your comments and suggestions. This pattern brought to you on special request from one of our members. |
 |
 |