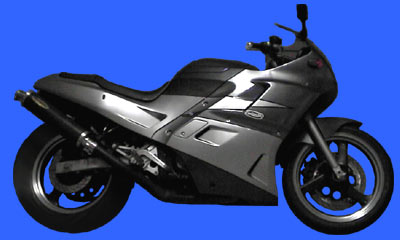
 Aftermarket Exhaust Cans.
 |
On making this modification, the once mild mannered Across
is suddenly transformed into a
teste-smashing brute-force machine, which effortlessly
trashes GSXR-1000s, ZZR-12s and hayabusas
with barely a quarter twist of the throttle.
OK, that's absolute crap, but at least it does sound
like a bigger bike.
Thanks to this can it has a beautiful throaty note when
it decelerates and cruises,
and it just wails like a F1 car at the stratospherically
high revs that the across is capable of.
The four cylinders produce a remarkably full note, and
if you didn't
know better, you would not believe it was a 250 cc engine.
It's a different bike to ride & it seems more powerful
(sorry, I don't have access to a dyno).
The note from the exhaust makes you feel as if you're
on a racetrack.
(That may or may not be such a good thing, depending
on your outlook!)
It seems to now rev to 17000 happily (but does strange
things at about 17.5  ). ).
Want to hear it?
These are both the same (bad) quality, but you can
get the idea.
Obviously choose the .ra file if your browser/plug
ins can handle it.
An exhaust shop did up the pipe which joins from where
I hack sawed off the original exhaust
(where would I be without my hacksaw?) through to the
can (for $70 - I was probably quite ripped off there).
The original exhaust mount on the bike connects to a
vertical plate
which is welded directly onto the new exhaust pipe section.
(more shots of the custom pipe
used to connect the can included below, 29/5/2002)
I don't think that this carbon fibre pipe was even meant
for a 250, but I don't think it's that critical for the across.
How "accurate" can stock exhausts remain when people
drill the baffles?
(You can drill the baffles of the across exhaust if you want more volume
& a possible increase in performance.
Check out the Krazy Ivan website for instructions (find it on this
site's link page).)
You can obtain a carbon pipe in the magnum brand especially
made for the across, it will set you back about $600
AUD retail.
I got this two brothers one from a wrecker for $175,
and it cleaned up pretty well.
(total cost with fitting = $245.00)
The magnum is about the same dimensions as this one,
but I think that it has a flange rather than slip-on
fitting.
(old pic prior to paintjob)
constrained 1024 x 768 pics
If you put on any aftermarket pipe, remember that it is going to get
a whole lot louder.
That can be a safety feature, but the downside is that it can also
alert those who you don't want to know about your presence and/or speed.
(I think that the noise
might have already saved my ass once, when some woman in a magna decided
to pull into my (left) lane just when I
was proceeding with the
right of way. She was in the right lane & stuck behind a right hand
turning vehicle, & impatient. She stopped just in time, and my emergency
braking left me right up next to her. If she had kept going, I would have
been forced up onto the footpath or worse. Onthe other side of the coin,
a friend with a CBR600 was recently spared a collision with a CBR250 as
he heard the other bike's can at the last minute, otherwise the guy would
have been on top of him.)
You can always bump it up a few gears to get it quieter if need be...
Also see the note on exhaust can
repacking.
Some more info on this fitting came up on the ezboard across forum;
Hey Michael,
Roughly where did you hack off the exhaust piping? Was it an option to
hack off just at the start of the
stock can and have your new can welded on without the intermediate piping?
Ivan.
Re: Ivan's question
Good question Ivan. Sorry I didn't respond to it straight away - I didn't
know it was there ! This
could be long...
I spent some time thinking about this before I decided to get the custom
pipe made up by a (pretty
ordinary) car exhaust place. I think that the way I did it was a personal
choice thing and there would be
a number of ways to do it.
The can came in two parts; one was the carbon can itself and the other
was a nice stainless pipe about
35cm long with a bend in it, designed to attach to the can & to the
cut off header section of the
exhaust. I didn't end up using this extension bit.
If you look at the exhaust, there is an obvious point for sawing, after
the 4 into 1 point, and before the
standard exhaust baffle & it's tapering (that fits to this section
of ( about 2") pipe). It's a clean section
directly under the foot peg, and it gives you about 15 cms or so to choose
from. I chose to cut about
an inch away from the baffle/taper end weld point. My theory at the time
was that this would be the
easiest point to get epoxy and a thick flat stainless clamp around to put
it on again for some unforseen
reason like if there were any probs (eg bike runs like an incurable dog)
or I wanted the carbon can off
for another bike.
Once the old exhaust was off, I found that the can couldn't fit straight
onto the sawn point that I
chose. It would stick out at a quite weird angle from the bike because
of the angle of the original pipe. If
you make up a second small pipe which comes off the original and then to
the can fitted in the "factory"
position, then there is a quite severe bend. What you could perhaps do
is cut the pipe further towards
the front of the bike & get a more progressive bend from a second custom
pipe, and then fit the can in
factory position. The bend that was needed at the cut point I chose would
still have been less restrictive
than stock exhaust, of course, but I personally didn't like it, and thought
that it might interfere with
exhaust flow. You might be able to get around this by getting the 4-1 side
bent a bit as well, but then
when you fit it in factory pos. you might run into other probs, such as
ground clearance with the wider
can. You also need to get the mount to hold the can out enough for clearance
from the swingarm. I
noticed some marks on my swingarm from the odd occasion when the stock
exhaust hadn't cleared;
don't ask me why -part of the last owners capers no doubt.
My can only clears the swingarm by maybe less than a cm., but it does clear
OK. The more it clears, the
more it sticks out, and I wanted it to look snug up against the bike &
nicely inline. Where I chose to put
the pipe, if it was to hit, it would hit the swingarm much higher in its
travel (swingarm has to move
heaps more to come near the exhaust). At the end of the day I preferred
my position to stock mainly
cause I think it looks better in this position and shows off the can more.
As you would know, heaps of
stock installations look this way and you can see a similar possy on many
bikes with aftermarket cans
(check out the twin brothers site, for eg).
The extension stainless steel pipe was actually a good bend but it was
too long, and put the exhaust
hanging about 3-4 inches past the rear of the bike. (Think it was on a
ZZR previously.) I didn't want
that, though some bikes do have them hanging out at the back this much.
I chose to get another piece
made up because I wanted to keep the stainless piece as it was (once again
for future unknown reasons
such as fitting it to a different bike) and I wanted the pipe to stay black
like the header side - it was a
colour choice that I thought just worked best with my bikes gun metal grey,
black, & silver colours. Mind
you I'll spray the bike sometime & that will all be out the door. The
stainless that comes on the twin
bros pipe is such a good quality grade that it would be a shame to throw
matt black over it.
So at the end of the day that's how I came to the decision - a bit of concern
for the practical, a bit for
looks.
Hope that this long rant helps!
cheers
michael
Due to more questions about the can fitment being
forwarded to me, here are some more pics on the pipe connection.
Here is also a copy of my text answer on the ezboard, re. the made
up pipe.
Re: Micheal...
--------------------------------------------------------------------------------
Got your email, didn't know whether to answer here or by email,
but will answer your post here anyway.
The long & short of it is to just go to any car exhaust place
and they can do you up a pipe. They have the standard 2" piping and all
of the pipe bending and slotting gear should make it easy. A bit of matt
black spray paint over the whole job and it's done. The best grade metal
they can provide for the pipe wouldn't hurt the longevity of your system.
Of course you have to get someone who is competent at their job and
can sus out the situation visually and make the bend right, so that your
can sits where you want it to, doesn't extend too far at the rear, and
doesn't hit the swingarm. Get a verbal guarantee and a clear quote before
they start. It cost me 75 but I reckon I was stung a little and many places
could do it a bit cheaper. (Didn't ask price first.)
The pipe they make up will need one bend in it at the appropriate
angle, with a tab (or 2? mine only has 1) welded to it that will bolt to
the frame where the old stock exhaust used to go. The end of the made up
pipe will need to be flared slightly and then slotted to fit over the remainder
of the standard exhaust where you cut the old exhaust off. Slotted so that
U-bolts can clamp down on the two pipes and hold them together. Slots should
not be so deep that they compromise the exhaust sealing, just enough length
to get the made up pipe gripping the header and exhaust can. I had to slot
the end of the can's slip on as well to grab the made up pipe.
My 2nd hand slip on 2 brothers pipe came with a neat stainless flat
clamp (instead of a u-bolt) which was made in europe somewhere. I used
it to bolt the can and the made up pipe together, so it looks neat. However
I haven't been able to find a place that supplies these yet. Thus I have
a conventional car exhaust U-bolt holding together the header pipe (where
it is cut, after it comes together to one 2" pipe of course) and the made
up pipe. The connection is at the bottom of the bike and so it isn't very
noticeable there, and it clears everything, but I want it gone as soon
as I can find another stainless clamp. Anyone know where to get them?
Sorry, it's not a very tech answer. It is a bit difficult to describe
this in words -so if it is still unclear check out my picks on the website.
Still a bit jet lagged & hung over so that doesn't help with being
coherent, either. Enough excuses. If they are not clear enough I'll post
another pic up there that is.
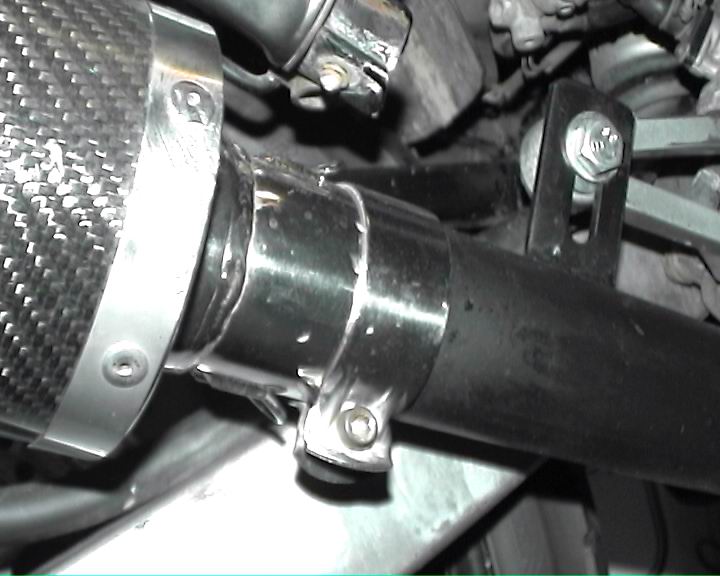
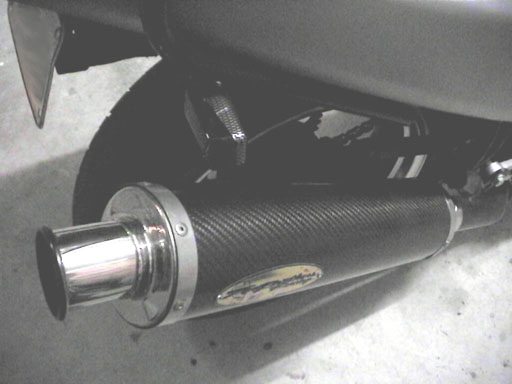
Shows the neat clamp that came with the
two brothers exhaust. Does anybody know where to get more of these?
(The reason for that question becomes
obvious in the next shot...)
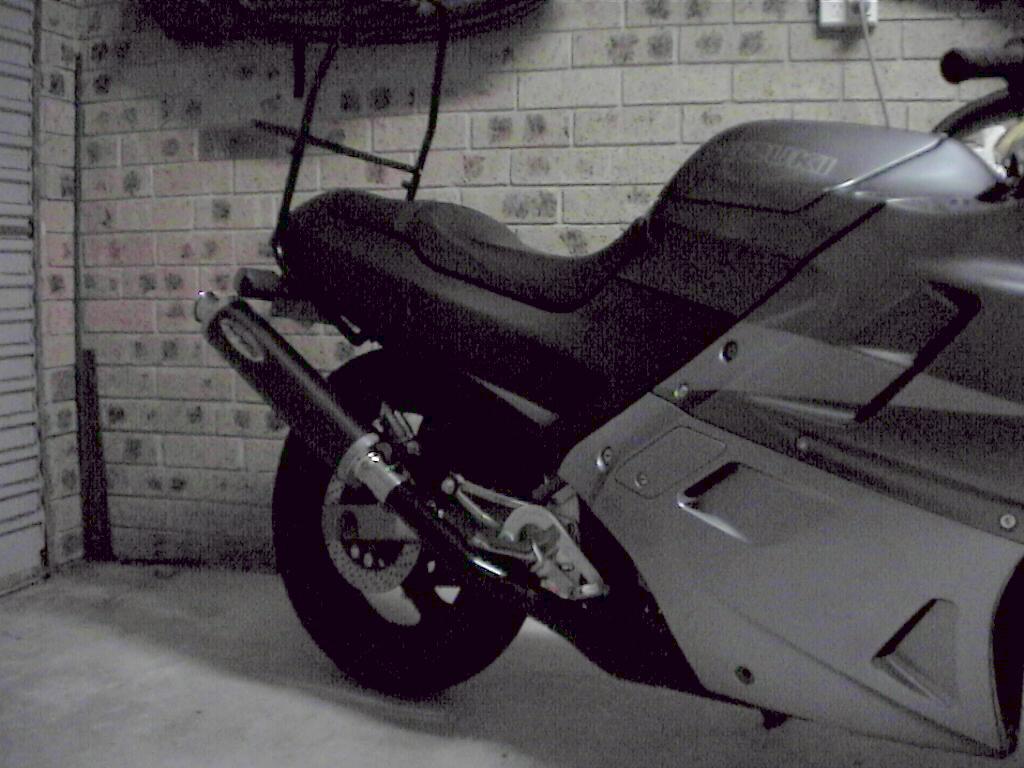
The tab that holds the made up pipe is
just welded directly to the pipe. The end of the slip on has been slotted
a little to
grab onto the made up pipe.
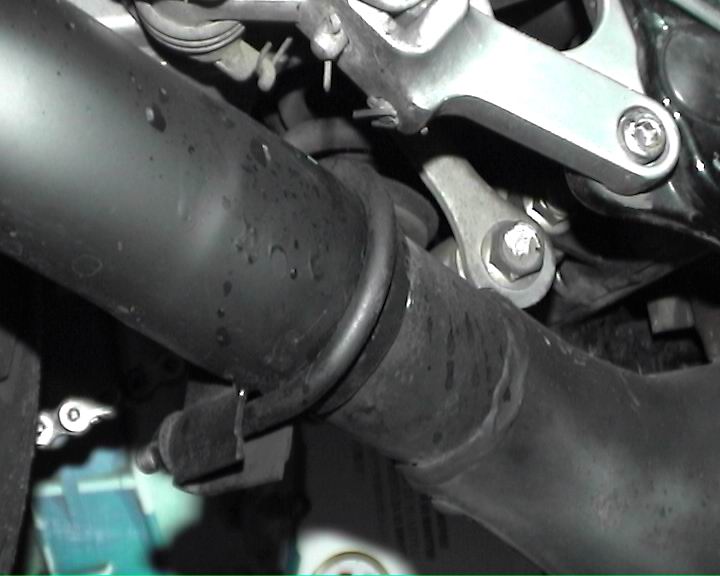
The header comes into one and is cut off
from the stock exhaust here.
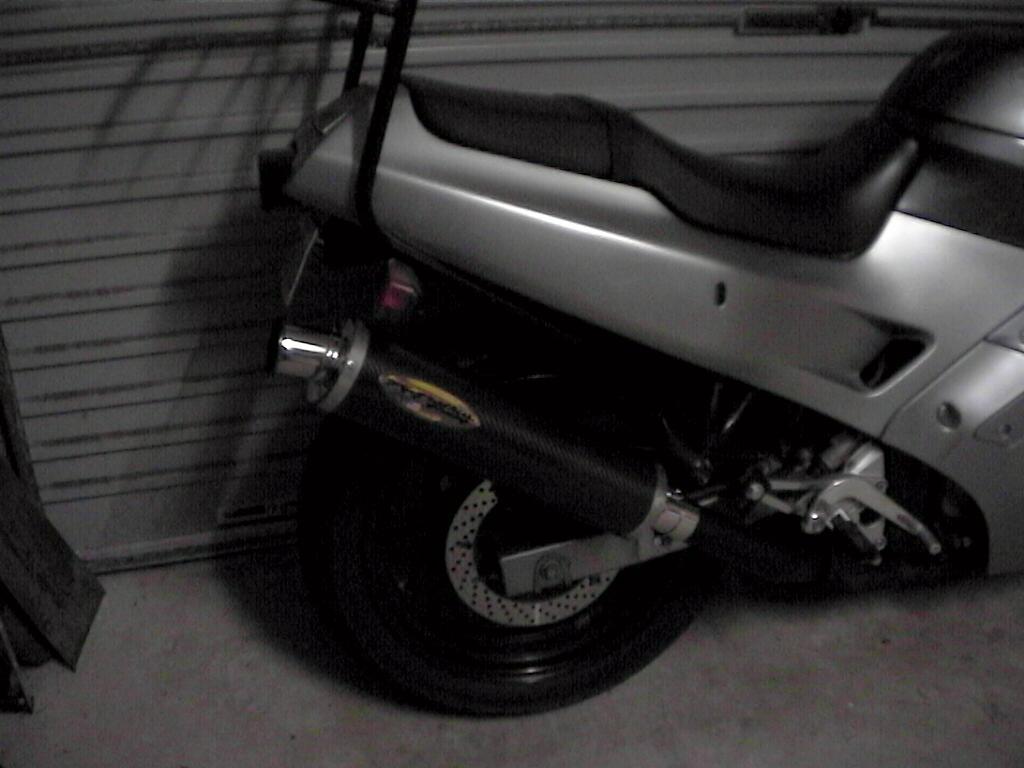
This is an old photo from when I had to
use an ugly car U-bolt to fix the made up pipe and
the header together. Here, the made up
pipe is slightly expanded to fit over the 2"
header pipe and slotted a little so the
U-Bolt can grab both pipes.
(The u-bolt has now been
replaced with a stock exhaust clamp from a CBR600 which is much neater.)
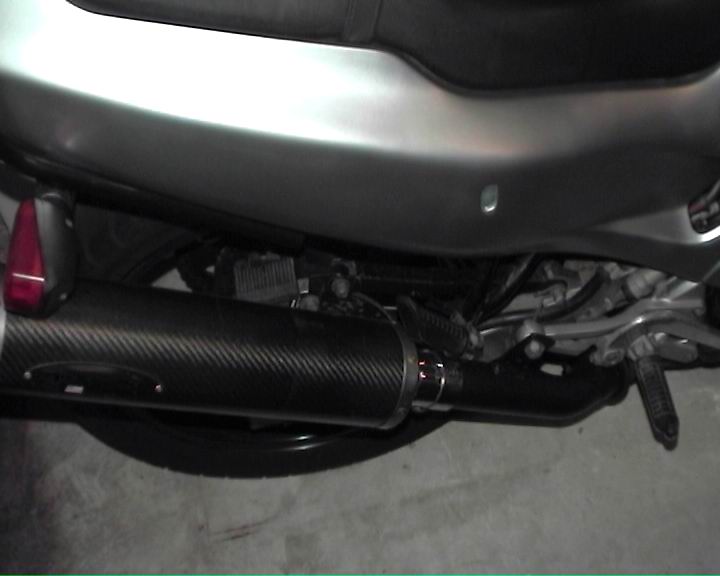
A view from above; make sure that the can
clears the swingarm
(especially the rear brake caliper line
bolt)
or that exhaust note might suddenly get
even louder!
|

 Made
in Sydney, Australia
Made
in Sydney, Australia