|
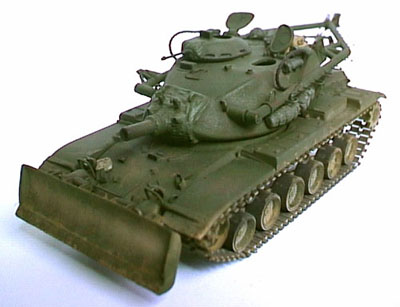
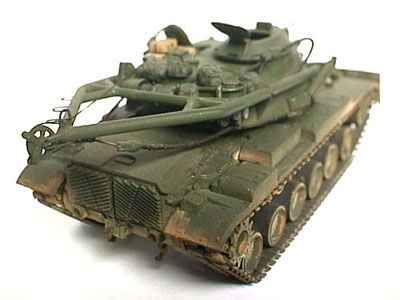
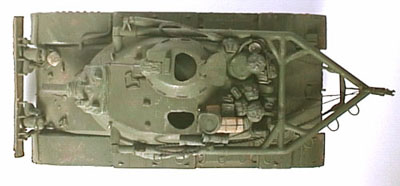
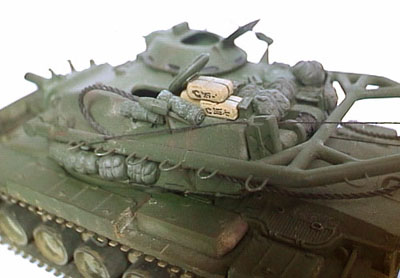
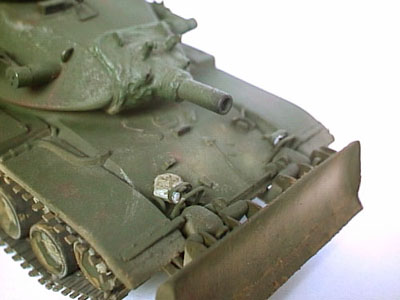
M-728 CEV About the vehicle: The M-728 is the Combat Engineer Vehicle built for the US army. Based on the M60 tanks, it features a short barreled demolition main gun, dozer blade and a tilting A-frame for lifting things. Why I built it: In the early 90's, there was an explosion of modern 1/72nd scale armor kits from ESCI. Among those was the M60 tank. I had a copy of Squadron publications M60 in action which had a segment on the M-728. I loved the look of the short barrel main gun, dozer blades and A-frame. So after carefully studying photos of the tank, I decided that this was a doable conversion. About the kit: I used ESCI's M60 kit as the basis for this conversion. It's a typical ESCI kit with very modest detailing, but the overall shape and look of the vehicle was good. Add-ons: Dozer Blade: the dozer blade was fully scratchbuilt from plastic sheet, plastic rod, wire and epoxy putty. The main reference for this was VP's M60 book. The main blade itself was formed by dipping plastic sheet in hot water and wrapping it around the barrel of a marker to get the curve shape. Not easy to do, the one I used here is from my second try. A-frame: made mostly from plastic rod. I cut up proper lengths and assembled it together, the joints were then smoothed out with milliput. Other details: the main gun was fashioned from plastic rod, the sleeve was plastic rod attached to a motor and the grooves filed in place. The mantlet cover was shaped from milliput. The commander and loader's hatch on the turret were drilled out and new ones made from sheet lead and plastic, then attached in the open position. The kit's lifting hooks were replaced with bent copper wire. Stowage: I sculpt my own rucksack and bedrolls using fimo polymer clay. C-rations were also fimo. Ammo cans are from Roco Painting: I airbrushed on a base coat of tamiya acrylic paint. Silver scuff marks were added, then a dark brown wash using oil paint thinned with turpentine. Drybrushing was done using oil paint and a final dusting of ground up chalk pastel was applied. Mud on the underside of the tank is a mixture of white glue, celluclay, a bit of sand and paint. Hindsight: there is a fair bit of details I could have added to improve the model (especially evident in the last photo), but I was quite pleased with how this one turned out. Now I trying to think up a diorama for this one, if you have any suggestions feel free to e-mail them to me. Just click below on the orange icon with letter sticking out from it. Well, that's about it for this one. Cheers! |
 |
 |
|
 |
|
 |
|
 |
