| Laser Show Computers & Equipment |
| This page contains info on the equipment I have accumulated (so far), including technical info on modification of the Amiga 1200 computer for use with laser show software, as well as some of the equipment I have constructed. |
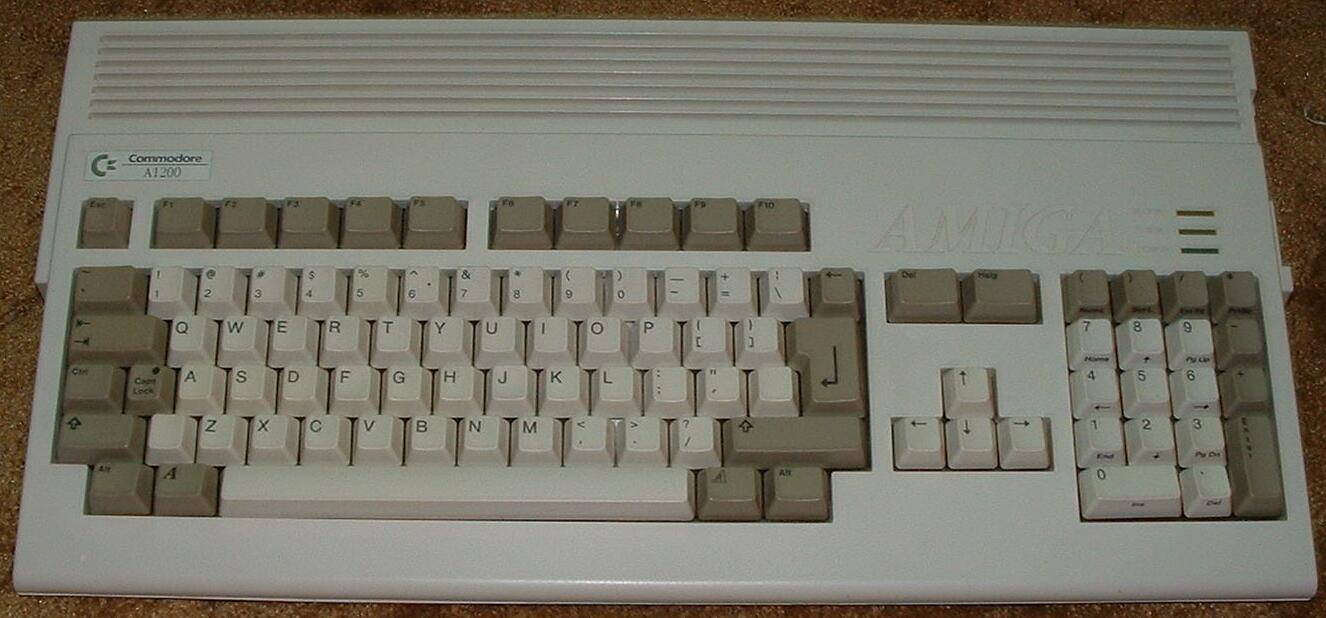
| Amiga 1200 (modified for DC output) |
 |
 |
| Top |
| Back |
| I know... you're thinking "why use such an old relic for your computer?". The reason is that there is some great free laser show software that was made to run on the Amiga 500 computer. The LSD1000 software by Pangolin, who released it to the public domain several years ago. I have found that it runs much better on the Amiga 1200! Pangolin still produces world class laser show software. The Amiga 1200 (and 500) computer does require some modification on the main board inside to be usable for laser shows. Click the link above for details on this. The A500 is covered elsewhere on the web, so my project pages will cover the Amiga 1200 only. |
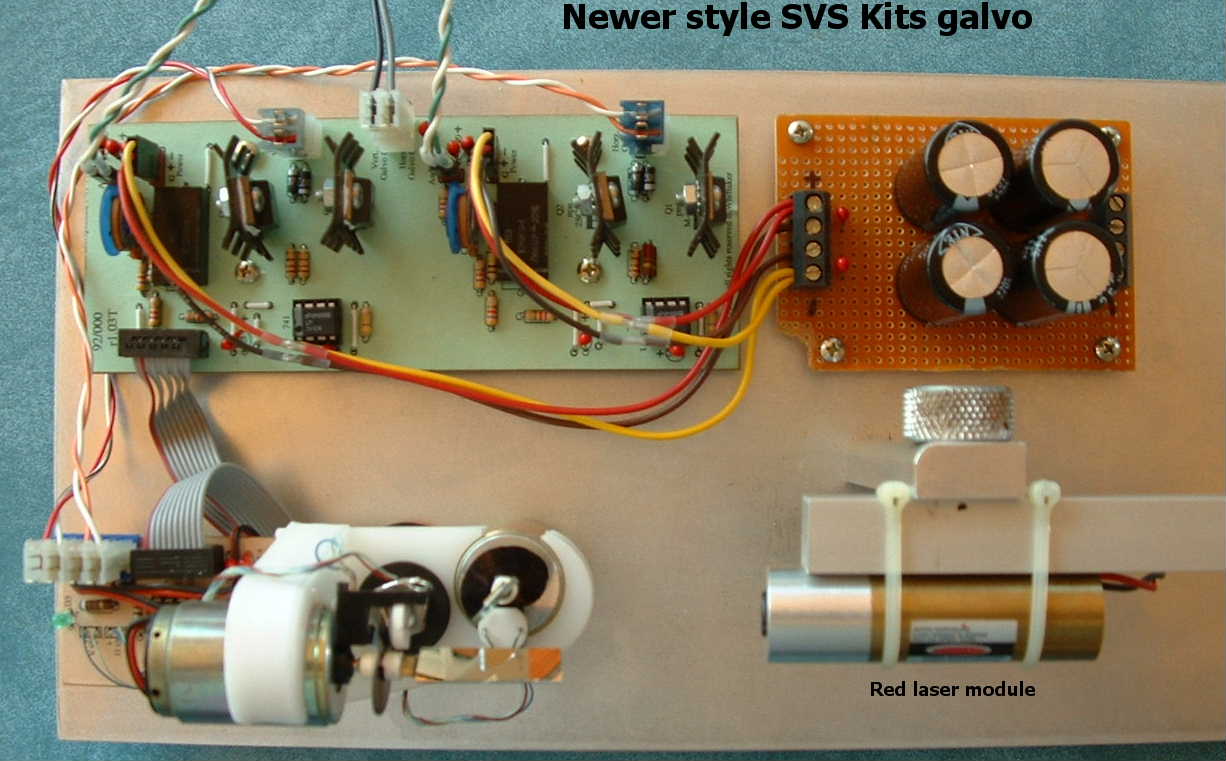
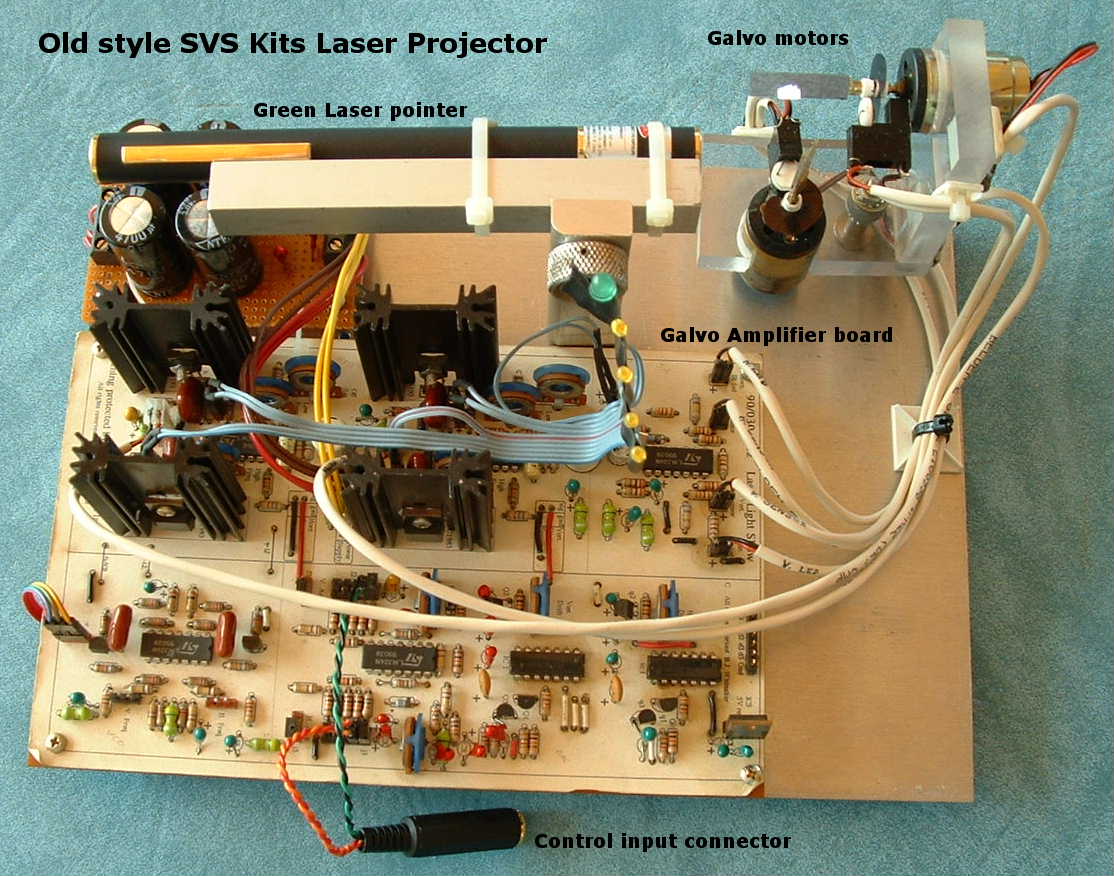
| The Amiga has to have something to control that will move the laser beam around. This is called a scanner. A basic scanner is made up of special galvanometers (called galvo's), and amplifiers. There are a number of different types of galvo's that can be used for this purpose, ranging in price from free ("scrap" components) to more than $1,000. More sophisticated scanners add a means to mechanically block the beam (for safety 'shutdown' of the beam) and means to modulate the beam for the purpose of blanking between images. This can be accomplished by mechanical or electrical means. My scanners (so far) only move the beam around. Any blanking is accomplished by modulating the laser power. This only works with diode lasers. Gas lasers must be modulated mechanically either with another galvo or with a crystal deflector, called an AOM (acousto-optical modulator). The two scanners shown to the right are both kit scanners from a company called SVS Kits. Unfortunately, this company is now either out of business or no longer making these kits. I found one of these (you guessed it) on ebay. The newer one was from SVS Kits. Click HERE for more info on galvo's, scanners, and projectors. |
 |
 |
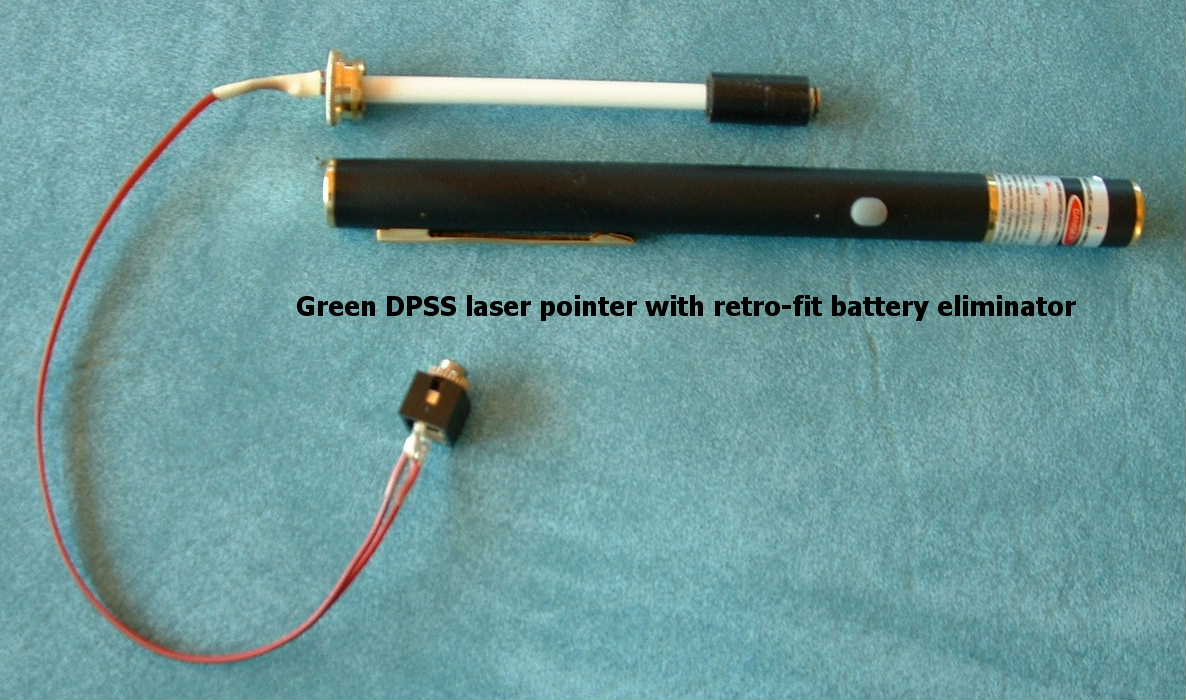
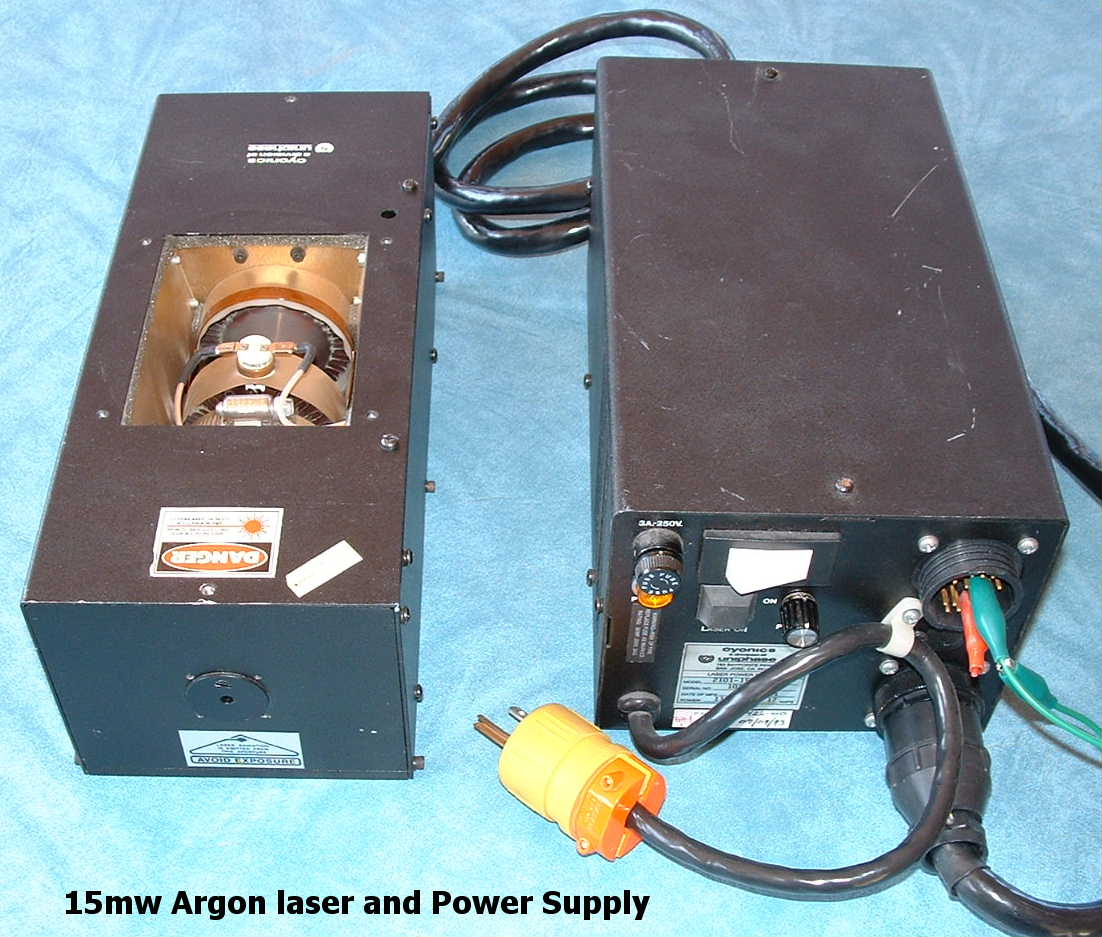
| Now a beam for the scanners... There's quite a variety of lasers to be had for use in a 'hobby' laser show. And, of course, just about every one I have was obtained via ebay. You must be careful when buying used lasers, and know what you are doing before bidding. A good place to go to learn is Sam Goldwasser's Laser FAQ. You'll find just about everything you want to know about lasers. To learn more about laser shows, try the Pangolin Resource guide page. Be sure to read the sections on laser safety! To the left are a few of the lasers I have used for my laser shows. The upper pix is of a green 5mW laser pointer that I modified for external power. The lower pix is of an argon gas laser and power supply, both of which I obtained via ebay. This Argon laser's optics are 'tuned' for 488nm which is a light blue beam. These are a few of the lasers I use. I have modified all my diode laser pointers for external power use. Most of them are the cheap 5 mW 'bullet' type pointers and just have wires soldered to the contact spring inside and the screw in cap. I have standard 1/8" audio jacks connected to the wires so I can use audio cables to connect the lasers to a power distrubution and switching console I built. Coming up with and building all this stuff is a big part of the fun of this hobby. Click HERE to go to the Lasers page. |
 |
 |
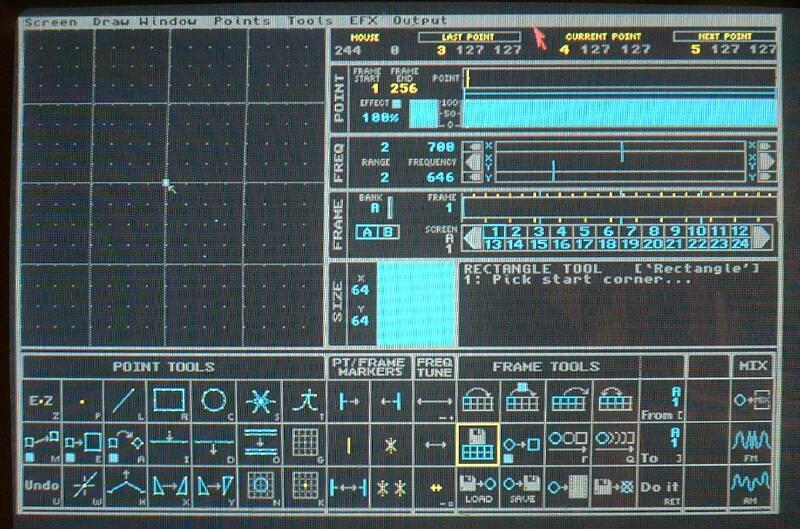
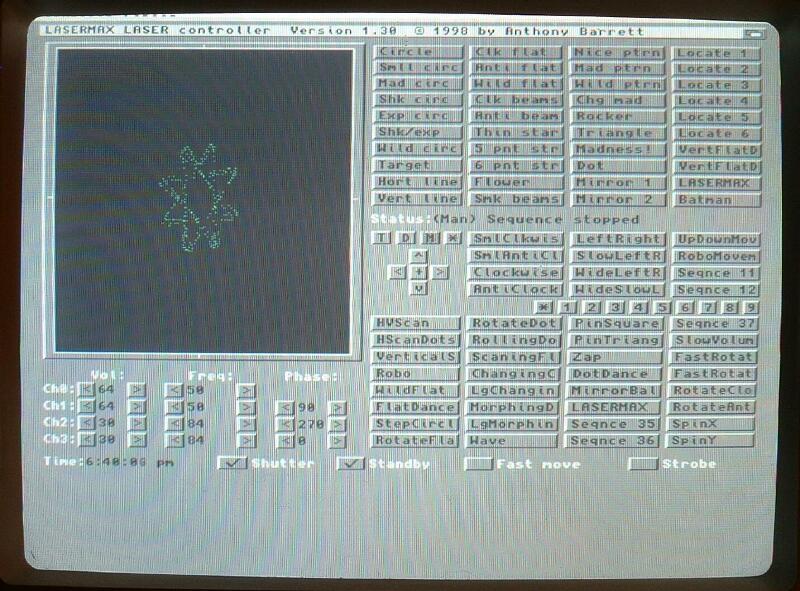
| What's left... How about something to run all this and make beams into art? There are many options, but only a few that are in the hobby relm. Since we are using the Amiga, let's look at the two software packages I have used. The first is Pangolin's entry into the commercial lasershow software market (1990), LSD1000. It's not up to today's standards, but never having used the pricey software of today, it seems great to me. I takes a bit of time to learn, but once you figure it out, you'll find it quite capable. And the best thing of all... it's free! Another program I've used on the Amiga is called LaserMax. It has more in the way of canned lissajous patterns that are easily selected manually in real time. You can select them in time with music while you're doing a show. You can do that with LSD1000 also, but to me it seems easier with LaserMax, and you can tweek and play with the parameters of any of the patterns. It is capable of quite a bit more, including selecting pre arranged sequences. LaserMax was a shareware program but has since been released to public domain by the author. It took me a while to finally get it to work, but it was worth the effort. I had to switch the Amiga's video mode to PAL to get it to display properly. Now you know what it took me quite a while to figure out. |
 |
 |
| LSD1000 |
| Lasermax |
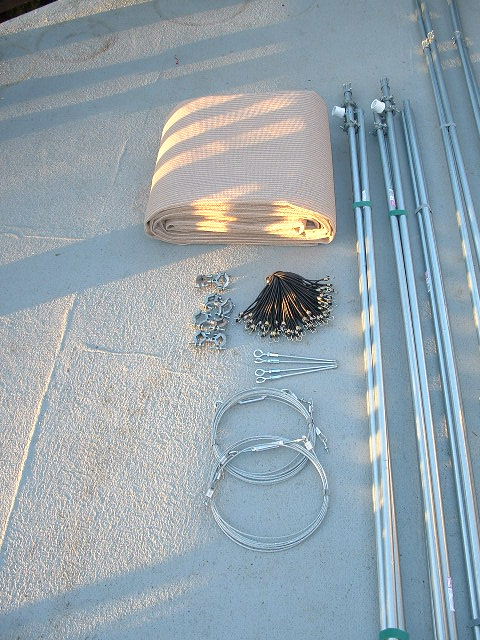
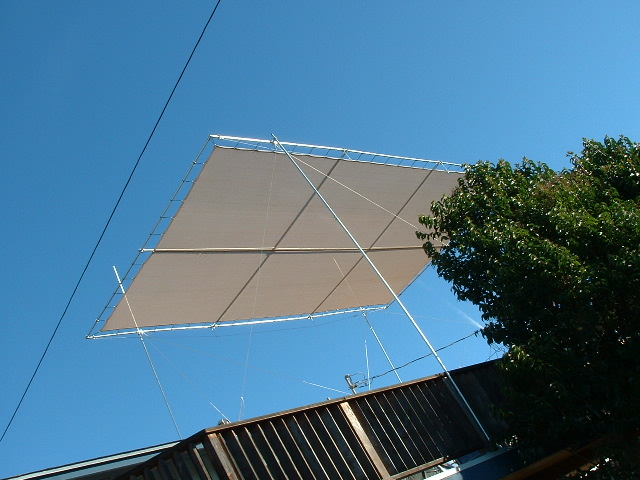
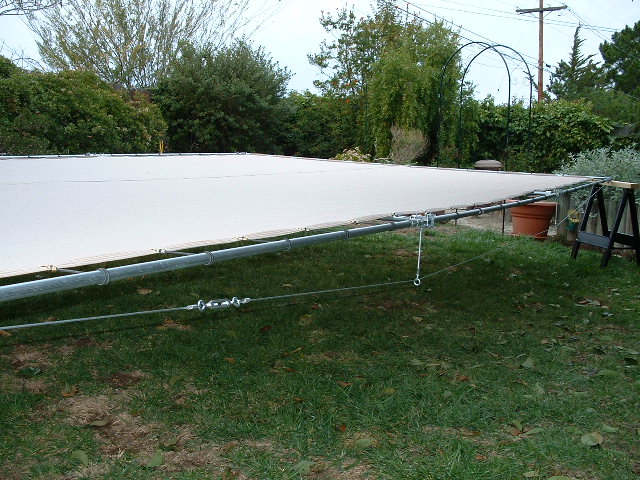
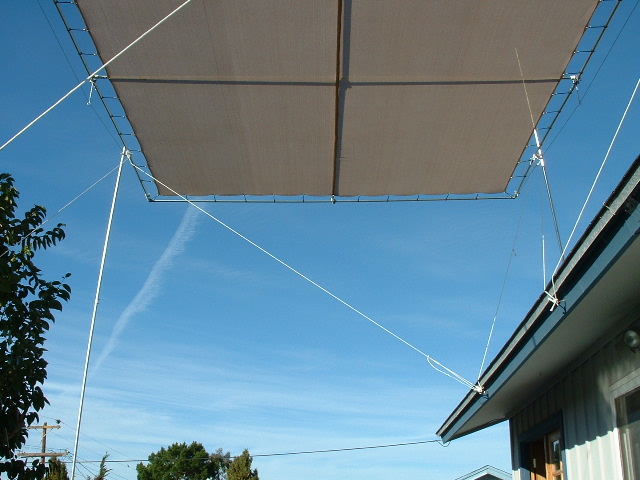
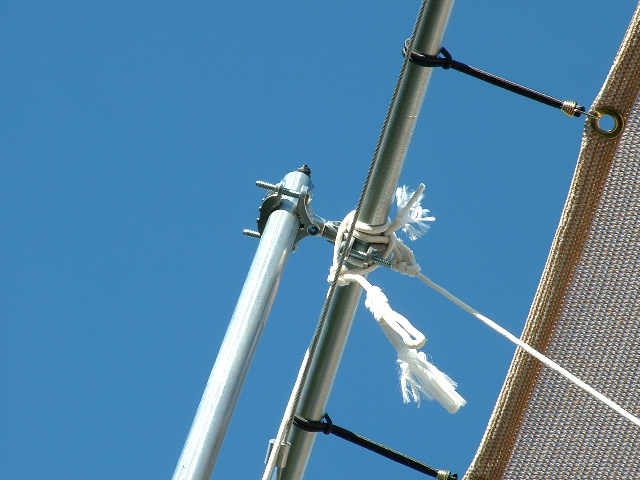
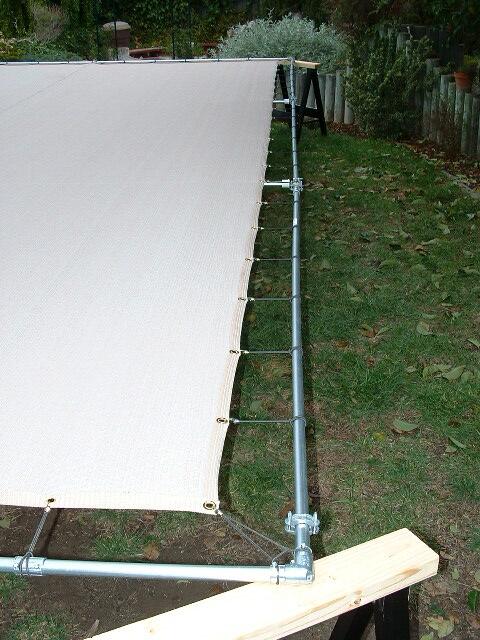
| Oh yea... there is one more thing... It helps to have something to project the lasers onto. I have used various surfaces as screens in the past, such as silver-gray tarps or white sheets, but my most recent screen is my favorite so far. It is made out of landscaping shade cloth, like the stuff you see shading the plant area at home dopot or similar places, except I use the lighter shades of cloth instead of the black. Of course black would not reflect the light very well at all, so the lighter shade cloth is the natural choice. I used the light (almost white) shade of brown. The cloth comes in 6' wide rolls, so I bought two 25' long strips and had them sowed together lengthwise at an upholstery shop to make a 12' X 25' screen size. The frame it is attached to is made from steel EMT conduit that is attached together with conduit corners and couplers. Since it is so long, I had to add extra support along the length on each side (see Tension Cable Detail picture). I used clamps on each end and stretched some 1/8" cable through two dropped (about 8") eye loops. I used a turn buckle on each side to tension the cable and take the droop out of the length on each side. It worked quite well. To keep the screen tight, I used 1/8" bungie cord to connect the frame to the screen cloth, to which I had installed over 100 eyelets along the folded over edge. It kept the screen almost trampoline tight! To suspend the screen over my deck I used four legs also made of EMT conduit, but I used 3/4" at the bottom and 1/2" inside it at the top, so I could adjust the hight of the screen. Finally, the whole thing was secured using rope to the corners. In hindsight, I will never try suspending it above my deck again. It was much to precarious and dangerous getting it into position. Next time the screen is used it will be set up like a movie screen in front of the audience instead of above them. The whole thing is easily stored in a small space though, which is one thing I wanted to accomplish with this design. It takes a couple of hours to set up. |
 |
 |
 |
 |
 |
 |
| Screen Kit |
| Screen over deck |
| Tension cable detail |
| Bungee detail |
| Support pole detail |
| The ropes |