| Olwen Pen Aur's Pottery Page |
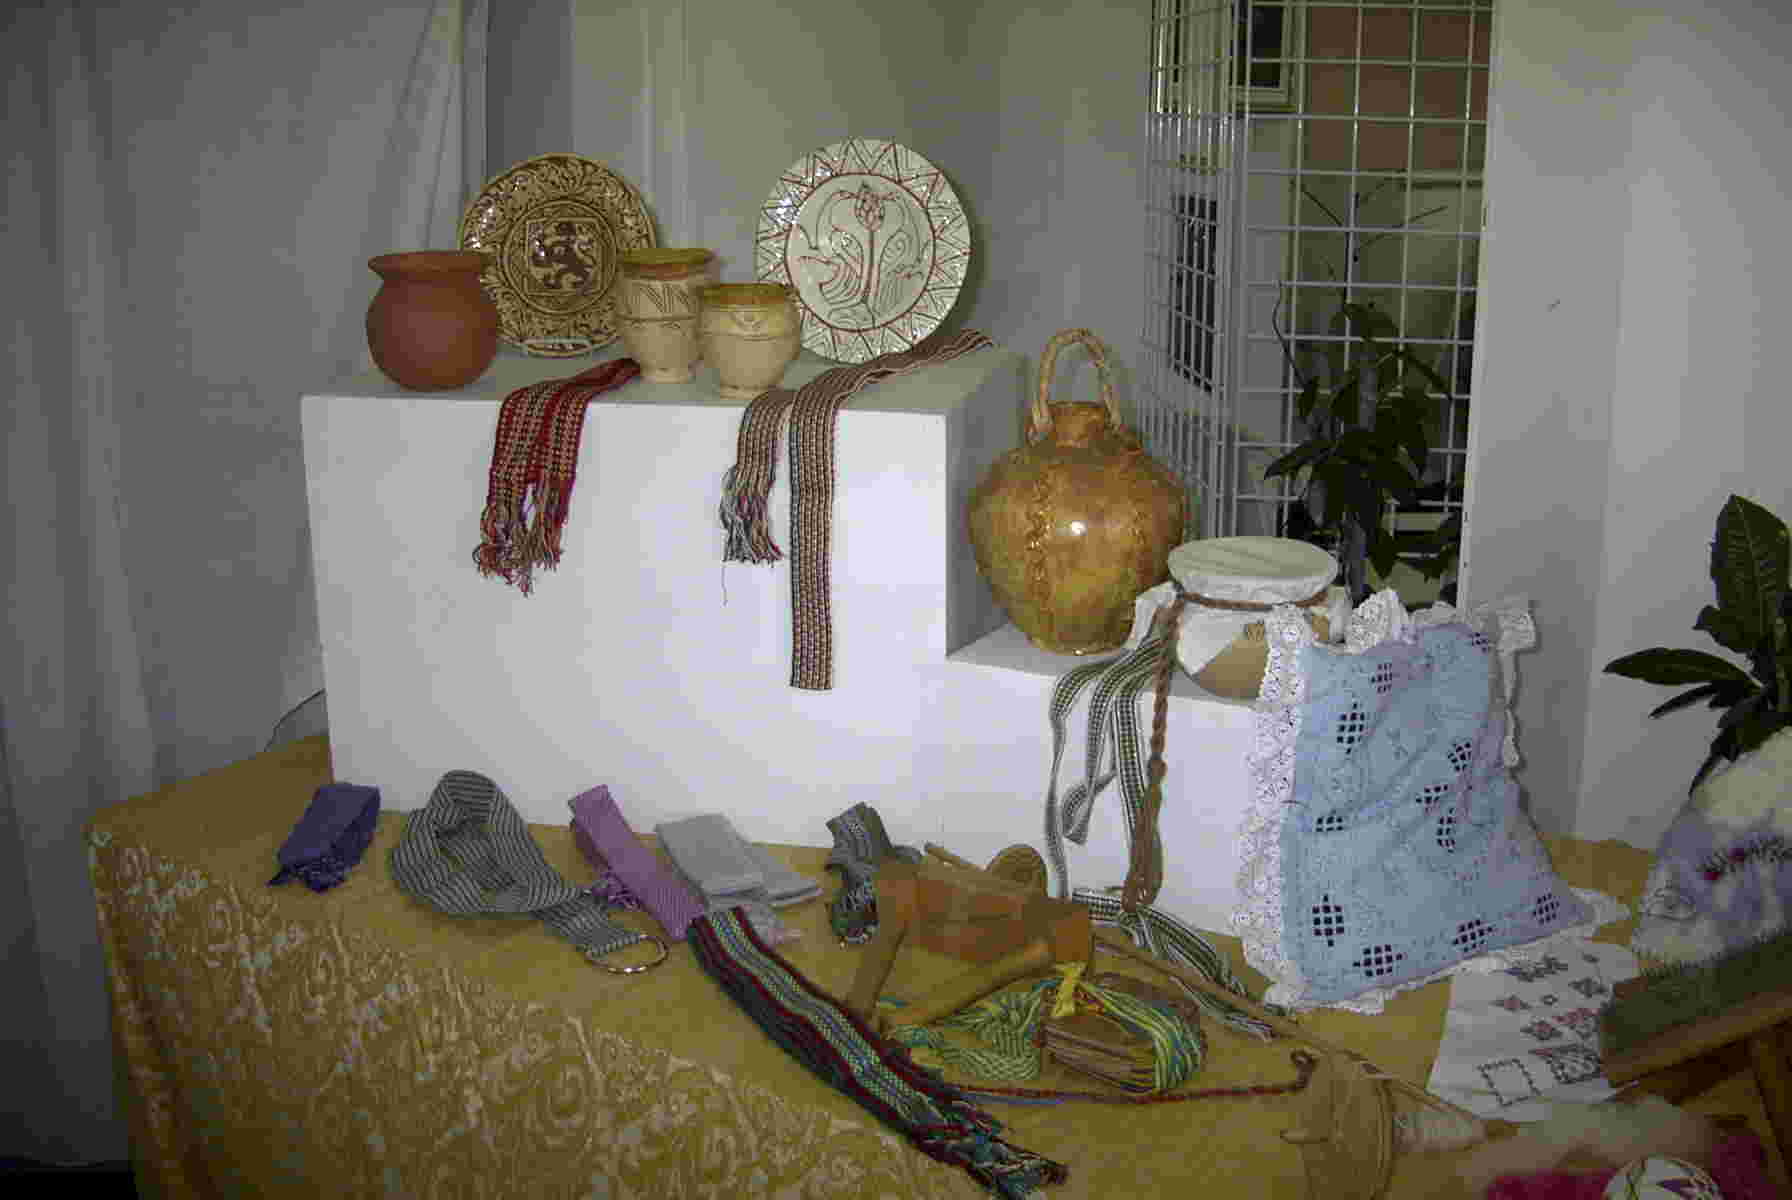
| Medieval Pottery I just finished putting together a two-hour whirlwind survey of medieval pottery. I don't want to spend that much time and space here on it. In most of Europe, pottery was considered utilitarian, and nothing more. Pottery was used for storing and cooking food and beverages, and for food preparation in the kitchen. It was also used for shipping foodstuffs, because it could be made fairly thick, so it wasn't as breakable as glass. But it was cheap, so if it only lasted one trip, it was no matter. Poor people ate off wood and drank out of wood, bone or antler cups, or leather wineskins. Wealthier people ate off metal plates and drank out of metal and sometimes glass. The one thing pottery was used for was jugs, because wine and beer don't taste very good stored in metal. And glass was expensive and very fragile. Pottery jugs also kept the wine slightly cooler due to transpiration, so this was also desirable. So we find many jugs and pitchers throughout the Middle Ages. Potters could often produce them in precise sizes to use as measures. However, in the Middle East, Spain and North Africa, Muslims were forbidden to use metal plates and bowls. So pottery was developed into a fine art, and was highly prized. Byzantine potters, poised between the Christian world of Europe and the Islamic world, were able to see and copy styles and techniques from both traditions. With the Crusades, Europeans brought home pottery as souvenirs. Some was made by Muslim potters, while some was made by Chinese potters. Chinese porcelain in particular was highly prized. The thin walls and pure white colour of porcelain vessels were much admired. From this time on, the history of European pottery becomes largely the story of European potters trying to steal or imitate the styles and secrets of Chinese porcelain or Islamic pottery |
| My Pottery I do several different styles of pottery: sculpture (usually figures or faces), plates and bowls using leaves pressed into the surface, sgraffito (more on that below), and early medieval style pottery. All of my pottery is hand-built, meaning I don't use a potter's wheel or slip-molds. All of my pots are formed using my hands, and occasionally slump or drape molds. A slump mold is a form that the clay is allowed to slump into, such as the inside of a bowl. I make my own slump molds using thick clay that I fire once to an earthenware temperature. The clay is still porous and absorbs moisture, so the clay doesn't stick to the mold. The mold also helps dry the clay out on the underside, which helps dry it evenly on all surfaces. A drape mold is the reverse of a slump mold. Where a slump mold is the inside surface, a drape mold is the outside surface, which the clay drapes over. The molds I've made work equally well as slump molds or drape molds: use the inside for one and the outside for another. I mainly use the molds for plates, but I do use smaller bowl-shaped molds to support the bottoms of large pots while they dry. This keeps the bottom rounded rather than letting it flatten out under the weight of the wet pot. There are three main techniques used in hand-building: coils, slabs and pinching. Coils are snakes or worms of rolled clay fastened together then smoothed out. Slabs are flat pieces of clay that are allowed to harden slightly so they will support their own weight. They can be cut into shapes and fastened together. I mainly pinch pots. This is a lot easier to do than it is to describe, and it's a lot harder to do well than it might sound. The clay is rolled into a round ball, then you press your thumb into it until it's almost to the other end of the ball. Then you start bending your thumb in different directions to make the hole larger. Once you've made enough room for your thumb to work, you start pulling the clay up the sides of the inside of the ball toward the rim.You thin the walls of the pot out as you go up. There are a few tricks. One is that even with a small pot, by the time you've got it high enough up to work the rim, you won't be able to reach the base with your thumb. So you have to get the base as thin as you're going to want it before you start working up toward the rim. The other is to control the rim. It will want to either cave in, or flop out and get too big and flabby. |
| Anglo-Saxon Pottery There are very few examples of British (Celtic, as opposed to English, or Anglo-Saxon) pottery from after the Romans left Britain. The closest I've been able to get is Anglo-Saxon pottery. And it suits my methods of working. When the Angles and Saxons left the Continent and moved into Britain, they generally left all of their best potters behind. Potters on the Continent were far superior to potters in Britain for several centuries. Where Anglo-Saxon pottters in Europe were using a fast wheel (what we would call a potter's wheel), English potters were still pinching pots or making them from coils, and possibly using a slow wheel only for decorating them. The main forms of pottery we find today from this period are funerary urns and pots for food storage and cooking. Early cooking pots are quite small. They get larger later on, for reasons we don't understand. The Anglo-Saxons cremated their dead, then buried their ashes and bones in urns. These are the best-made pieces of pottery most settlements had. They were decorated in a number of ways, almost all abstract. Mainly, they were incised using a sharp instrument (probably bone. Wood leaves a raised edge when it cuts through clay, and this is a nuisance. It means going back over your work and cleaning it, making it a two-stage process. Bone cuts through smoothly). The potter also used stamps made of carved bone. And they would push the walls of the pot either in or out in places to create bosses. Some of these urns are wild and creative in their use of decoration. I make small drinking beakers out of clay. They're pinched, as the Anglo-Saxons would have done, with a swollen belly and flared lip. I incise decoration using a metal dental tool. Their pots were unglazed, or had natural glazes where ashes fell on the outside of the pots. I glaze mine on the inside, for hygienic reasons. I use either a clear or a green-gold commercial glaze. I also make spouted pitchers based on a style used in England before the 10th century. Early jugs had cylindrical spouts added to them, unlike hand-made pitchers today which have a pulled lip along the top rim. These early pitchers also had small handles at the top, usually two or three. Three was most common. But where there are only two, they're on the sides of the jug, not at the back as we would expect. After I thought about this for a while, I realized that the jugs must have had rope or wicker handles that have long ago rotted away. They were designed to be lifted up, then tipped ("pitched", hence, possibly, the word "pitcher") to pour, as a bucket it tipped to pour. I make my own wicker handles. The great thing about this design (and I can take no credit for it. Not my idea, I just recognized a good one when I saw it!) is that there's always air pressure going in the top as the liquid pours out the spout. So it's a steady even pour, with none of that "glug glug" you get with bottles. I generally glaze these, inside and out, with the same green-gold glaze. It's the closest thing I can find in a commercial glaze to the lead glaze early medieval potters used. Their glaze was just powdered galena (lead ore) sifted onto thes urface of the damp pot. Well, I'm sorry, authenticity be damned, I'm not about to shake powdered lead all over my workshop just to be authentic. So I use non-lead glazes. The best way to describe the colour of their lead glazes is "snot green." It's slimy and glossy, but in places it's runny or matte, and it ranges from bright yellow through gold to green. They glazed pots only on the outside. I glaze mine inside as well, for reasons of hygiene. To see some of my Anglo-Saxon and Anglo-Norman style pottery, click here. |
| Sgraffito This has become my big love in pottery. The technique of sgraffito is fairly simple, although painstaking. You make a pot out of one colour of clay, let it dry out a bit, then paint it with a layer or two of a different colour of clay. You let that set up until it's what potters call "leather hard." Then you cut through the top layer of clay in a design. The contrast between the painted layer and the pot itself is what creates the decoration. This technique has been used many times throughout history, but it goes in and out of fashion. It hasn't been used extensively in European pottery since the 17th century. Byzantine potters used sgraffito to decorate their pots, using designs they saw in nature or copied from Islamic pottery. Spanish potters were also using sgraffito. When the Moors were finally conquered and forced to convert to Christianity or leave Spain, Spanish potters fled to Italy. Meanwhile, potters in Northern Italy were already using sgraffito decoration. In southern Italy, the technique used for decoration was Maiolica, which is a method in which coloured minerals are painted onto a white tin glaze. It's very difficult to get the firing temperatures and times exactly right, and coloured clays don't look the same unfired as they do fired, so this is both an art and a science. Maiolica, which is the same tradition as most European pottery, is much prized and has been collected and studied extensively by historians and art lovers. Sgraffito, on the other hand, is relatively unknown and unstudied. But it photographs really well, so you can find lots of pictures of it. Just very little information about it. We do know that potters were as highly regarded in the Renaissance as painters. Many famous painters designed pottery, and many potters were also painters. Pottery had the advantage over painting of being portable (oil paints were just being invented, so painting was mostly still on walls) and permanent. Pottery was purchased as a pure luxury item. There are prints from the time of people eating a gourmet meal off of metal plates, while they admire the expensive pottery displayed on a linen-draped table in the middle of the room. One reason Italian potters did sgraffito was that the only white clay they had wasn't strong enough to make plates out of. But there they are, trying to get that white surface to decorate on, just like porcelain. So they made their plates and bowls from their good old stand-by red clay, and coated it with white slip (liquid clay) to get the prized white ground to decorate. I do mainly sgraffito plates. It's easiest to do it on a flat surface rather than on a curved surface. And it shows off the workmanship better. I use mainly red clay for the pot and off-white for the surface, but occasionally I reverse it. I use designs from Renaissance and other sources, but have started branching out on my own. I usually fire the plates 3 times: once to bisque temperature, then I glaze the underside and fire the plate to Cone 6, and finally, I glaze it with a commercial food-safe lead glaze and fire it again to Cone 03. Potters in the Renaissance glazed their sgraffito with lead glazes. These would have been the same as the method described above, powdered galena sifted onto the piece. Again, I'm not about to subject myself to that level of proven danger in materials. While it's not as authentic, I buy lead glazes. In this case, nothing can give you the same brilliant transparency that a lead glaze can. But there are lead glazes that are food-safe when fired hot enough (above Cone 04) to burn off the lead. To see examples of my sgraffito pottery in the Renaissance and Byzantine styles, please click here. |
| Olwen's Art Page |
| Olwen's Medieval History Page |
| Olwen's Home Page |
| Original text copyright 2001 JoAnn Turner. |
 |
| Anglo-Saxon Pottery Page |
| Sgraffito page |
| Thoughts on Medieval Pottery |