I initially made covers out of an old striped bedspread. It was very medieval fabric in orange, black and gold stripes (orange is a grossly underused colour in the SCA, considering how incredibly easy it ts to obtain with natural dyes) with inserts of brocaded scrolls. Okay, so a certain Baron of Lions Gate did ask me where the ottoman and TV remote were, because they looked so much like tacky living room furniture. But they were darn fine, in my opinion. And why do we assume people in the Middle Ages did NOT have tacky furniture?
So I made another set. It wasn't so much the tackiness that prompted me to make new ones, as that we found some really nice fabric on sale, and that the orange ones developed large holes where the stress of wear and tear showed.. So I made the second set very differently, and have been extremely pleased with the results. This is how I did it.
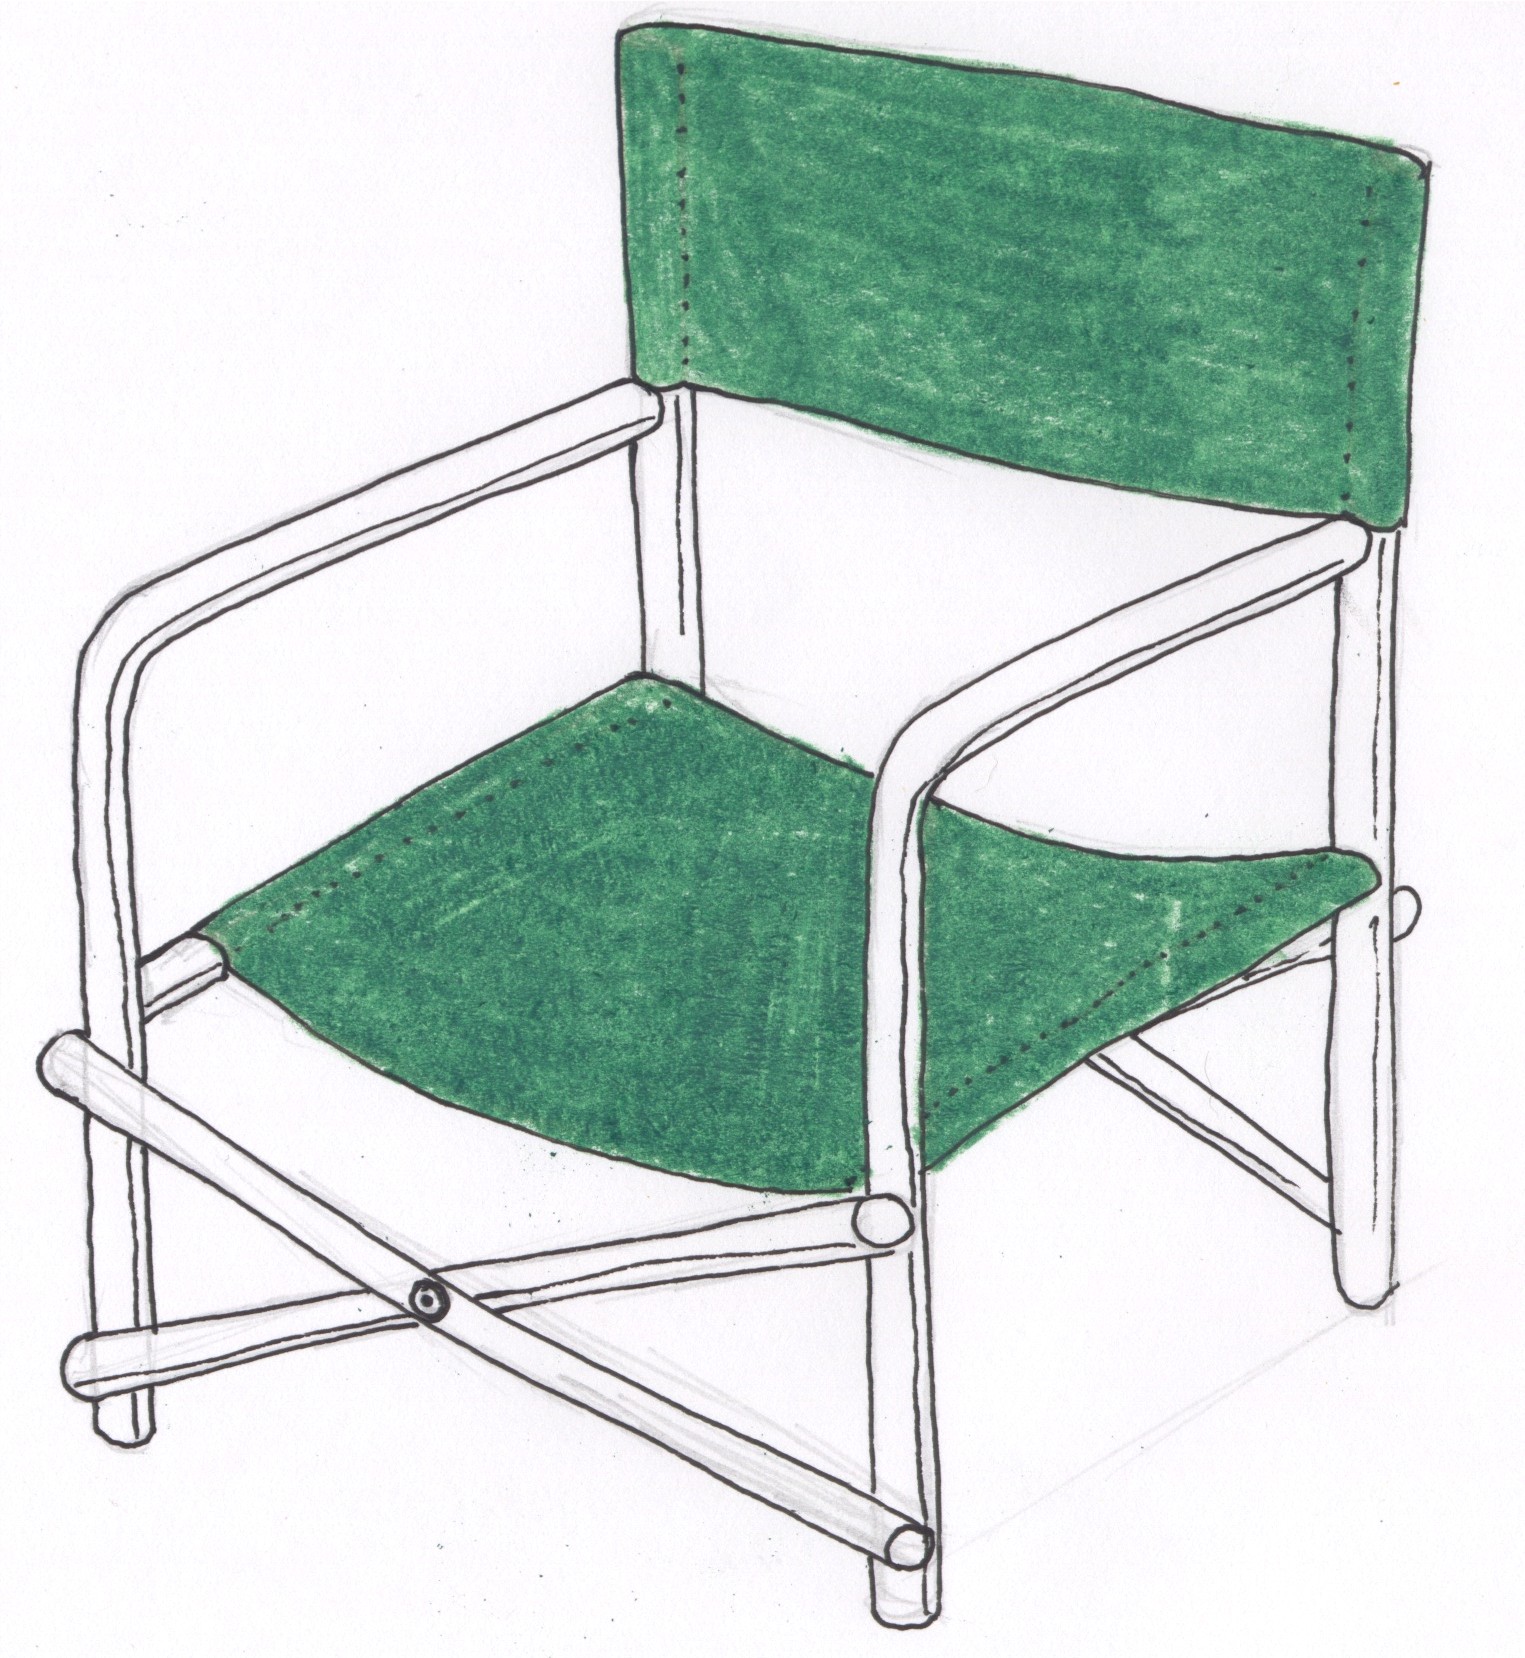
What I discovered from my first set of chair covers is that if you make the back and seat in one piece, every time you sit down you put enormous stress on the UPPER corners of the back. This is where mine wore out.
Possibly a hard chair wouldn't do this, but I suspect that the flexibility of the seat on these chairs allows the seat to go down a lot farther with weight on it than with a rigid chair, thus putting stress on the fabric joining the seat to the uppermost rigid part of the structure.
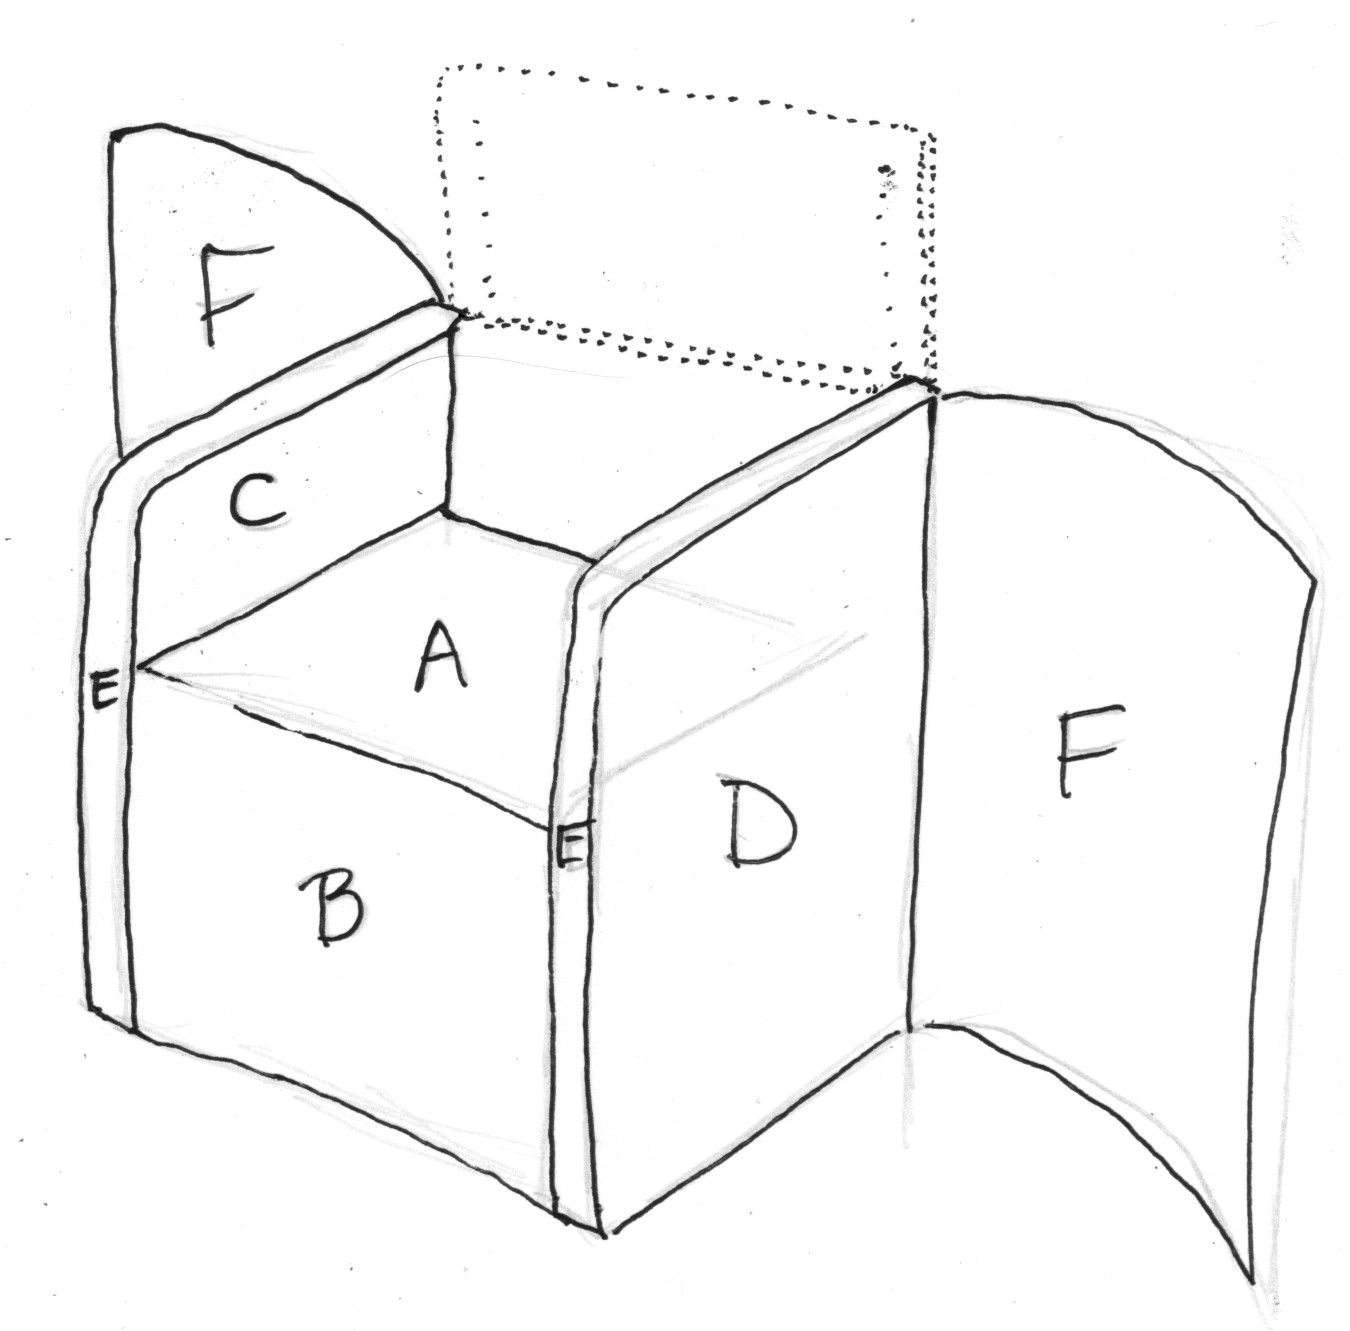
A is the seat
B from seat front to floor
A and B can be cut as one piece, or as two and seamed together, depending on your fabric.
C inside arm (cut 2) - match curve of metal arm
D outside arm from top of arm to floor (cut 2) - match curve of metal arm
E 2 1/2 inch wide strip
F back flaps that cover from side to side of chair (cut two)
Make sure to allow at least 1/2 inch seam allowance on each edge.
For the back portion, you need still more of E the 2 1/2 inch wide strip, so cut lots of strips. You may want to use a fabric that contrasts or complements your main fabric, rather than the same fabric.
G inside or front back from top of chair to about 6 inches below seat
H Outside back from top of chair to floor
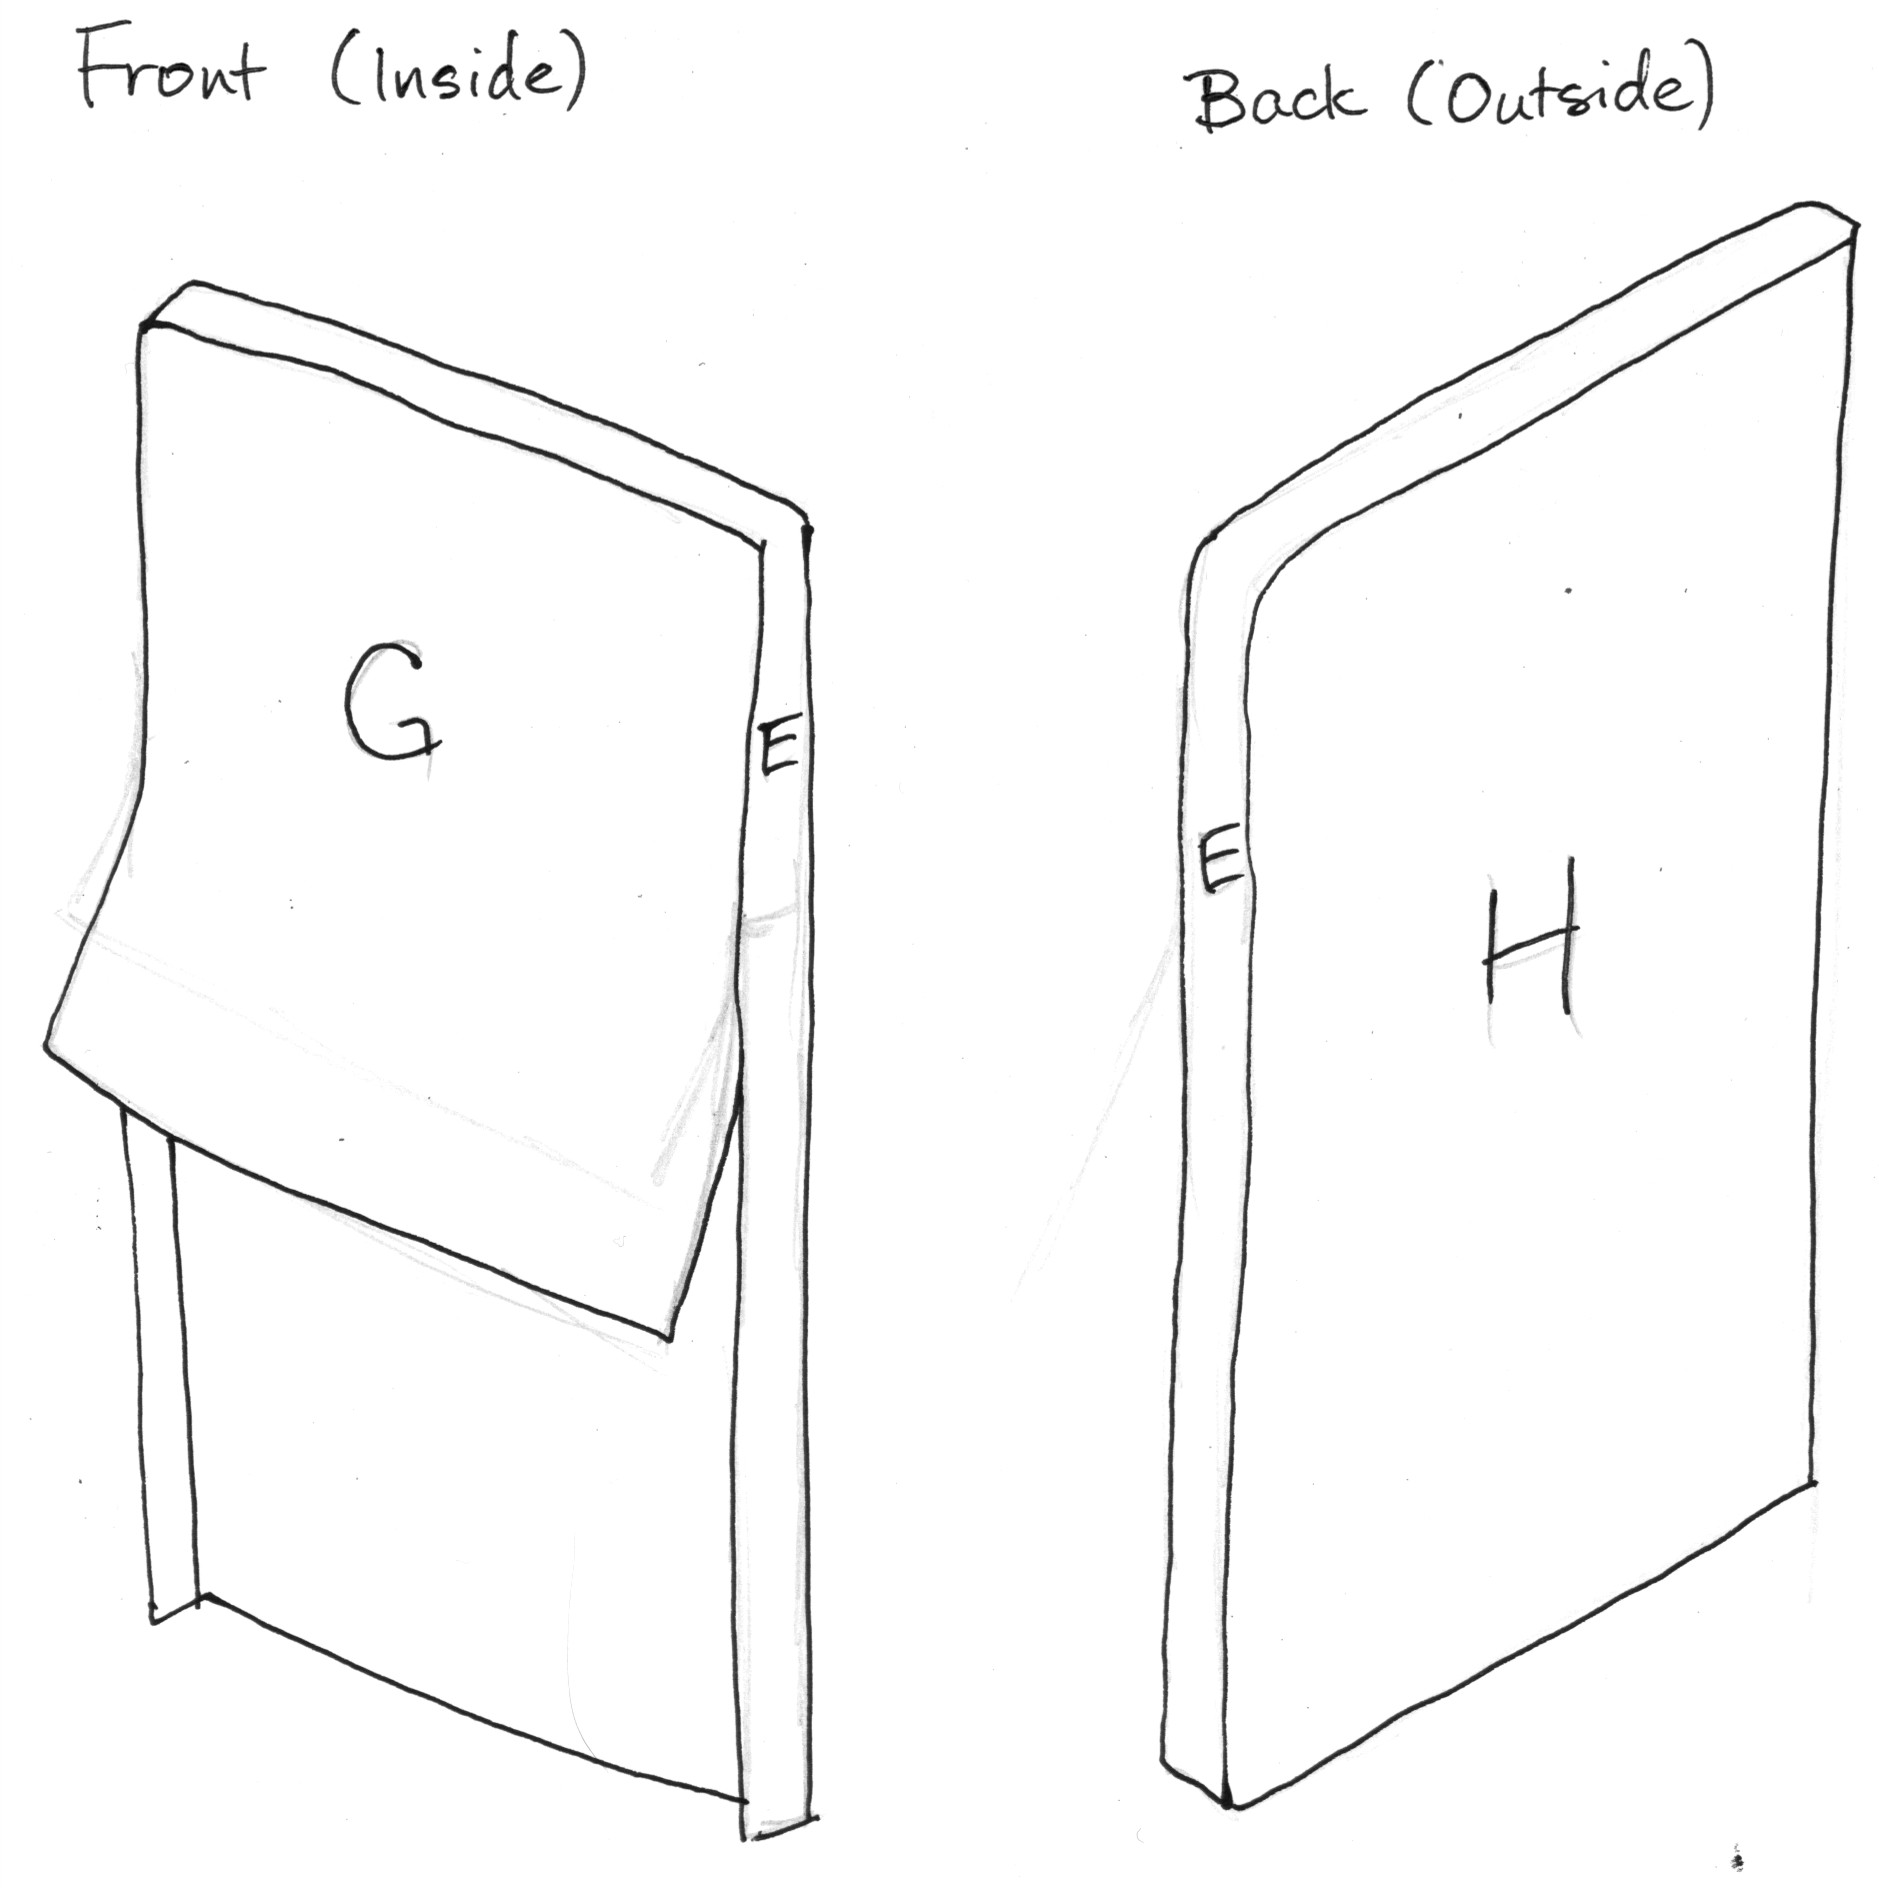
I found that adding the extra strip of fabric helps keep the whole thing in place. It also makes the chairs look more solid, as if they might be made of wood or some other plausibly medieval material.
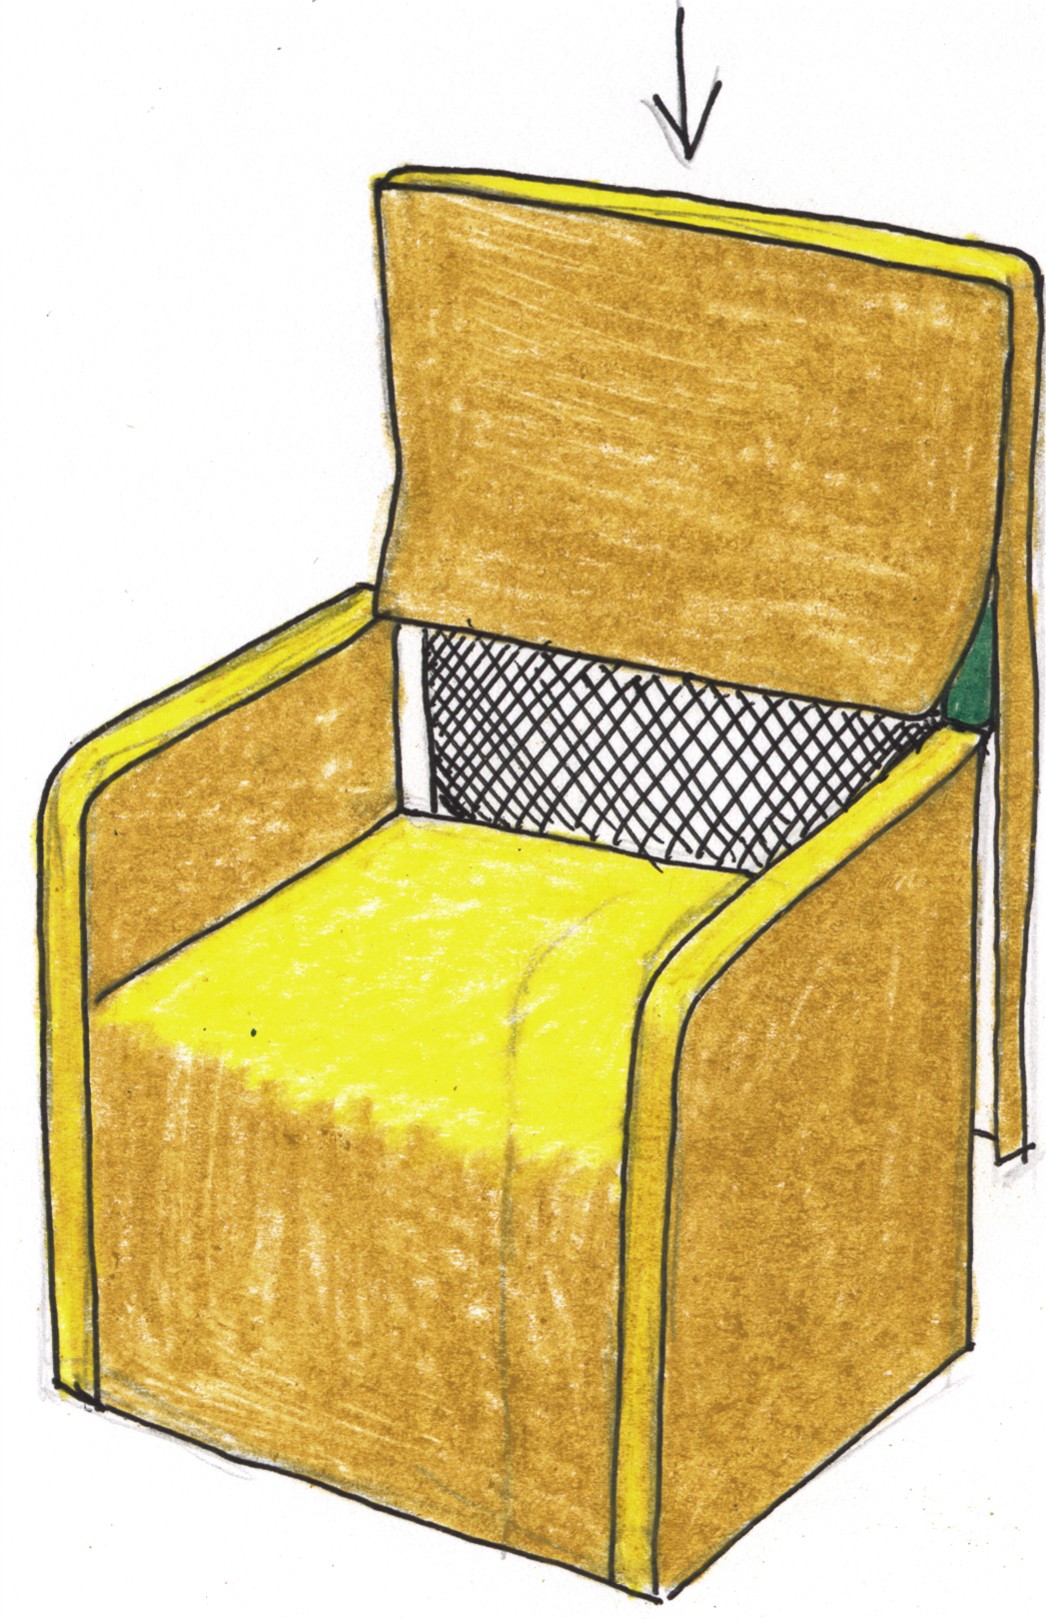
One more tip is that when Coleman chairs are set up, the back is taut and very hard to remove. But release that tension and the back comes off way too easily. You'll find that you'll take it off when you take off the chair covers, and may not even realize it.
A friend of ours solved this problem by drilling a hole in the tubing at the side, right at the base of the back fabric, then putting a small screw through the fabric and all. This holds the back on even when the chairs are folded.
You can leave the chair covers on even when you fold the chairs up and move them. We normally transport ours without the covers, so they take up less room and the covers don't get damaged or dirty during transport. Then we put the covers on when we arrive at the event, and they stay on for the whole event even as we take our chairs to Court or to friends' encampments for socializing.