 |
|
|
|
|
|
|
|
|
|
|
|
|
|
|
|
|
|
|
|
|
|
|
|
|
|
Honda QA 50 |
|
|
|
 |
|
|
|
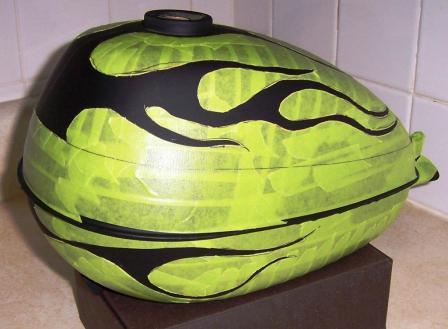
Here is the qa tank after fiberglassing smooth and painting flat black. I taped the tank and then freehanded the flames and cut them out. (7-14-07) |
|
|
|
|
|
 |
|
|
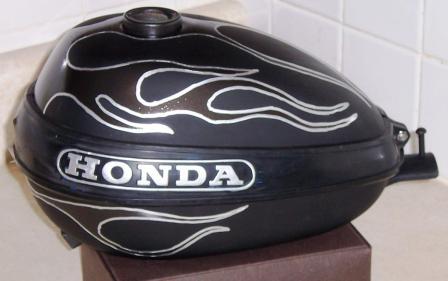
The flames were sprayed gloss "hammered" black and then the edges were pin stripped in silver. A word to the wise, if you remove the rubber tank surround, it shrink. You will have to heat it back up before reinstalling. (7-16-07) |
|
|
|
|
|
|
 |
|
|
|
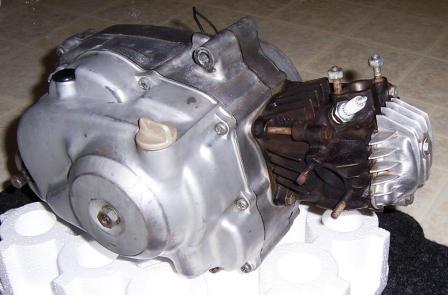
After soaking the motor in degreaser for a day or so and a couple hours of scrubbing with a wire brush and scotchbrite pad it is much cleaner. The impact hammer loosened the clutch case screws and now for some surgery. (7-26-07) |
|
|
|
 |
|
|
|
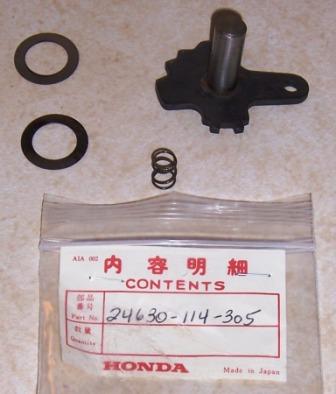
All of the required parts are here for the clutch rebuild including the infamous second gear slip kit repair. It is only four pieces but these kits are almost impossible to find. This thing better shift perfectly for the trouble I went through getting these parts. (7-27-07) |
|
|
|
|
|
Below is the engine after removing the right crank cover. 1) is the pawl shaft spring, remove the e-clip, slide the old spring off and the new one on (not too tough). 2) The main gear must be removed to install the new washers which requires removing the clutch. First slide off the gear shift arm in front of the clutch. The three arrows are the first clutch screws that need to be removed. They were pretty stuck so I notched them with a dremel and used a large standard screwdriver. (7-29-07) |
|
|
|
|
|
 |
|
|
|
Next |
|