Photographing my 'model' was an interesting exercise in itself since with the flash at about 18 inches from the subject and a minimum aperture of the digital camera of f/8 I had to reduce the brightness of the flash .
First session by covering up most of the flash tube. To fire it in sync with the camera I used a trigger working off the camera's on-board flash which was also covered, although I was careful not to cover the light sensor in the flash housing.
There was also enough spill to trigger the slave unit
Second session I used the auto setting of f/8 and reduced the light further by increasing the 'film speed' from 100ASA to 400ASA..
I was interested to discover that my digital syncs at all speeds, up to 1/1000 anyway.
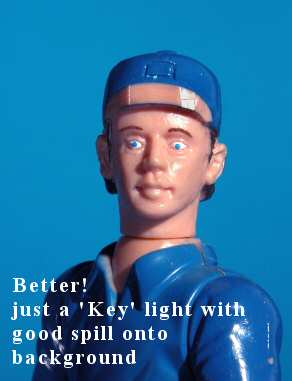
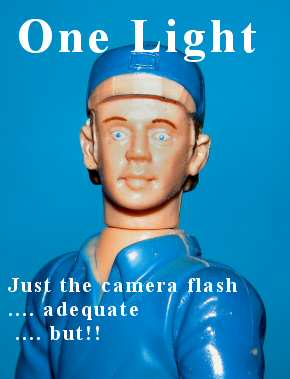
Top left is just the camera light itself . left is when you separate the flash from the camera and mask off the camera's own flash.
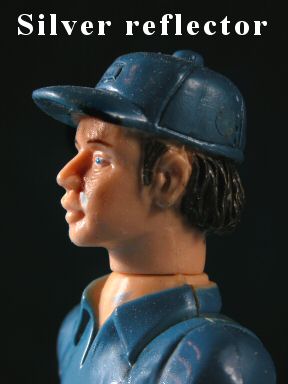
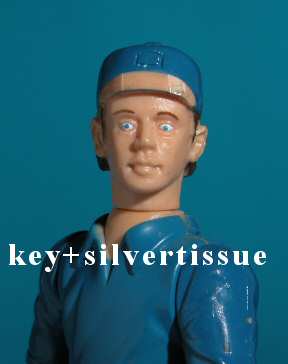
Two kinds of reflectors. The white side of photographic mounting board and some silver foil, which could be kitchen foil, or in this case some builder's insulation foil mounted on cardboard.
Both reflectors are at 180 degrees opposite the light and light the back of the neck with the dark area of the cheek missing out.
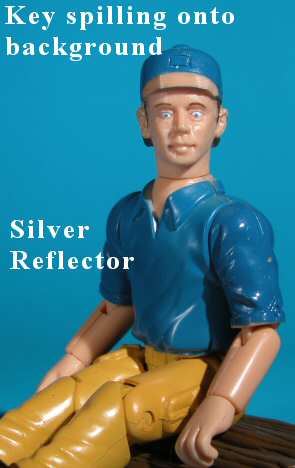
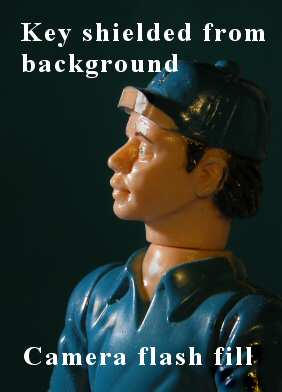
In the board shot the key [flash] light was allowed to spill onto the background which gives shape to the cap. Missing in the silver shot where only the sheen of the plastic gives us a faint outline. A person's hair would just merge into the background.
With these shots of him looking left the key light in also on the left and the reflector is on the right, our right, of him
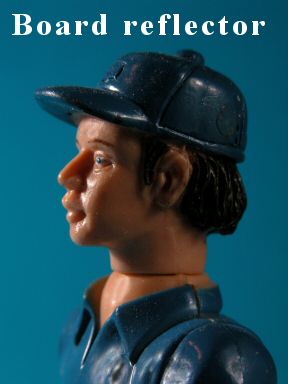
In these examples the reflector is close to opposite the keylight and gives the effect of two keylights rather than the filling effect I was after. If the fill was a light it would be close to the camera line to soften the shadows cast by the key, and provide a 'catch-light' reflection in the eyes
There is not much difference between 'board' and tissue, both are soft and low power reflectors.
Since I was working so close I had to reduce the strength of the camera flash with card and tape. But for full sized photography the average digital on-board flash is so weak, perhaps with a Guide Number of around 20 that it balances nicely with a independent flash of 56 or 80GN
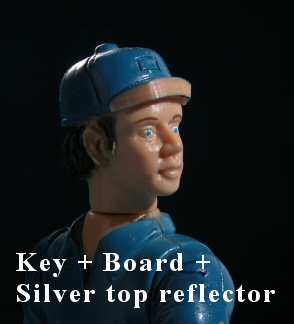
To separate the top of the head from the background you could use another reflector up and behind the subject but tricky if you do not use a torch to simulate the flash's light and check something as directional as silver paper is actually reflecting where you want it.
While one can work blind it is to quite a degree hit and miss what effect you are going to get. So it is very desirable you have a lamp in the flashgun's position to see what effect it is giving.
There does seem to be a drawback to working with this that a torch is a spotlight and I had to swivel the flash/torch assembly around to see the effect that the reflectors were doing.
I got a nice spot of light behind the models head but of course when the flash went off it was a broad light across the whole background
In the shot to the left the top 'hair' light isn't really doing much to show the whole head, separate it from the background. So the key light should have been allowed to spill onto the background.
REMEMBER ...It is the flash to subject distance that is important with both lights and flash. So if one was working with a 135mm telephoto for portraiture the lights could be closer to give a desired f / number for depth of field, or further away for less DoF.
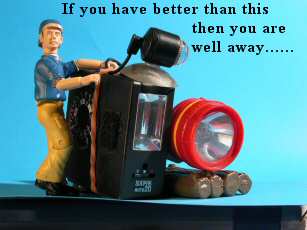
This shows you can work with pretty basic gear so long as your flash-to-subject distances are within the capability of the flash. Single and twin portraits at around 5<7ft well within this gear's capability. How you support your reflectors is up to you but upright chairs with a small stick taped to the back to hold the reflector in place is one solution. I have strung string across rooms to hang backdrops, using clothespegs, and lights on before now ..if you have picture rails in the house they help in this direction to save knocking nails into the wall to tie the string to..