One Light exercise
diagrams
The basic set-up with flash off to one side and raised above the level of the camera's lens.
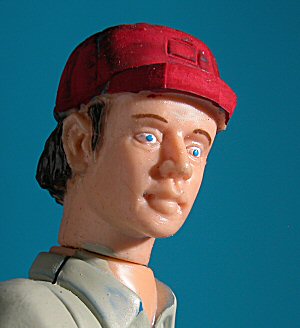
The idea of lighting this way is to show the three dimensional face in the two dimensional photograph by the use of shadows. Some say that the main light or 'key light' should not be so high as for the nose shadow to stretch onto the lips.
We can see detail in the shadow side of the face because of the light from a 'fill light'.
In this case not a light but a reflector pushing back 'spill-light' from the Key Light.
The key is also spilling onto the background.
Another point is that to maintain that lighting the Key-light follows the head around as we change from a full frontal to the 3/4 view of the photograph.
A live person could well have their eyes turned back towards the camera. Which makes for a more interesting photo than a front on shot.
When we control the key light with a 'snoot' or 'barn doors' we can stop the light reaching places where we do not want it ... to turn the background dark or black.
Or the use could be to highlight just the face, or even part of the face such as the eyes in a glamour shot, by shading the key light from the shoulders of the subject downwards.
By cutting a hole in the side of the 'snoot' I permitted some light to reach the background for a darker version.
The key to imaginative lighting is the control of it rather than just flooding the light all over the place from a pair of umbrellas or suchlike.
For a softer result there is nothing to stop you controlling where the light is going but also to soften it, after the fashion of an umbrella, by placing some tissue paper in front of the flash.
DONT do that with 'hot lamps' .. it is a fire hazard .. but strobe is not.