 |
|
|
|
|
|
|
|
|
|
|
|
|
|
|
|
| back |
|
how it happens |
|
next |
|
|
|
|
|
|
|
|
This page is intended to give you an insight into the various processes that I use to create a painting. No two paintings are alike. Each presents its own problems and challenges. Various techniques are employed to achieve the final result.
The trick - and the fun - comes from figuring out each approach. |
|
|
|
 |
|
|
|
1. After the client has approved my sketch,
I enlarge it to final working size on my photocopier and trace it down onto illustration board. In this case I used Bainbridge 72, a smooth surfaced board. |
|
|
|
|
|
 |
|
|
|
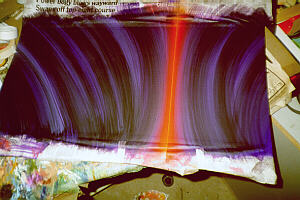
2. I mask the border with scotchtape and newspaper. I underpaint with a broad brush to get the desired streaks.
The paint is a mixture of Liquitex acrylics, student colours and housepaint - which adds "tooth" to the plasticity of the acrylics.The yellow light beam is masked with paper and airbrushed. |
|
|
|
|
|
 |
|
|
|
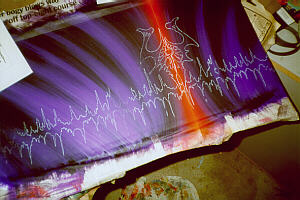
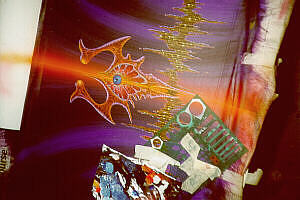
3. The sketch is traced onto the background using white tracedown paper. Aluminium foil makes a good disposable palette. I use a range of brushes - flat chisel brushes for the broad areas, down to tiny triple "O"s for the micro-details. |
|
|
|
|
|
 |
|
|
|
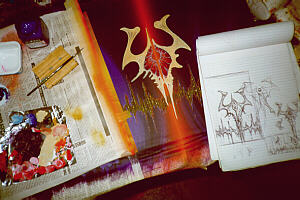
4. The foreground is blocked in with a mid-tone. Then the darks and lights are introduced as I render the bone-like textures on the surface of the object.
My very first rough sketch is referenced to try and re-capture some of the spontaneity of the drawing which is lost during the tracing and rendering. |
|
|
|
|
|
 |
|
|
|
5. I use a template as a mask when airbrushing the underpainting of the "eye". I spend a bit of time rendering the details on the iris since it is the focus of the whole painting. |
|
|
|
|
|
 |
|
|
|
|
 |
|
|
|
|
|
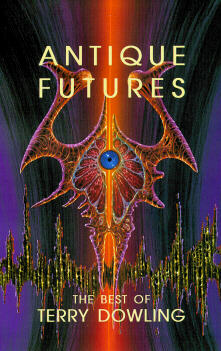
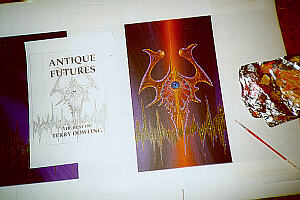
6. Above and right: The final artwork, after the protective tape has been carefully removed. The art is sent to a photographer who makes transparencies which are then sent to the client. |
|
|
|
|