Installation of phone cradle for handsfree kit in 1994 Honda Civic.
This is mostly a collection of photos taken after I installed a Nokia handsfree kit in my 1994 honda Civic. It is not intended to be a comprehensive installation guide.
The part number of the kit shown is CARK91-US, but pretty much any car kit could be installed in a similar manner.
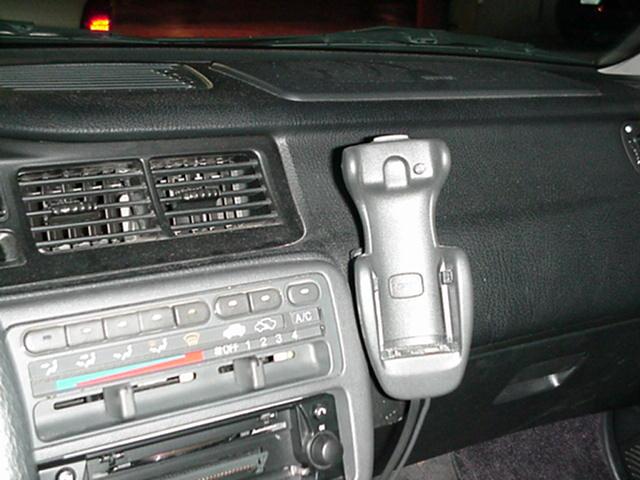
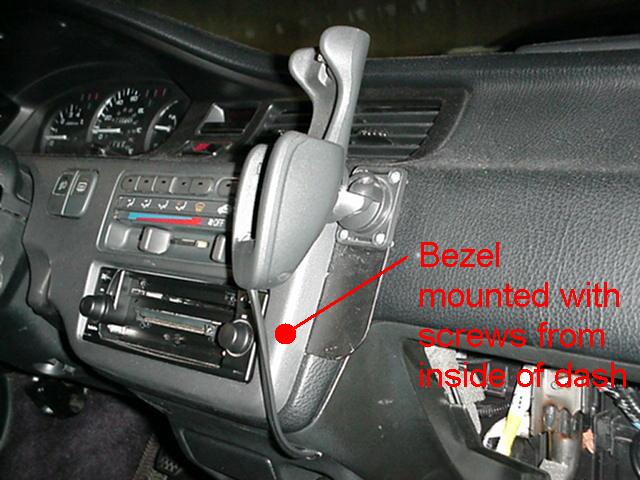
Installed cradle viewed from driver's seat.
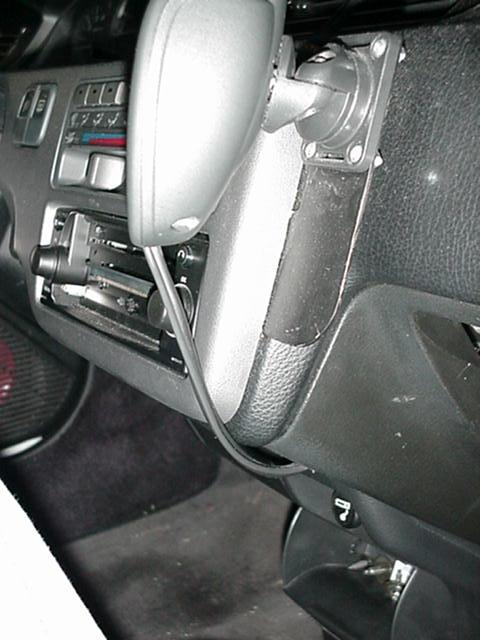
Installed cradle viewed straight on.
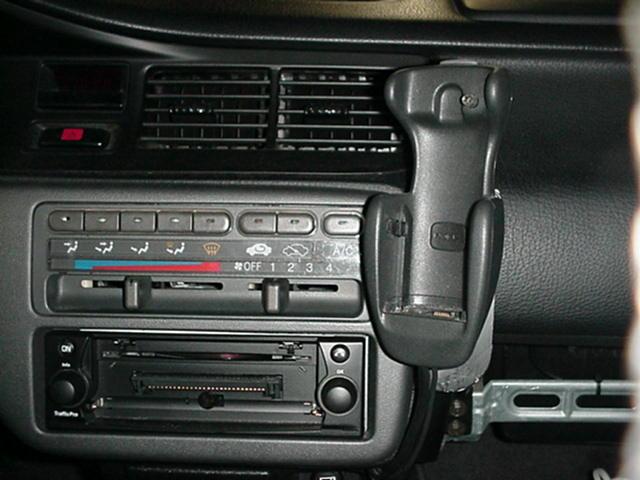
The cradle is mounted using a bracket mounted to the inside of the dash, specifically to
the vertical wall to the right of the stereo and heater controls. To get access, I had to
remove the stereo. Good instructions for how to do this can be found at
Install Doctor.
I seem to remember having to remove the heater control unit as well. It is mounted with one
screw from below at the back of the unit. Make a note of how the temperature control cable is routed,
if you get it back in wrong it could bind, making the temperature control hard to operate.
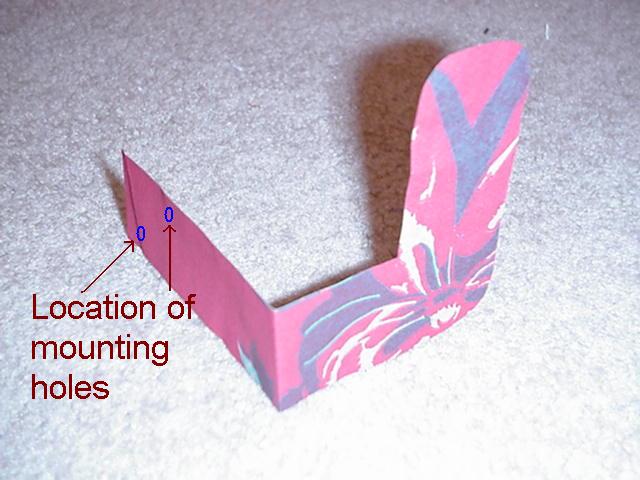
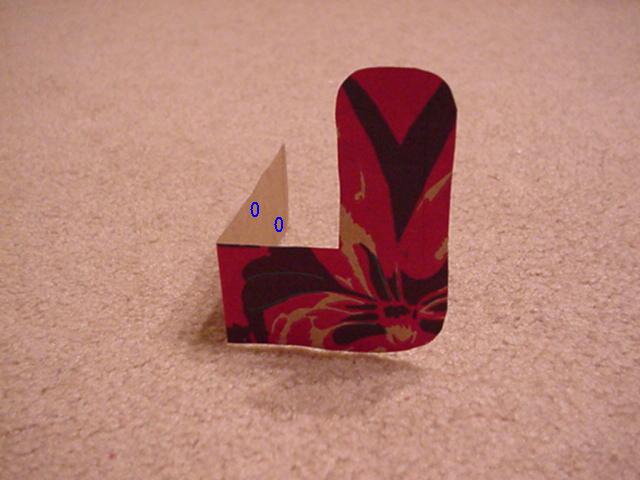
The bracket is fabricated from an 8" x 2" (~20 cm x 5 cm) corner bracket from a local
building supply store. It cost me less than $1. The next two photos show the approximate
shape of the bracket after bending, filing and cutting. The specimen in the photos is cut
out from a pre-Christmas paper grocery bag, thus the festive decorations..
The bezel around the stereo, heater controls etc. has to be loosened enough to slide the
bracket in there. It is not necessary to remove the bezel all the way. The bezel is mounted
with screws from the inside of the dash in several locations. Be prepared to get your hands
scratched up a bit, plenty of sharp edges in there. I used a right angle screw driver to
get access to some of the screws.
I had to cut away a small section of the actual dash underneath the bezel in order to get
the bracket to fit. The area cut is covered by the bezel, so if the handsfree kit has to come out at a
later date, there will be no visible cuts in the dash. The next photo is a slightly closer
view of the same.
Viewed from above through a windshield that needs cleaning, it looks like this:
Drilling the holes to mount the bracket is a royal PITA. I drilled holes in the bracket first.
It is not particularly critical where these holes are located. Then I test-fitted the bracket
and drilled holes in the vertical wall inside the dash. A cordless Dremel tool would be
perfect for this. I had no such luxury, so I wrapped some tape around the blunt end of
a drill bit and turned it by hand while holding the bracket in place.
I removed the glove box before actually mounting the bracket. The glove box has a spring
& damper at the right hand side. It is screwed into the side of the glove box with a Philips
head screw. Remove this first. Pay attention to the damper so you don't accidentally break
it while it is hanging loose. Next there are stops at each side of the glove box to stop
it from coming all the way out when you open it. Reach in and rotate these rubber-clad steel
stops backwards about 90°. Finally, there are two bolts at the bottom of the glove box holding
the hinges to the dash. Remove these and remove the glove box.
When you put the glove box back in, there will be some play before you tighten the hinge
bolts. I found I had to bias the glove box somewhat to the right before tightening
the bolts. Otherwise I got a rattle from the glove box.
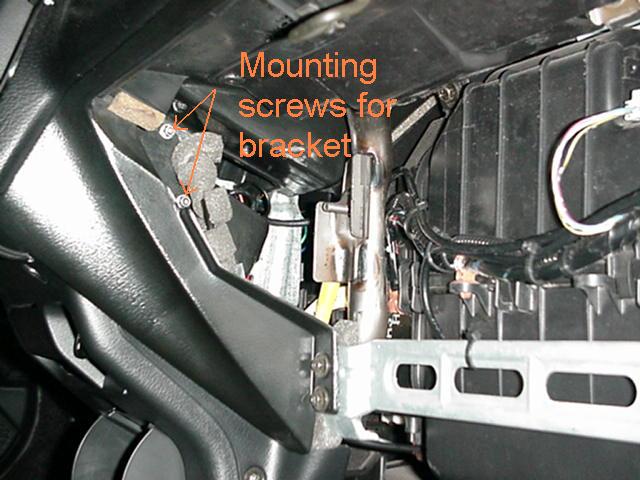
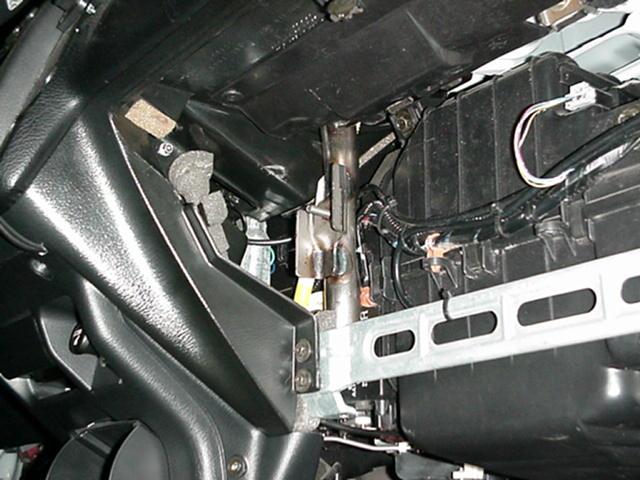
The following photo shows the inside of the dash with the glove box removed. You can see the
screws and nuts that hold the bracket to the vertical wall.
The next photo shows the same from a slightly different angle. The gray foam you
see close to the bracket mounting screw is weather stripping I wrapped around the
temperature control cable. It was giving a horrible rattle which turned out to be
due to wrong routing of the cable.
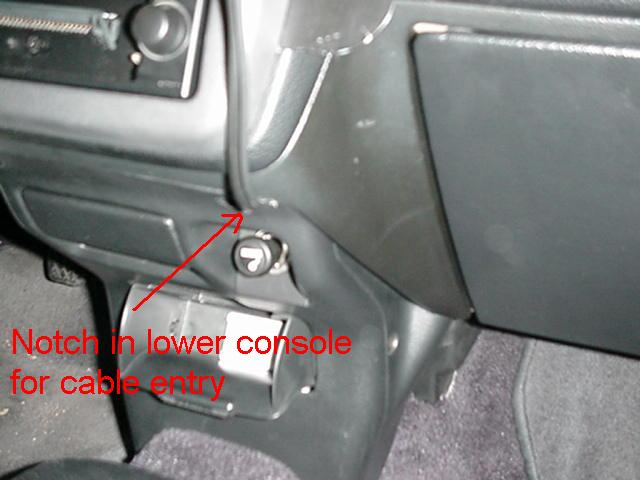
I cut a small notch at the top part of the lower console in order to get the cables
routed back into the dash. This can be seen in the next photo.
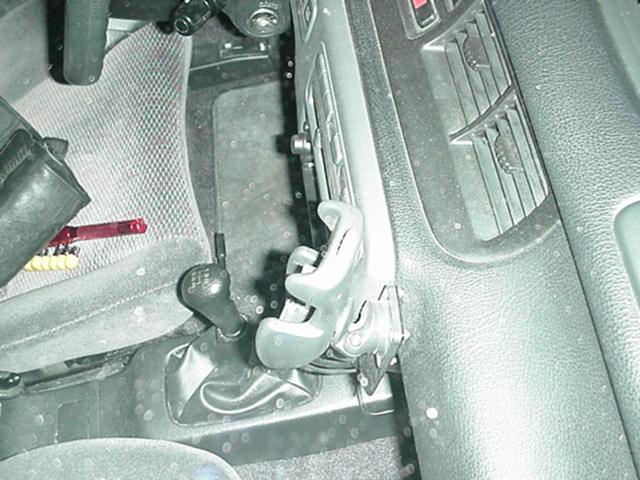
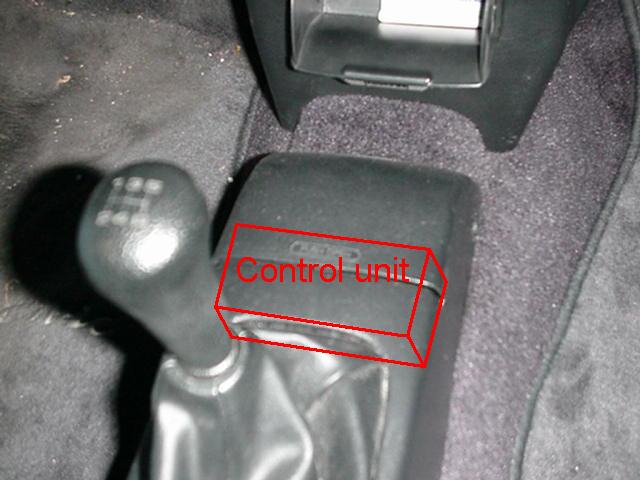
Finally, I hid the control box for the car kit under the shift lever trim. Cables are
routed down inside the dash, then back under the carpet and into the area under the shift
lever trim. See photo.
I mounted the microphone on the head liner between the left and right sun visor. The
cable is tucked up above the head liner and routed over to the driver's side A-pillar.
Here it goes behind the pillar trim, down into the dash and over to the center console
before making it down and under the carpet.
The fuse box in the Civic has options connectors that are convenient for connecting
accessories like this handsfree kit.
2004.12.31 @ 23:59 PST: Created
2005.01.01 @ 23.37 PST: Some dude with a Ph.D. in computer science nagged me about using absolute paths, so I changed them to relative.
2005.01.08 @ 02:04 PST: Cleaned up some non-conforming HTML code