 |
|
|
|
|
|
|
|
|
|
|
|
|
|
|
|
|
|
|
|
|
|
|
|
|
|
|
|
|
|
|
|
|
|
|
|
|
|
|
|
|
|
|
|
|
|
|
|
|
|
|
|
|
|
|
|
|
|
|
|
|
|
|
Setting Up of New Tank |
|
|
|
 |
|
|
|
 |
|
|
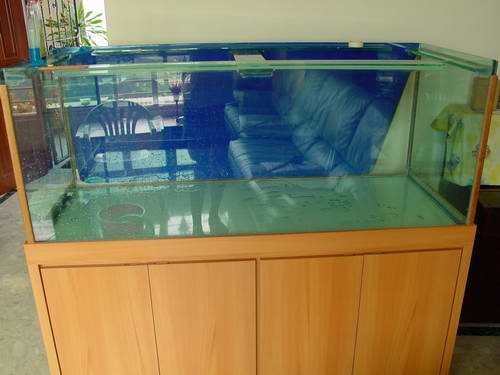
On a clear and sunny Saturday afternoon in September 2001, the 5 foot fish tank that I had ordered 2 week earlier arrived. It was larger than I had expected and took up a sizable area of my living room.
I bought it at Tanjong Pagar, and it set me back by a cool S$1500. The cabinet was the most costly item. It was made of plywood and finished by veneer. Comes with a matching top cover.
It is very important to have a removal top for planting and maintenance purposes. Also the top cover has to be opened to allow the natural ventilation especially in hot tropical Singapore. |
|
|
|
|
Topless Tank with the Cover Removed |
|
|
|
|
 |
|
|
|
|
|
|
 |
|
|
|
|
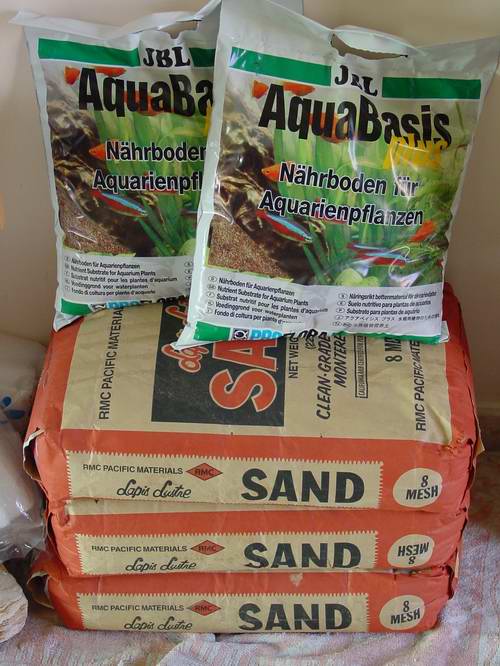
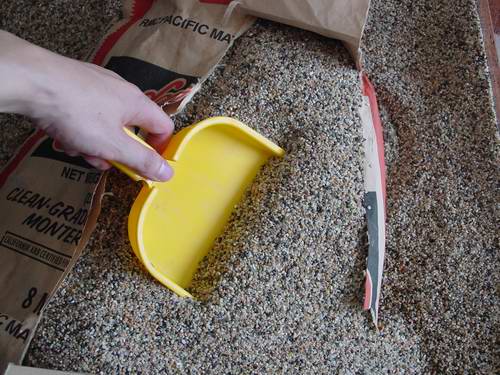
Before the tank came I had most of the materials ready. I bought 2 packets of JBL substrate fertiliser and 3 bags of sand weighing nearly 70kg. |
|
|
|
|
|
|
|
|
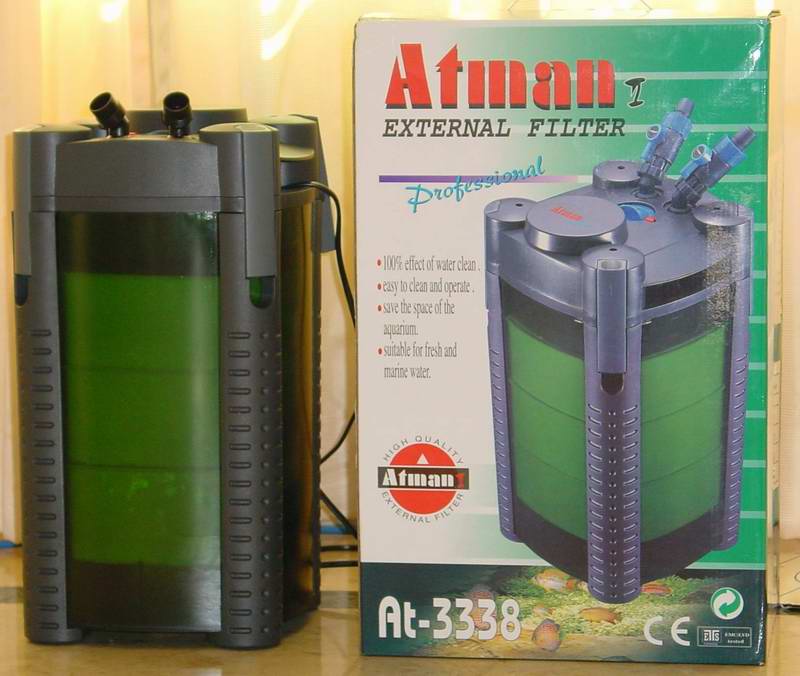
I had considered for a while between the German Eheim canister filters and the made-in-China equivalents. Eventually, I bought the China made Atman 3338 instead which costs only S$135 compared the ~S$300 Eheim 2028. Why pay such a high premium for German technology when the canister filter is basically a low tech piece of stuff ? After all, the most important factor is having good media material for the colonisation of the beneficial bacteria. So I use a combination of sponge, bio-balls, ceramic rings, and sintered glass. Hey you've got to pamper the bacteria who are doing all the biological filteration for you. |
|
|
|
 |
|
|
 |
|
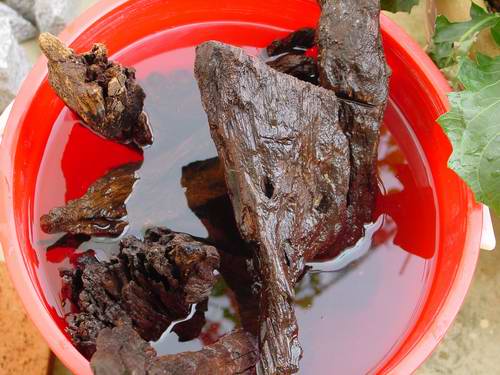
Here are the driftwoods that have been soaking in a pail out in the open for days. |
|
|
|
|
|
|
|
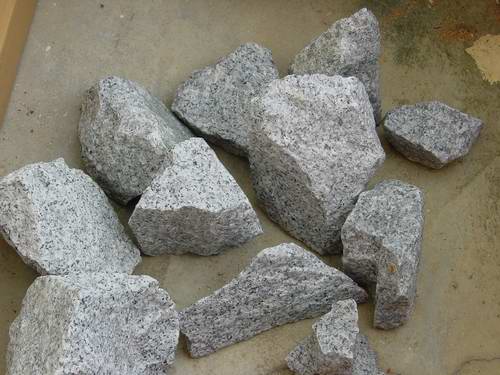
Granite rocks that I collected from the Mandai quarry. Sshh..don't tell anyone.
|
|
|
|
|
|
|
|
|
|
 |
|
|
|
 |
|
|
|
|
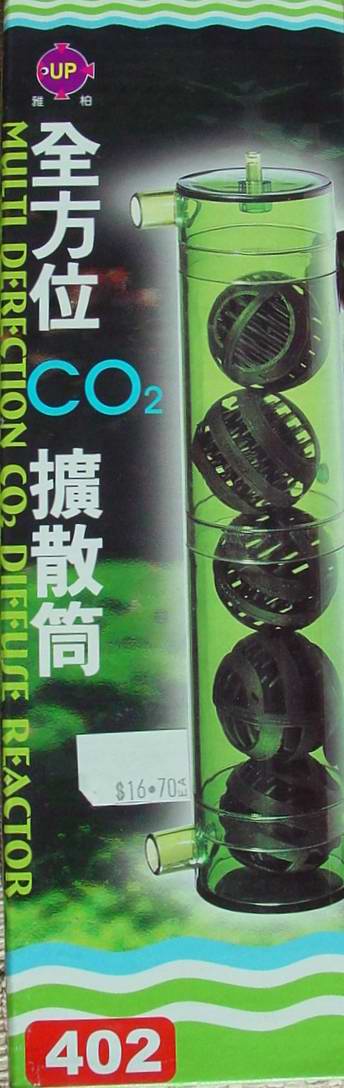
I use this CO2 reactor to dissolve the CO2 achievimg a near 100% efficiency. Much better than the ceramic diffuser which you will lose at least 50-80% of the CO2 to the surface. Only S$16 and made in Taiwan. Hey I am a cheapo man too. |
|
|
|
|
|
 |
|
|
|
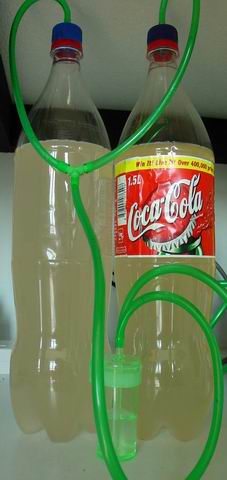
To save costs, I decided to go with the DIY approach for the CO2 source. Hey I am a DIY man you know. Get 2 1.5l of Coca-Cola bottles, hook them up. I have connected the output to a bubble counter, not to count bubbles but to make sure that the fermented stuff don't flow into the tank, otherwise you risk getting your fish drunk ! |
|
|
|
|
|
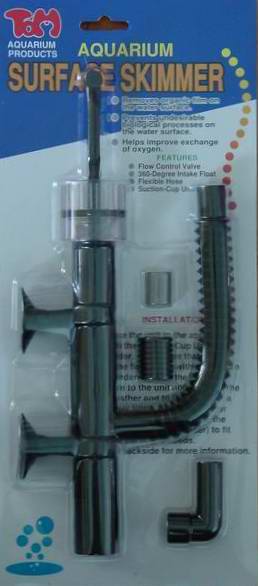
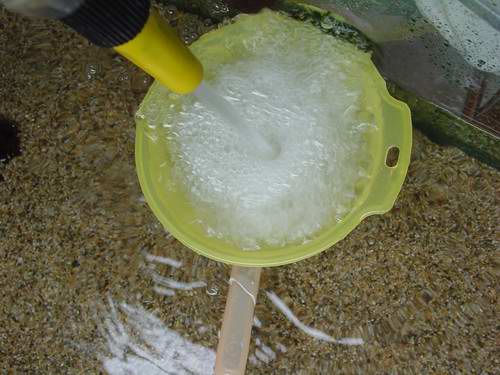
Important to have a surface skimmer to maintain a clear water surface. Just follow the instructions when connecting to the input of the canister filter. |
|
|
|
|
|
|
|
|
|
|
|
|
|
|
|
|
|
|
|
|
|
|
|
|
|
|
|
|
 |
|
|
|
 |
|
|
|
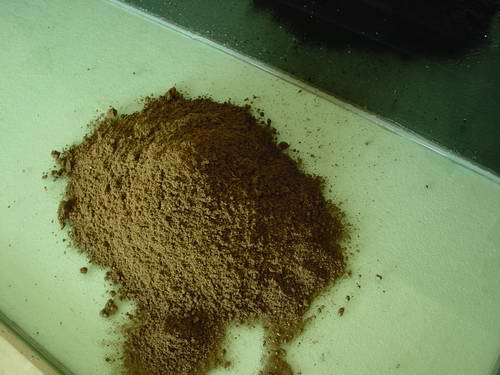
Here goes the substrate fertliser, yucks! ............. followed by the sand. |
|
|
|
 |
|
|
Finally, let there be water....and lots of it. |
|
|
|
|
Sorry guys, I have no pictures of the planting process as both my hands have to be in the water and I don't want to risk damaging my Sony DSC-S70 digital camera. |
|
|
|
|
|
|
 |
|
|
|
|
|
|
|
|
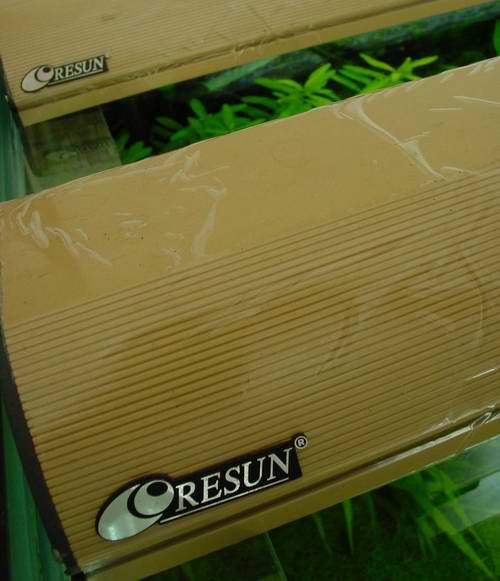
Next switch on the 2 sets of Resun flourescent lights. Each set comes with twin 36W flourescent tubes, making a cool 144W for the tank. |
|
|
|
|
|
|
|
|
|
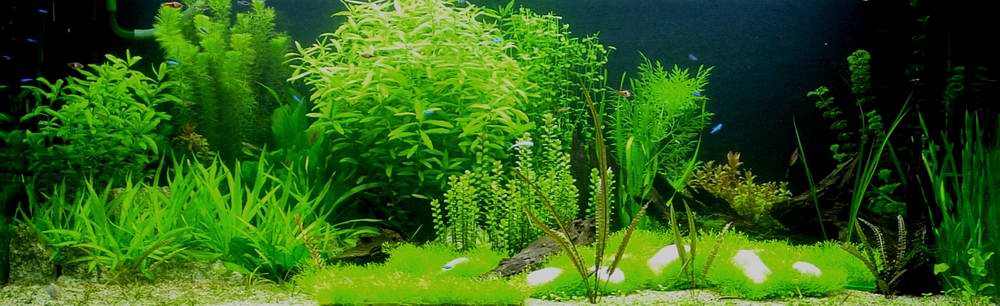
Relax, enjoy the growth process, feed the fishes (not too much), do weekly maintenance and here's what I got in 6 weeks. |
|
|
|
 |
|
|
|
 |
|
|
|
o Home o My Philosophy o Setting Up of New Tank o Pics of 5 foot Tank o Tools & Maintenance o
o Harvest on Demand Riccia o Harvest on Demand Xmas Moss o Planting Mesh o |
|
|
|
|
|