Chances are that if you're reading this, you've already heard the reasons you should start a native plant garden. Maybe you heard about your co-worker's butterfly garden and got curious, maybe you saw a video on the internet where someone started a polinator garden and thought 'Hey, I could do that! That sounds fun', or maybe your hippie neighbors started their own garden full of 'weeds', and you want to understand why.
In the event that you've never heard of native plant gardens, and want to know why gardeners all over the world are starting them, read on.
Native gardens are green spaces consisting of solely (or mostly) plants which grow in the wilderness, and help support the other lifeforms in the spaces in which they are grown. They tend to contain species that act as host plants for butterflies, hoverflies, bees and so on, as well as food sources for songbirds among many other creatures.
Maybe you live high in the mountains and you've noticed plants along the roadside which only seem to grow in the wild areas nearby your home. It is likely that these plants are endemic to your region. Endemic plants are species which are not only native to your area, but which also won't happily grow elsewhere. This is because they have been in the area they currently are for longer than humanity itself. Yes, you read that right; endemic plants are often much older than the entire arch of humankind.
If your area is too salty for the decorative plants at the big box hardware store, or too cold for the palm tree you killed last year, you should look into what plant species are native to your specific area. This can be done in a number of ways online. Now o'days most people would simply ask an ai chatbot to get more info on this, and if that's your thing, go nuts. I tend to prefer reading more from individual sources and groups who I know my support matters to. It's more mentally stimulating, and you can often connect with like-minded passionate gardeners that way, but I digress.
For information about what plants are native or endemic to your region, visit my "Links" page located in the navigation bar at the top of this page.
If you've decided to start a native garden, and you want to know what to do next, I am here to help you learn the information you should consider.
So we've established that in the native plant garden, the plants which grow in your region are the obvious first priority. This doesn't mean you can't grow other things, despite the comments of snarky trolls on the internet. These comments are many, and wholely unimportant, ignore these people. You can still grow exotic plants if you want to conributre to native gardening. The reality is it doesn't take much space, time, or money to make a big difference in your area's ecosystem. If you have a yard you could dedicate one small portion of it to rewilding. If you have a balcony or patio you could just grow one pot full of native flowers. You could even have one small window-box with some asters growing in it, the critters will be glad you did. The odds are high that if you have any green space nearby you, you will be able to find, and collect your own native plants with minimal effort. They're already outside your home if you have a yard. You may have disregarded these vital species as pesky weeds. It is my goal to change your mind about this, but I must reiterate there is no problem with enjoying the flowers and vegetables you're already famiiar with.
The second priority in native gardening is among the most important of all: learning which plants are not native to your area, and elimenating them where possible. You may be saying to yourself 'Didn't they just say growing exotics is OK?', yes, I did say that. Not all exotics are invasive. An invasive plant is one which threatens the ecosystem once it break the containment of your carefully curated garden bed. These plants are something we native gardeners are always trying to avoid. Some greenthumbs even make it their duty to go into public areas where permitted, and get rid of these species themselves in an effort to protect the wild spaces around them. You can learn about invasive species in your area in much the same way you would learn about natives. You ask fellow gardeners, you talk to the nice lady at the native nursery, you ask the internet, and you become increasingly familiar with these plants so you can create the best native green spaces for yourself and others.
The reason invasive species are so lamented by native gardeners, is that they often compete for soil space, nutrients, and sunlight with native plants. Over time these species can completely eliminate the plants they compete with.
In many cases, these plants actually act as a parasite to plants, such as vines which attach themselves to trees. These vines will in many cases climb to the top of the tree searching for light, they will surround the foliage on the tree, thus depriving it of sunlight.
A plant with limited or no access to sunlight will become sickly, and eventually die. This process is accelrated in cases where the species of invasive vine is a true parasite; in other words it bores into the bark of the tree to access its cambien layer, sapping nutrients from the tree directly. Once a mature tree has become ravaged by an invasive climbing vine, it can cause a knock-on effect by shading out plants in the lower stories. It is important to avoid the agressive species of plants when planning a native garden.
Okay, now that you know what not to do, your next logical thought is probably along the lines of 'what do I do?'.
Most people have the same few questions when starting to propogate native plants. These questions often consist of the following:
Q:Where do I find native plants?
A:You look in the wild areas near your home, and you begin to propogate the plants there yourself, or you visit the closest native nursery and purchase starters to transplant into your garden. See my "Links" page to find a native nursery.
Q: How do I identify the wild plants near me?
A: You bring a dumb phone, snap pictures, and upload them to iNaturalist or ask your preferred chatbot. This will at least give you a broad idea of what the plant may be. You can do further web searches to narrow in on the specific plant species if these resources don't get you 100% of the way to the answer.
Q: How much money can I expect to spend on a native garden?
A: This depends how much you intend to do, You can spend $0 by transplanting local wild plants into your garden, you can spend $1000s going ham trying to show off your creative skills and travelling to attend seminars. That is up to you.
Q:What if I live in an HOA?
A: Buck the system at your own risk. If your HOA is anything like the one's I've dealt with, they will be hesitant (or outright unwilling) to accept your new found love for natives at first, but will come to understand your point of view in time. If we allow these busybodies to dictate our lives forever, things can only get worse for already endangered wildlife. It is every botanist's duty to be the change they wish to see in the world.
Q: What if most of the wilderness around my town has been developed on?
A: Pull up google maps, start looking for high-voltage power lines nearby your home. These lines are often sitting on land that is not maintained for months, or years at a time. This is long enough for the land to become "re-wilded" and supply you with more native plants than you'll know what to do with. Other locations such as just off your nearest hiking trail are sitting on public land, and are often littered with natives waiting for you to propogate them. Just take measures against ticks, and don't take more than you need. We're trying to save the plants; not ransack the place. This should be hard to do, but is always worth mentioning in case you stumble upon an endangered species.
If you've never learned to propogate plants, I've got you covered. I love to teach others how to propogate. It isn't particularly challenging, and it can totally transform your garden and your attitude about the natural world by allowing you to take a hands-on approach. These aren't plants you went to a store and bought, you "made" them grow. By getting your hands dirty (literally) you will gain a new sense of purpose, and begin to feel connected to your garden, and to nature.
There are a few different ways to propogate a plant, and today I'm going to cover each one as clearly and concisely as possible. Think of this section as a sort of crash course for those who are just starting out.
This method is as straightforward as they come. You obtain seeds, you sow them in seed starting mix, and you keep the soil moist (not wet), and you wait.
Some plants are very easy to sow, and take very little time to get going. Think Cucumbers. These little goliaths will pop out of your starter mix in a matter of 2-3 days, take off like a weed, and start producing edible food in as few as 4-5 weeks. But we are more interested in the "how" since this is a how-to guide after all. So I'm going to run through the few things everyone should know before planting seeds for the first time.
Seed starting mix is the preffered medium for starting seeds directly into the soil. This can be made with different ingredients, or purchased at any gardening supplier such as the big box store. It usually consists of a few things, such as a simple sterile soil, pete moss (there are alternatives, but this is the most common), and perlite. Soil is the byproduct of leaving the land to do what it does to decaying organic matter. If you raked up a pile of leaves, left it alone for a couple of years, then used a pitchfork to turn it over, you'd notice there isn't much remaining of the leaves at all. Just nutrient-rich organic soil. This happens because there are many critters which feed on decaying plant material. Everything from the size of a worm, all the way down to microscopic organisms have adapted to seek this material out, and get it broken down. To these creatures, your refuse pile is their all-you-can-eat buffet. To gardeners, these creature are our recycling system made to keep plants happy. The soil you use is going to depend on the species of plant you intend to propogate, but a good general rule of thumb is that your starting mix should be able to hold onto water without become soggy, and should be light and airy enough for plant roots to easily wiggle around in it while it gets going.
The reason the soil portion of starter mix is sterile, is because we don't want anything living in the soil which may compete with, or prevent the beginning prosseses of a seedling. Some bacteria, fungi, nematode and worms are actually very beneficial later on in a plant's life, but right now they're only going to get in the way of what we're trying to do, which is get a plant started happy and healthy before up-potting or transplanting it into the ground. The reason pete moss is in seed starting mix is because it is light and fluffy, and retains only a small amount of water. This allows healthy roots to form, remember; we're trying to make it as easy as possible for a healthy root system to form. The seed has everything it needs if given the right conditions to "activate". Once activated the seed has everything it needs to get going, then we will need to help it continue its journey once it has used up what it came pre-packaged with in nature. This activation typically (but not always for every species) happens when the seed senses it is in a dark, moist area with access to oxygen. This brings us to perlite. Perlite is a naturally-occuring mineral which is very porous, which allows water to flow through it without absorbing it very much. As such, this is the perfect material to add for retaining oxygen within a seed starting mix.
Your starting mix should be pre-moistened by adding water to it until it can make a clump in your hand when you gently squeeze it, but that clump should also fall apart pretty easily right after. It should be light and fluffy like a sponge. This is how you can judge if you've added the right amount of ingredients to a mix you are making from raw materials separately. Generally speaking soil should be the main ingredient which takes up ~2/3s of your mix, then pete and perlite should be added to fill out the remaining ~1/3. This isn't a precise process, you can eyeball it in a plastic tub or out on a tarp. It is generally more art than science, although, much like a scientist, you should always experiment with different mixes and methods to find out what works best for your purposes.
Now that you know what a good medium to start seeds in looks and feels like, it's time to learn how toa ctually sow your seeds. I know most people will read this and think 'what's so hard about that? you throw them i the ground and they grow', and they'd be right, but there is a little nuance to the process you should consider. The first thing to think about is what you are going to start your seeds in. You could use dixie cups, but you may end up water-logging your soil by adding too much to an unnecesarily large container, then get a root rot situation before your plants even get started. You may end up thinking your plant has taken up enough of the cup and attempt to transplant it, only to find out it takes some plants longer than you expected to grow into that much soil, then damage your root system when you try transplanting only for the root balls to fall apart.
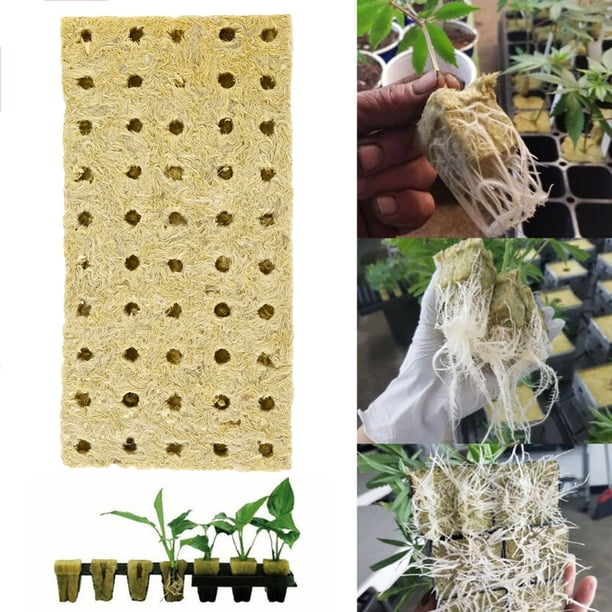
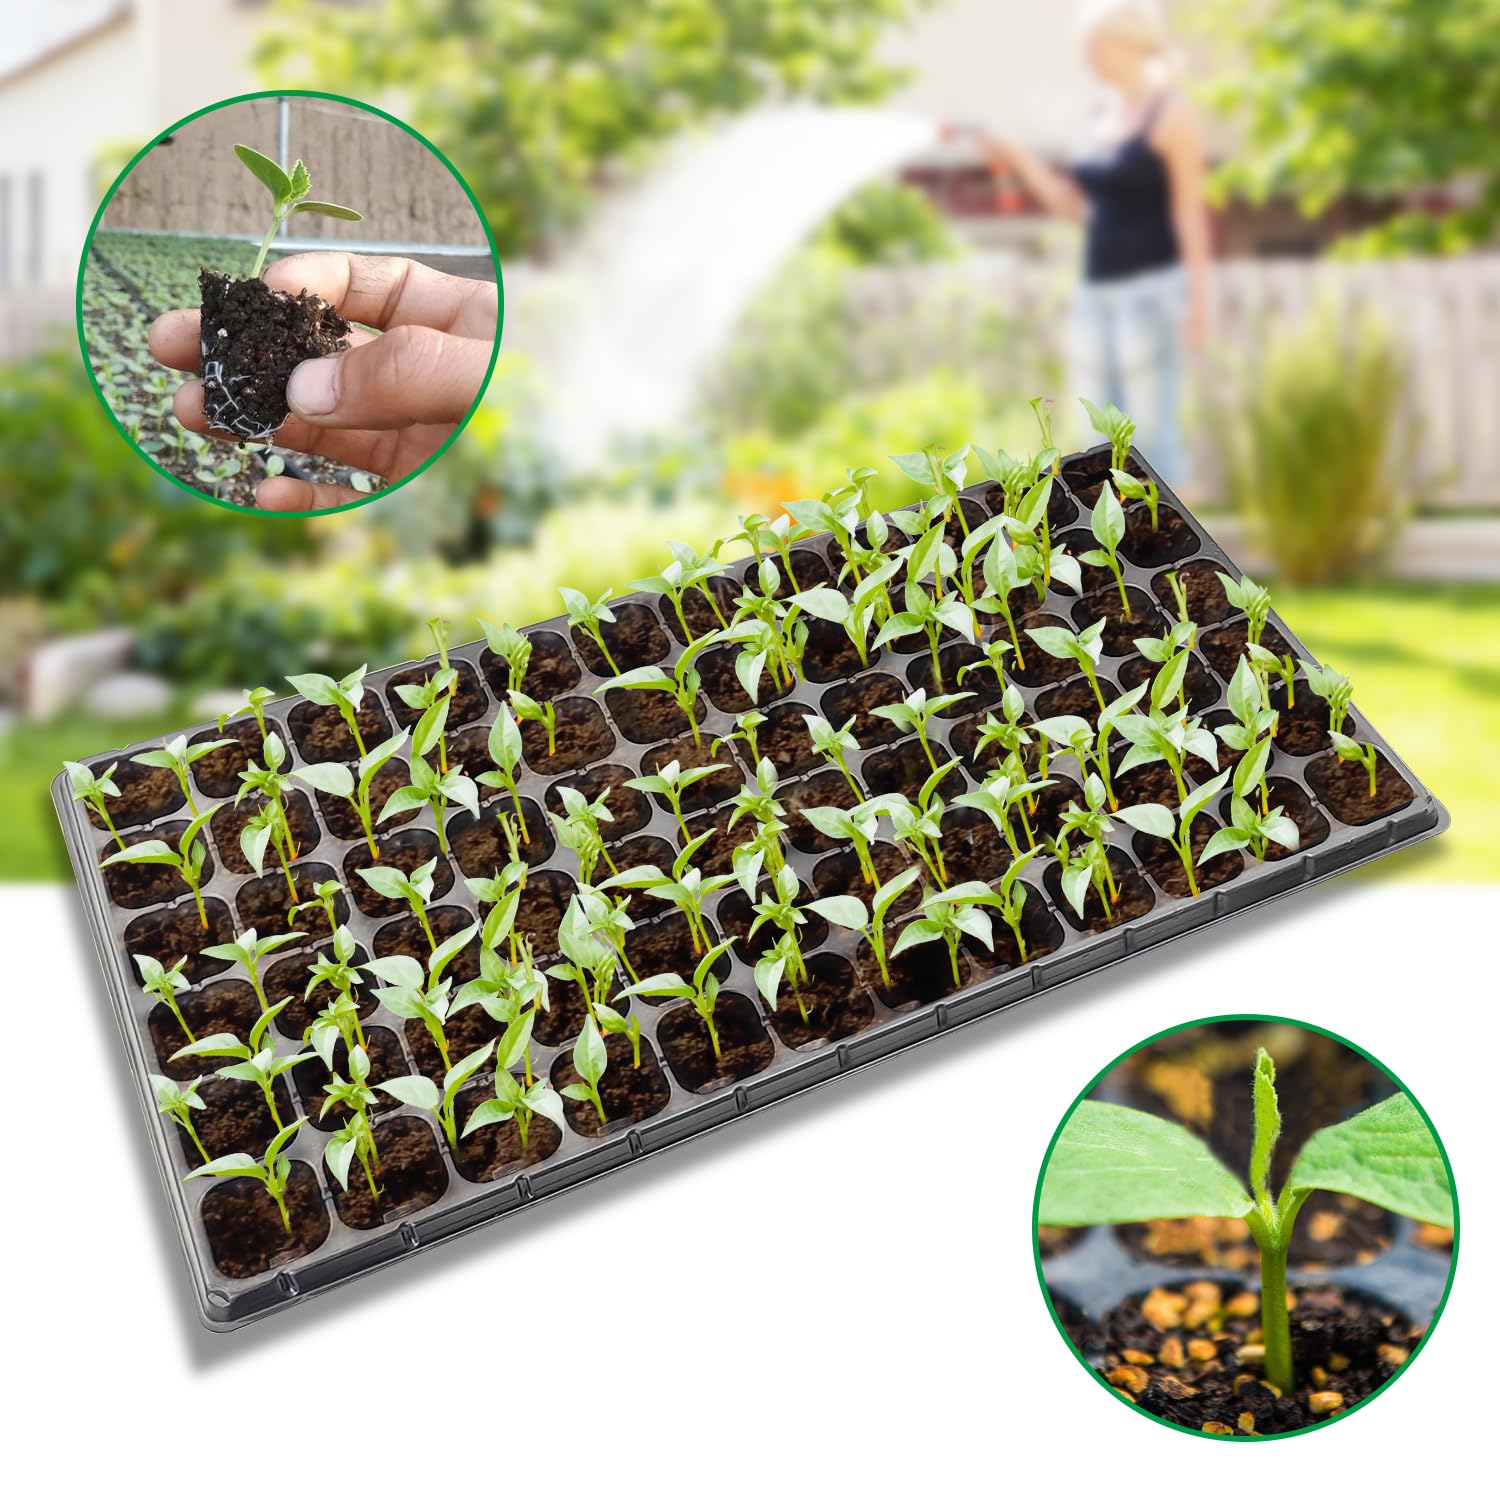
Your starting mix can be placed into any well-draining, small container, but it is a wise investement to purchase some starter trays. You can get them practically anywhere, they're generally inexpensive, and they are going to make things easier and more organized for you. There are some kinds which use a cotton-like material called rockwool. Rockwool is made from natural mineral materials which are heated up to molton temperatures and spun around into the fluffy product you see at stores. My preferred method is a simple 72-cell tray with a '1020 no-hole wattering tray' underneath. Each tray holds up to 72 seedlings, and they come perferated so you can break off individual sections of 6 cells. To fill them you take your pre-moistened starting medium, add it to your starter tray, and you gently jiggle it around to allow any large air pockets to escape. You don't want to mush the medium down and create a compacted soil mix, this will be hard for the roots to penetrate and slow down your propogation. You also don't want any large pockets of air becaise your plants cant use this space, but aerobic bacteria can, and that's the last thing you want to deal with in your plant's crucial formative phase.
Next you are going to want to think about planting depth. If you bought your seeds in a packet, you will find the planting depth domewhere on the packet. This instructions list will also tell you when to plant your seedling outdoors, if it should be sown directly into the soil or can be started in a tray, and when to expect it to bloom in relation to when you sowed it. You don't need to break out a ruler for checking the depth of your seeds, just eyeball roughly 1/2" (or whatever your instructions say), use your finger, or a chop stick or pencil to make the hole in your starting mix, toss a few seeds into the hole (this is called oversowing and ensures at least one will germinate), and keep the soil moist, but again, not wet. Remember, we want a light, spongy material. It shouldn't dribble out water when you squeeze it in your palm, but it should still feel moist to the touch.
You've taken the first steps to growing wild. You identified and collected a handful of pretty plants, you potted (or better yet planted into the ground) your starters, you watched a hundred hours of videos, and you found yourself asking 'Now what?'. Now you share. Share what you've learned with fellow newbies, share your excess plants which are beginning to spread by themselves, share your time helping a neighbor or acquantance getting their garden started, or restarted. The true value of connecting with nature is beginning to understand and appreciate your own humanity. You are a native species too, and you belong to a community even though it may not feel that way sometimes. Sign up for some forums, post on a bulletin board at a park, do anything to reach out to your fellow gardener and start making connections. These relationships will grow increasingly valuable during your journey in botany. Speaking of which, learn the ropes of botany proper. Start familiarizing yourself with the plants you are growing in a more academic capacity. You don't need to go to school to do this, just go online and search for "entymology", and start reading and watching content created by the "real botanists". You are today's link in a chain which spans the aeons of Earth's history, and botany is a valuable window into that inconceivably long past. I firmly believe that learning about botany can make you a kinder, more humble human being if you let it. These 'weeds' are tools which can take you to places you've never experienced, and no, you don't need to make medicine out of them (if that's your thing, no judement) to expand your mind. Whatever you decide to do next, just keep growing. You will thank yourself later.