| SEAT MODIFICATION |
| PROBLEM: |
| SOLUTION: |
| TOOLS / EQUIPMENT NEEDED: |
| DIFFICULTY RATING: |
| INSTRUCTIONS |
| The following is an alteration done to one of my Reflexs. This is for informational purposes only. |
| Any modifications are done at your own risk. Check local laws for restrictions on some of these changes. |
| A drivers backrest was needed for my Reflex at the time none was available. |
| Now Utopia Products makes one for approx. $170 (US ) |
| My version is much cheaper |
| Piece of steel |
| Bolts |
| Medium |
| Drill |
| If you need a larger view of any of the pictures on these pages E-Mail me with the picture number and I will send it to you. |
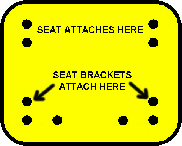
| Picture SM1 |
 |
| Some way to bend the metal |
| 1. Remove sliding backrest see adjust seat page ( Picture SM2) |
 |
| Picture SM2 |
 |
| 2. Prepare piece of metal ( Picture SM1 ) |
| Plate must be very stiff or it will bend when you lean on it. |
| Measure distance between bolts on seat and make sure metal is at least that wide. |
| Drill 8 holes in the metal 4 near the top for the seat to attach to and 4 near the bottom for the support to attach to |
| Height of the metal it your personal preferance. It depends on where you want it to hit you in the back. |
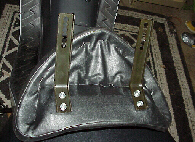
| 3. Attach seat to the top of the metal |
| 4. Attach brackets to the bottom of the metal |
| You may want to put a bend in the metal to fit your back |
| 5. Re-Install brackets |
| 6. Adjust to fit you and secure it. |
| 7. You may need to put two bolts thru the metal and thru the seat if the OEM brackets start to bend. |
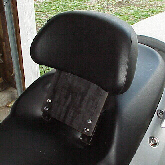
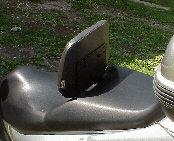
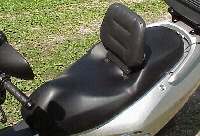
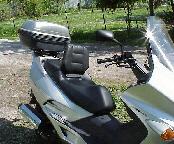
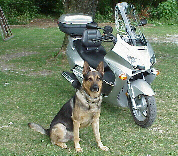
| You can use the OEM backrest ( Picture SM3) or you can get another one to take its place. |
| I found a used Gold Wing backrest at a swap meet and used it. ( Picture SM4, SM5, SM6, SM7 ) |
| Picture SM3 |
 |
| Picture SM4 |
 |
| Picture SM5 |
 |
| Picture SM6 |
 |
| Picture SM7 |