|
|
|
|
|
|
|
|
|
|
|
|
|
|
|
|
|
|
|
|
|
|
|
|
|
|
|
|
|
MAZDA MIATA SEATS
|
|
|
|
|
|
|
|
|
|
Page 3
|
|
|
|
|
|
|

|
|
|
|
|
|
|
|
|
|
|
|
|
|
|
|
|
|
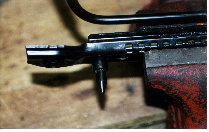
The front of each rail has a pin that I removed. I suppose it could be left on and a hole drilled in the floor pan, but I didn't
like the idea of drilling holes
in the pan. It appears to be a hardened steel pin, but a hack saw worked well. I also tried
a Dremel Tool with a cut-off wheel. Either one will work well.
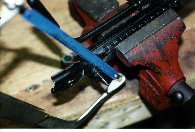
As mentioned on Page 1, the right front mount hole of the driver's side needs to be modifed. The mount hole needs
to be elongated to allow proper
alignment. By placing the seat in the well and fastening the left front mount, I scribed
an arc with a marker from the under the car through the mount bolt hole. I then
drilled 2 holes next to the original hole
to allow for the elongation.
|
|
|
|
|
|
|
|
|
|
|
|
|
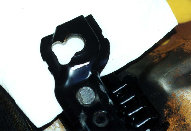
Reattach the frame rails to the seat bottoms and make sure that both rails
are at the same slide position (count the slots on the side to the "lock teeth").
Reattach the slide mechanism linkage wire. Fasten the seat bottoms to the
car using the original front mount holes and bolts. IMPORTANT!!! Be
sure to mount the
seat as close to the center of the car as possible. Also, as
far back as you can.
|
|
|
|
|
|
|
|
|
|
|
|

|
|
|

|
NEXT PAGE
|
|
|
|

|
PREVIOUS PAGE
|
|

|
BACK TO TECH
TIPS
|
|
|
|
|
HOME
|
|
|
|
|
|
|
|
|
|
|
� Copyright 2000, Geoffry L. Bush
|
|
|
|
|