|
|
|
|
|
Updated 6/2/03
|
Firstly, I'd like to take a moment to mention that
this is purely meant to be used as a basic guide. This method, I have
found, works best for me. I know many people out there will state
different facts built up by years of experience and I do not have that.
All I do have is a lot of research. I have tried many stated
methods and come up with a few myself. Alas, most have failed me (or me
them?). So I have funneled down until I found the method following. I
have had great success with both seeds and cuttings using this method.
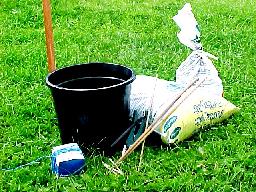
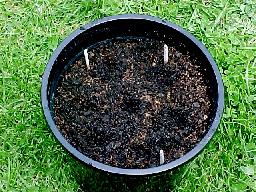
First of all- make sure you have all you need: A medium pot, maybe 250mm, string- fairly weather proof, three or four thin stakes- bamboo are good for this (cheap and strong), small steaks- labeled with either name of plant and date or a code which leads to the information, soil (I personally use a fairly good, normal potting mix and a seedling mix, I will mention more about it later) and plastic- either a bag or sheet, making sure it had good clarity.
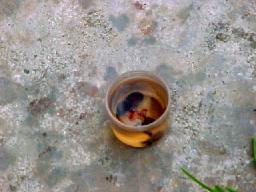
Now following my fertilizer test I now soak all my seeds over night in, a very watered down, liquid fertilizer. Simply placing the seeds in a lid filled with the fertilizer. One point to remember- if working with multiple seed types, make sure you remember, and can tell, which is which. It my sound silly, but you would believe how easy it can be to make a mistake like that!
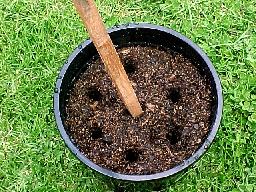
Firstly you need to place the base soil. In my case I
am lazy and go for a ready made potting mix. I have heard that a mix of
top-soil, compost and sand is great and possibly even better than
pre-made. My fear is not getting the right amount of each in the mix.
The most important thing with any soil is how well its drainage is of
water- this will also show how much air is able to pass through the
soil.
Next, fill the holes with a second soil suitable for seedlings. I simply use a seedling mix. This will give the new seedling a helping hand at the beginning until they reach the base soil mix. Make shallow holes as each seed has a stored amount of energy and will wear itself out before reaching the surface if made to deep. Around 2mm should be ideal.
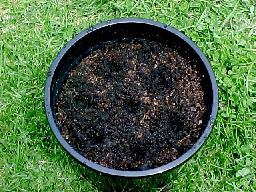
Next place the seeds in the holes and lightly cover. Place the labels near the seeds in an order which will be easy for you to remember- I personally place the label next to the middle seed of that type and have the number of seeds on the label.
Now place the stakes evenly space apart and being careful not to come too close to one of the seeds. firm the soil around the stakes and give the pot a good water with a spray as to make sure it does not disturb your work.
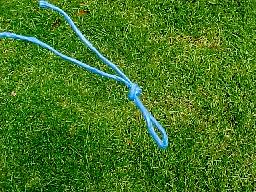
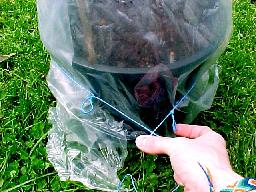
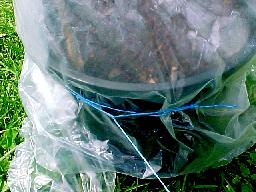
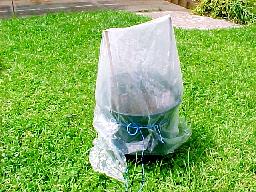
What is left now is to cover the pot. You need to have either a bag or plastic sheet with good clarity (ie. you can see fair amounts of detail through it). I have worked with mostly plastic bags in the past but have recently come into a large amount of clear sheet (covering my sons new mattress believe it or not) and so will be using that for this demonstration. So now I want to talk about tightening it up. I have found this knot system to be the best. Firstly, tie a tight loop at the end of your string.
Loop the string around the pot tightly, find and make another loop around 20cm away from the first. Then cut the string so you have about 30 cm length following the second knot.
The excess string now thread through the first knot then the second. Loop the string behind both of the string in front of the second knot then tighten using the excess and the end of the string next to the first knot.
Now use the looped string to tie and easily untie-able
knot. This will make the string easy to tighten and reuse. Good luck!
|