The MAF to Elbow Assembly
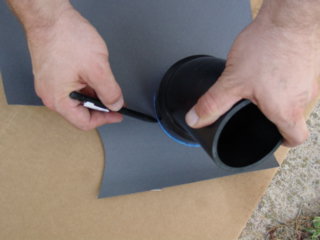
2. Using a utility knife or pair of scissors, cut the outer diameter of the flange.
3. Next cut the inner diameter of the gasket. I found it useful to start in the middle and cut a doughnut.
4. Using the 150grit sandpaper, sand the mouth of the coupling end until it is even. Use the 800 grit to smooth the rough scratches.
5. RTV the gasket to the elbow.
6. Make sure that the gasket lines up before the RTV sets.
7. Set the elbow aside and let the gasket and RTV seal.
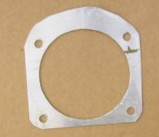
2. Mark the four bolt holes, and drill them out with a 1/4" drill bit.
3. Find the center of the 4 bolt holes by drawing a diagonal line from the top left hole to the bottom right and vice versa.
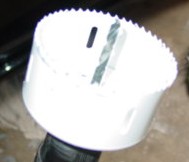
4. Using the 3 1/2" circular saw bit, drill a 3 1/2" hole using the intersections of the lines in step 3 as the center. Be careful to secure the aluminium or plastic plate as it will try to spin from the drill's torque.
5. Using the tin snips or hack saw, cut the outline that you traced in step 1.
2. Slide the Mounting plate over the end of the elbow and work it down to the coupling end.
3. Line the MAF up with the elbow such that the elbow bends to the right with the MAF's electronics facing straight up.
4. Secure the MAF to the Mounting plate with the 4 2 3/4" bolts, finger tight.
5. Measure the distance from the MAF to the Mounting plate and cut 4 spacers from the brass tubing.
6. Remove the bolts and slip the brass spacers in place.
7. Look inside of the MAF and make sure the inlet is matched up and that there is no restriction caused by the elbow, especially from the flange.
8. Tighten down the four bolts with a wrench.