|

|
Home
| About | Links
1967 GTO main | 1967 Ram
Air GTO Retrospective | 1968 GTO
Auto to Manual Swap |
Muncie Rebuild
| GTO trunk
Jeeps | Minibike | Other Rods |
1967 GTO trunk repair which includes wheel well and rear quarter work.
This page goes in sequence of work. Scroll down for latest stuff...
|

|
I started taking the car
apart winter 2004, but really started stripping the rear of the car in
the spring 2005. Life, as usual, got in the way. After doing deck
stuff, lawn stuff, installing central air (by myself) etc, I think I'm
going to try to spend some quality time this fall.
So, what I have here is some pix of where I'm starting.
|
|
First thing was to take
out the main trunk floor sections. I used many implements of
destruction, but mostly used my 4 inch grinder with the 0.040" cutoff
wheels. These work really fast, but don't last long. I cut
out big chunks of floor so that they'd drop free. I left the
edges where they're spot welded for more delicate removal after.
I found the partial VIN on the rear frame rail. It's a bit hard
to see, but if I shine a light at a low angle, I can read
it. And whoop-dee-do, it matches.
|
|
After the big chunks are
out, it was easier to delicately (relatively speaking anyway) peel away
the sections from good metal. For instance, I wanted to remove
the trunk floor pan from the trunk extensions (the vertical filler
pieces between the trunk floor and the rear quarter) without damaging
them. In fact, I didn't want to drill out every spot weld either,
since it'll obviously leave holes. Sure, you can weld 'em up
after, but I found that the thin remaining strips of trunk floor could
be removed from the extensions by grabbing them with vise grips and
peeling them off. I had enough leverage to pop the spot
welds.
|
|
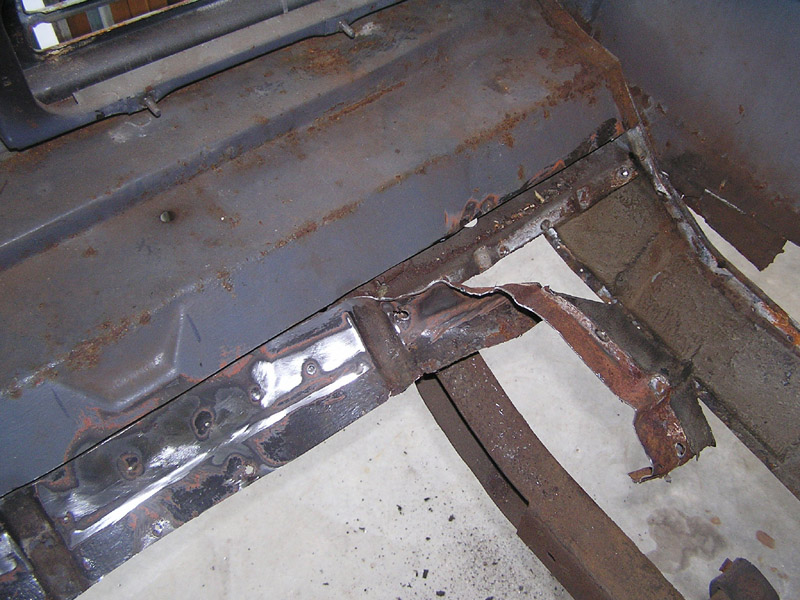
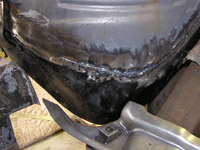
The rear part of the
trunk pans are spot welded to the rear body brace which spans across
the car and sits on top of the rear most body mounts. I wanted to
make my pan seams here so you can't see the seams from under the car;
it'll be hidden by the brace. In the picture, you can see how I
have about 3 inches of pan I'm removing. These spot welds were
beefy and I had to drill some of them. Some did just pull away
too, and these aren't rotten either.
|
|
So I was pretty happy
with getting most of the trunk out with not too many holes from
drilling out spot welds. I've got some Master Series primer and
some weld thru primer so hopefully the weldin' and patchin' will get
underway.
|
|
November 10, 2006
Well, haven't done as much as I've wanted to. But I have accomplished something.
Welded in my first patch on the passenger inner wheelwell. I made
the patches by hand since I didn't want to go for a complete
replacement wheelwell. Of course, you can't buy correct
convertible wheelwells anyway.
|
|
Notice the shaping I had to do. Not too smooth, but I don't have a bean bag yet for pounding in shapes.
|
 |
The
patch is welded in. I welded from inside the wheel well. I made
the mistake of butting the patch up against the virgin metal with no
gap. I've subsequently found that it is easier to have a gap
between the metal when butt welding. The molten beads fall in between
the gaps and fill in nicely. Of course you still have to do quick
tacks. No long welds or the thin sheet metal heats up and you blow a hole through.
|
|
|
 |
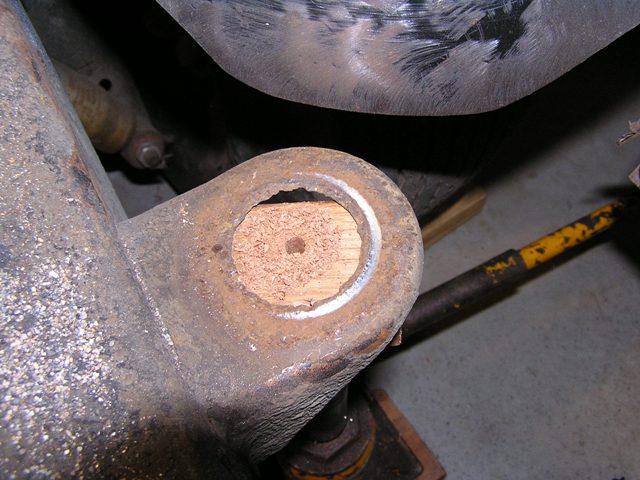
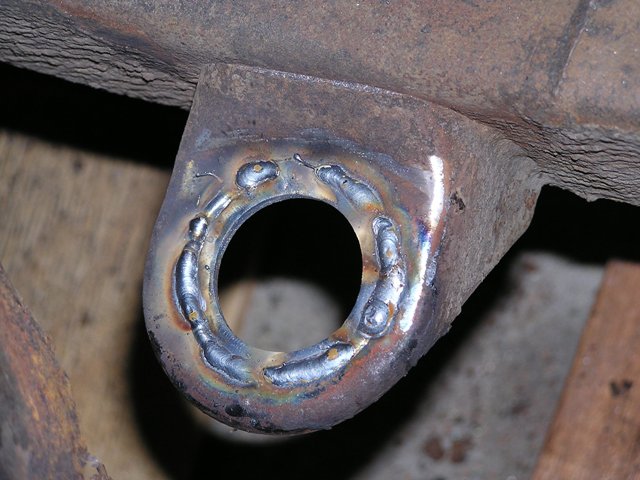
Next
was the body bushing frame mount repair. The original mounts were
thin where the rubber bushings resided for almost 40 years and the hole
I.D.s were rusted oversized. Rather than weld on big washers onto
the mounts over the old metal, I wanted to cut out the thin damaged
metal and butt weld new washer sections and grind smooth.
|
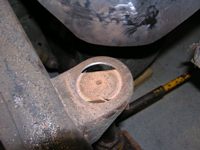 |
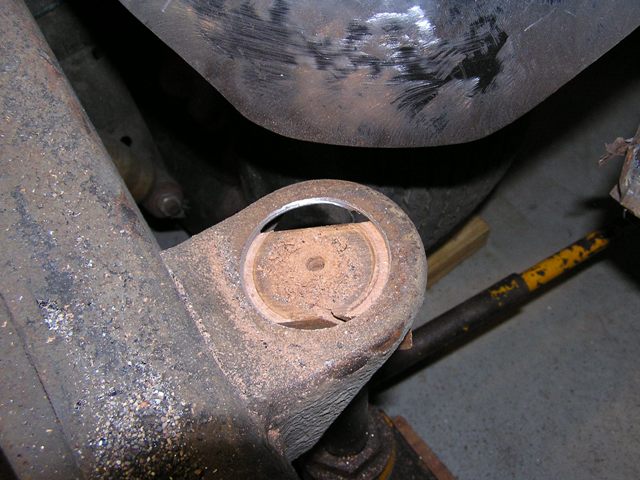
I
started by using a 2 inch hole saw to remove the damaged metal. I
used a jack to jam a piece of wood under the mount to use as a pilot
for the holesaw arbor. |
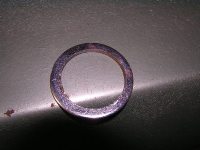 |
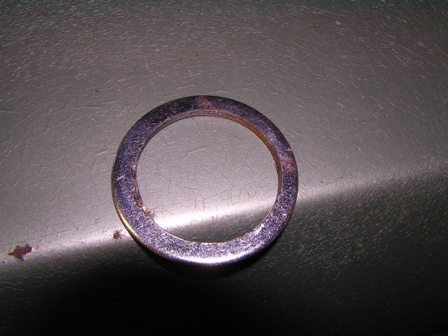
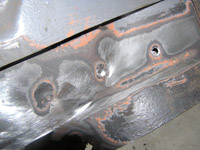
This
is a regular old washer after I drilled out the I.D. with another
hole saw to get the 1.625" I.D. I sanded off all the zinc plating
so it could be welded. |
 |
This is the washer welded in. Still need welding practice, but it's getting better. Grinding to follow... |
 |
June 7, 2007
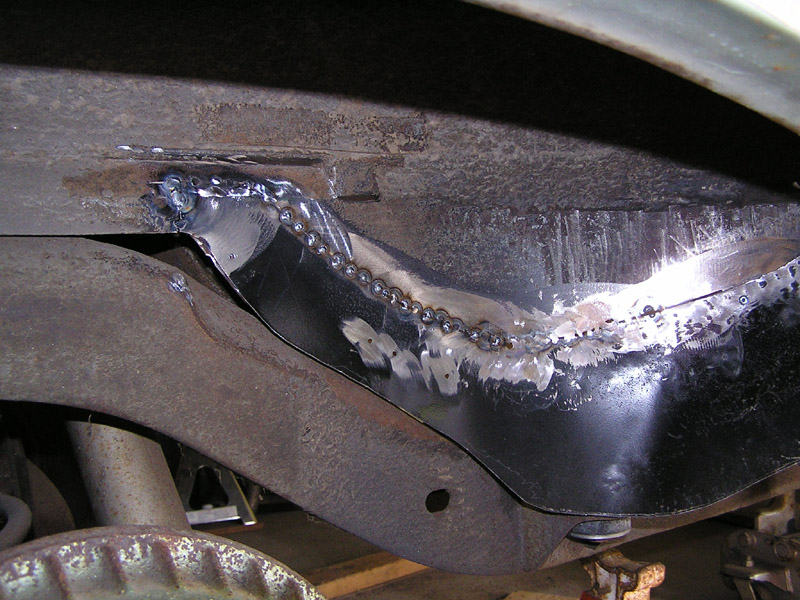
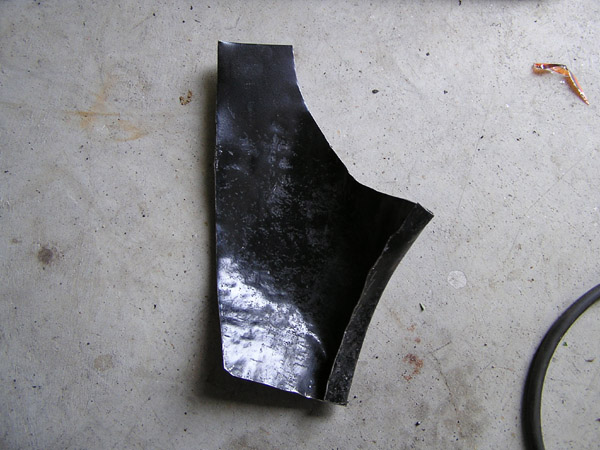
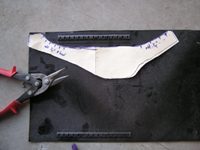
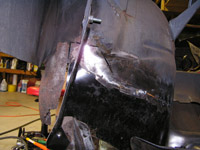
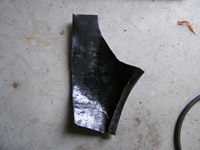
Astonishingly, I've done
some work. I made a patch for the drivers side wheel well.
This patch shown on the left is the inner wheel well patch. It's
much bigger than the passenger side described earlier. It's a
compound curve piece which was not easy to form. But I got it
beat to shape pretty closely. I decided to pop rivet the patch in
place in a lap joint over the original metal, then used my angle
cutter with the 0.040" blade and, starting on one end, sliced through
both new and old so the new piece would fit perfectly against the old
with a gap the width of the cutter.
|
 |
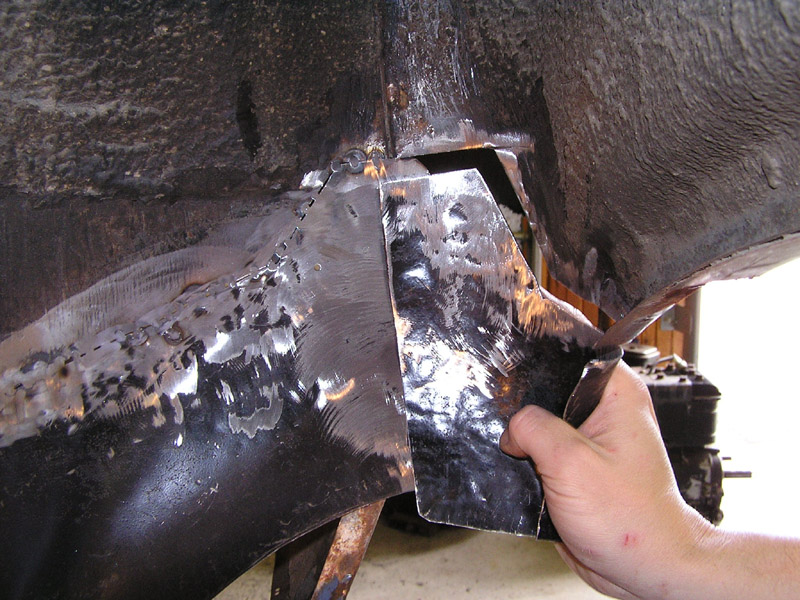
Before
starting to weld, I nipped the trimmed overlap ends and peeled them
away so they'd not be in the way of welding. (not shown) See the
Mopar Muscle website which describes this cool technique. MOPAR butt welding technique
You can see the right side of the patch is not trimmed or welded yet. |
 |
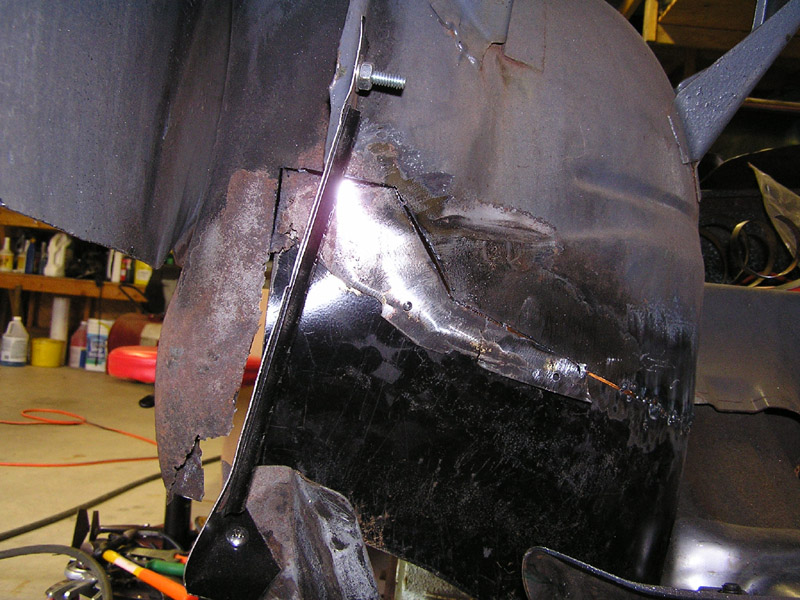
This
is a view from the back (inside trunk). You can see I haven't cut
the patch to form fit with the old wheel well metal yet. Notice
the rivets holding the overlapped new and old together ready for
cutting. Also note the funny looking vertical piece with the
bolt...it's a temporary strut I made to keep the trunk extension in
place while all this wheel well patching goes on. The bolt is
going through that hole in the existing wheel well flange. |
 |
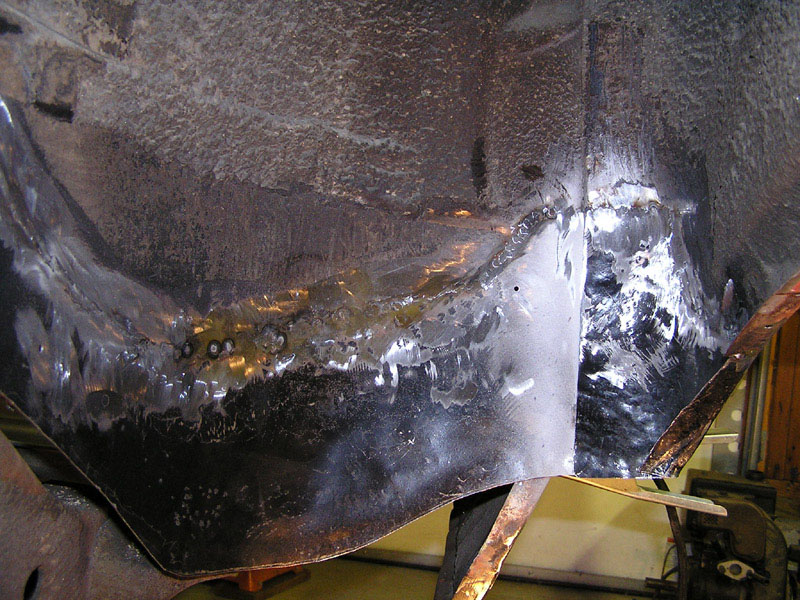
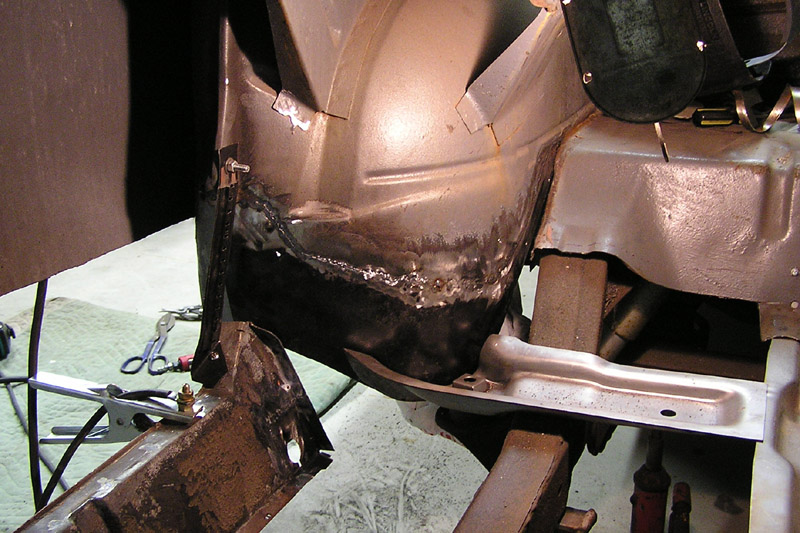
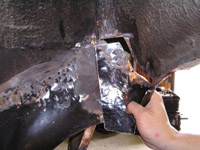
Here
is another view from the trunk. Notice the welding from the
right, but the cut hasn't been made yet on the left. I'm ready
here to cut through the patch and original metal on the left there.
I'll drill out the rivet and I can bend away the the trimmed
overlap piece. And yeah, I was blowing major holes in the sheet
metal when welding. It's hard to keep the tacks very short
time-wise; the longer the trigger is pressed, the heat builds up
and I end up blowing holes. Luckily, I'm getting good at using a
copper puck backer and filling holes with weld. Kinda messy, but
that's what grinders are for. |
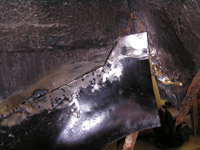 |
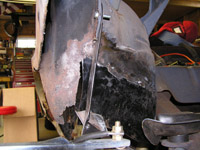
Here's
a view from inside the wheel well looking straight toward the back of
the wheel well. Notice the vertical seam (near top of picture;
original metal) where the inner ww and the outer ww are joined.
The inner and outer wheelwell sections are joined with an "L" lap
joint all the way around until it gets to the point where my new patch
is. The seam then turns into a flat lap joint. The original
metal was rotted from here down. The new inner patch will
correctly be over lapped with a flat lap by the new outer wheel
well patch shown a few pictures down. This is the way Pontiac did
it. |
 |
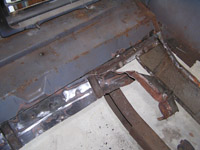
From
behind you can see I'm ready to remove the trimmed original metal.
The patch will now fit in like a puzzle piece and be ready for
butt welding. |
 |
This
is a view of the wheel well looking toward the front of the car.
I decided to not do the overlap, rivet, cut technique on the
outer ww section as it's too tightly curved. I trimmed the rotten
metal away and I'll fit the new piece I made carefully. |
 |
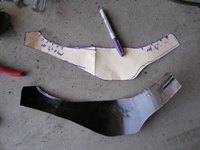
Here
is the outer wheel well section patch. I haven't quite trimmed
the piece to fit to the old yet. But it's getting there. I
still need to sand off the paint. This is still old bookshelf
metal by the way. I think I should probably go visit my local
metal supplier for some good sheet metal. |
 |
I'm fitting the new piece in. Notice how the outer patch will overlap the inner patch. |
 |
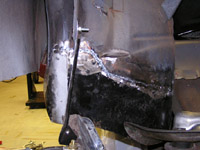
The
outer ww patch is tacked in. Again, this is inside the wheel well
looking toward the back. The gray on the inner patch is weld thru
primer. I'll put in the lower triangular piece when I weld in the
rear quarter patch. Of course, ultimately I'd love to cover up this work with some Red Fender Liners. |
 |
Here is the almost-fully-welded-in patches viewed from behind. |
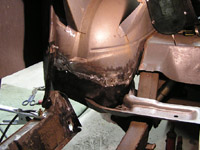 |
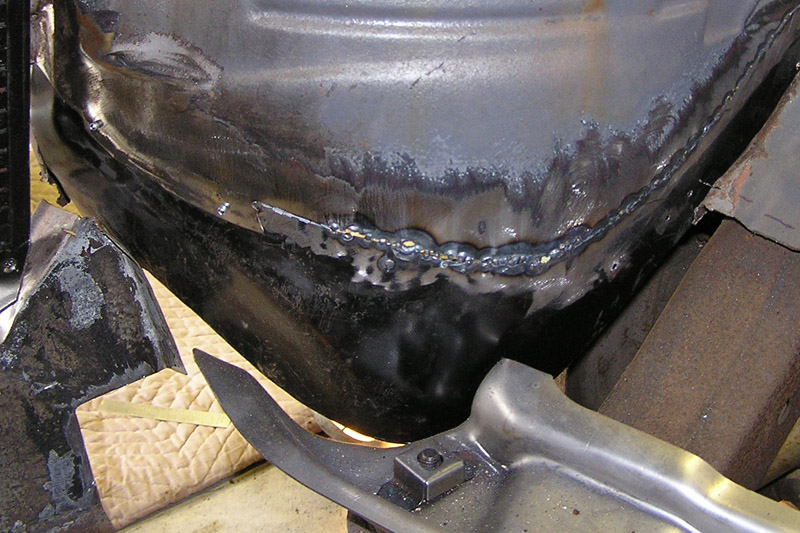
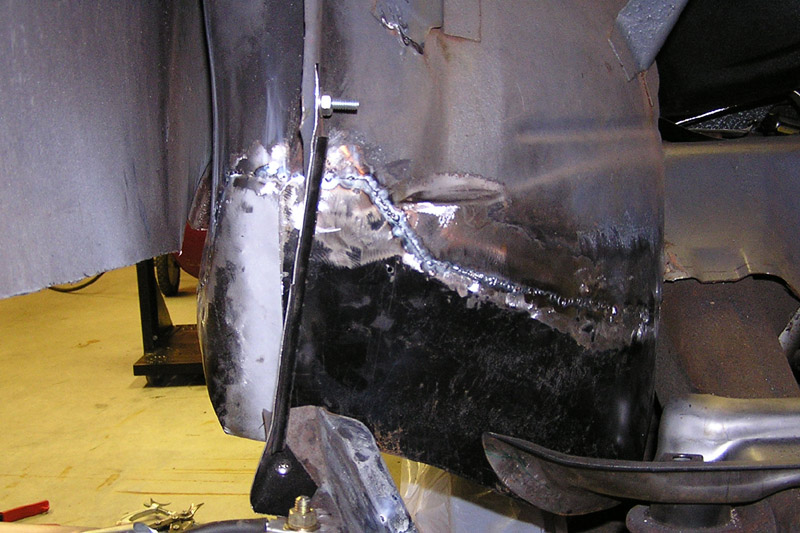
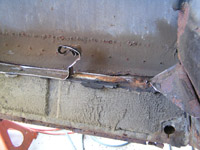
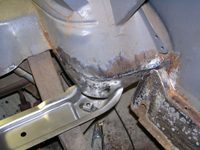
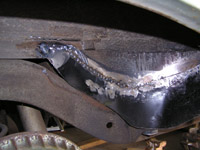
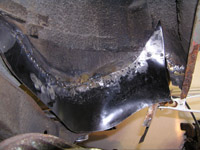
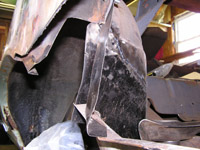
A
view with the side to side brace fit up to the wheel well. You
can see where I repaired the trunk extension corner (lower left in pic). It's got a
hole for a drain plug. |
|
Coming
next: Trimmed the trunk pans to fit to the original metal.
I'm butt welding the front, lap welding the back since it's over
the crossbrace and it'll absorb any mismatch in length fore and aft.
Also cut the holes for the body plugs. I've got the plugs,
might as well make it look stock. Pix coming.... |
|
|
|
|