Configuring and Using Fotoze ScreenSaver
Activating Fotoze ScreenSaver
To activate Fotoze ScreenSaver
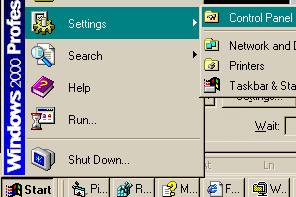
as your Windows screen saver, click Start, Settings, Control Panel, then
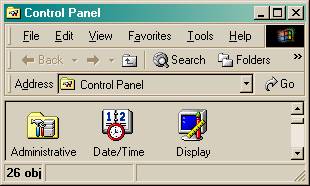
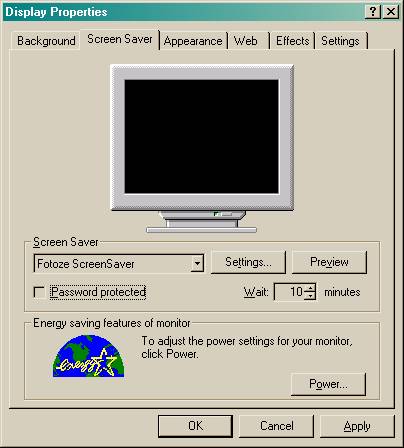
double click the Display icon. Select the Screen Saver tab.
Select Fotoze ScreenSaver from the Screen Saver list.
Click OK or Apply to save your selection (clicking OK will
also close the Display Properties window).
Example of clicking the Start
button, then Settings, Control Panel:
Example of Display icon in Control
Panel:
Example of Screen Saver tab on
Display Properties window:
Launching Fotoze ScreenSaver Options
To configure Fotoze ScreenSaver,
just click the Settings button to launch Fotoze ScreenSaver Options.
You can also launch Fotoze ScreenSaver Options by clicking Start,
Programs, Fotoze ScreenSaver, Fotoze ScreenSaver. If you have never
configured Fotoze ScreenSaver, the Options window will appear
automatically when you select Fotoze ScreenSaver from the Screen
Saver list on the Screen Saver tab.
Location of Images Tab
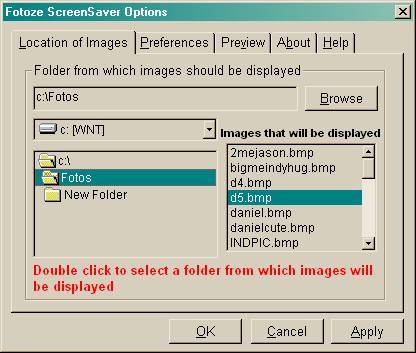
The Location of Images tab
is the where you tell Fotoze ScreenSaver to find the images you wish for
it to display. You can type in a path to a folder on your local hard drive or
to a network location. To eliminate any possible input errors, you should click
the Browse button and navigate to a folder containing images. Images
that Fotoze ScreenSaver recognizes will appear in the box on the right.
All images listed will be displayed. If you do not wish for an image to be
displayed, remove it from the folder using Windows Explorer (under Start,
Programs, Windows Explorer). Click the Apply or OK button to
save your selection (clicking OK will save your selection and also
closes the Options window).
Example of Location of Images tab:
Preferences Tab
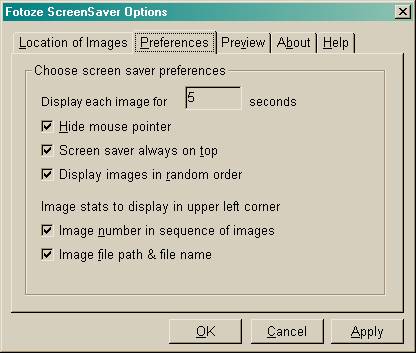
The Preferences tab is
where you set most of the screen saver options. By default, all options are
selected (turned on) when the screen saver is first installed.
Display each image for # seconds: displays
each image for a selected amount of time. Accepts only seconds. If you need
minutes, multiply each minute by 60 to get the total number of seconds. For
example, 2 minutes would be 2x60 seconds for a total of 120 seconds. The
default display time is 5 seconds.
Hide mouse pointer: mouse
pointer disappears when the screen saver appears. Most screen savers hide the
mouse pointer. Deselect (uncheck) this option if you wish to see the mouse
pointer while the screen saver is running.
Screen saver always on top: screen
saver hides all other windows on the screen while displaying images. Most
screen savers hide all other windows. Deselect this option if you wish for
other windows to be able to appear while the screen saver is running.
Display images in random order: displays
images in random order. Deselect this option if you wish for images to be
displayed sequentially and in the same order each time the screen saver cycles
through the list of images in the designated folder.
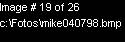
Image number in sequence of
images: displays in the upper left corner of the screen each
image’s sequence number in the list of images and the total number of images to
be displayed.
Image file path & file name: displays
in the upper left corner an image’s file path and file name.
Example of Image number and Image
file path & file name:
Example of Preferences tab:
Preview
Tab
Click the Preview button on
the Preview tab to save your selections and launch the screen saver.
Clicking the Preview button will also close the Options window.
You can also preview the screen saver by clicking the Preview button on
the Screen Saver tab of the Display Properties window. Previewing
the screen saver allows you to verify that it displays the images from the
folder you designated and displays them according to the preferences you
selected.
About
Tab
Click the About tab for a
brief description of Fotoze ScreenSaver and to find out the version
number of the version installed on your computer. The current version available
from the Internet is listed in the section above in Where to Obtain Fotoze
ScreenSaver. When contacting the developer, please include the version
number listed on the About tab.
Help
Tab
Click the Help tab and then
click the Help icon or link to access this document. You can also access
this document by clicking the Start button, then Programs, Fotoze
ScreenSaver, Help for Fotoze ScreenSaver. The most current version of this
document is located on the Internet at http://www.geocities.com/michaelneice/fotozescreensaver/fotozescreensaver.htm