Home Gallery Tutorials Downloads Other Stuff Links About Me Email
TUTORIALS
More Boolean Operations
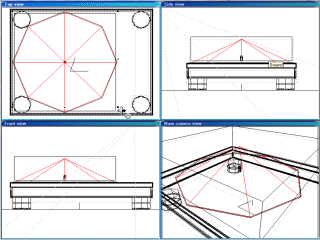
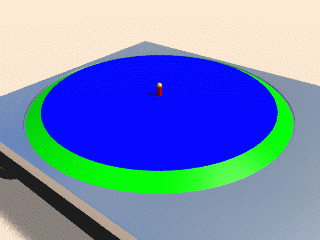
9. Adding the platter is fairly easy. Create a cone so it fits inside of the inset we just created, making sure there is about a 1 unit gap between the cone's edge and the inset edge (mine was 112.5x112.5x27.3). Now add a cube and place it directly over the cone. Resize it so it fits over the whole top part of the cone. Subtract the cube from the cone using a boolean operation. Look at the platter you just created and check your reference pictures to see if it looks right. If so, well done. The sides of my platter when I first created it were at a too greater angle. To reduce their angle, I just decreased the height of the cone. In the centre of the platter, create a small cylinder for the spindle. On top of it create a sphere so it smooths the top of the cylinder off. The cone is green, the subtracted cube is blue, the spindle cylinder is red and the sphere is yellow. Name the new group platter.
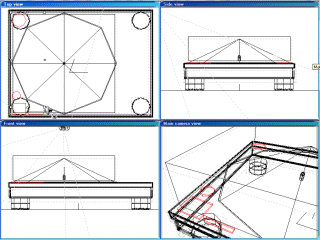
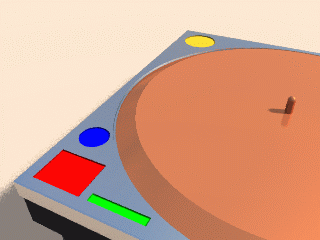
10. Use step 8 to create insets for the start-stop button, the 33 and 45 buttons, the strobe light and the record hole adaptor (the thing in the upper right of the deck). In the render below, the start-stop button inset is red, the 33/45 button inset is green, the strobe inset is blue and the record hole adaptor inset is yellow. When creating these, always refer to your reference pictures so you'll know all the buttons will fit and look in proportion. When you subract the primitives, make sure it is from the original deck.
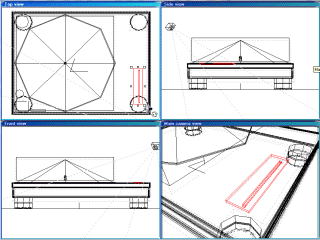
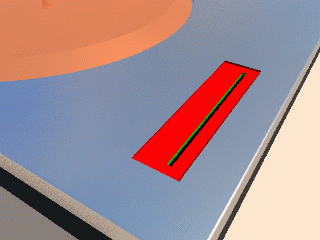
11. For the inset of the pitch control, use the previous step by creating a cube (mine was 10x42x1), but this time make the inset a little deeper. When this has been subtracted, create another cube but much thinner and a little shorter. Place it a little to the right of the centre of the inset you just created and subtract it from the original deck and the new inset. This should have created a groove for the pitch control slider. Under the new groove, create a flat cube that covers the area of the groove. Make this black so when you see into the groove, you don't see where the groove was subtracted from the deck. The pitch control inset is red, the groove is green and the area under the groove is black (make sure it is pure black, with 0 diffuse and 0 ambient colour).
That is all for part
one of this tutorial. Next tutorial we will continue adding detail using
boolean techniques. If you need anything clarified or want more information,
email me at [email protected].
Best viewed in 1024x768 using Netscape Navigator
Copyright Michael Balzer 2000/2001
[email protected]